> ## Documentation Index
> Fetch the complete documentation index at: https://docs.caplena.com/llms.txt
> Use this file to discover all available pages before exploring further.
# Append Rows to an Existing Project
> Easily upload new data to your existing project, no need to start over or reconfigure your analysis.
Need to add more responses to your existing Caplena project? You can do this easily from the **Data View** tab.
As long as your existing data has already been analyzed (i.e., topics are in place), any newly added data will automatically be assigned to topics using the current setup.
## Step 1: Go to the Data Tab
* In your project, click the **Data** icon in the left-hand navigation bar.
* Then click **Add new rows** in the top-right corner.
 ## Step 2: Upload Your File
In the import screen:
* Drag and drop your file, or click to browse
* File types supported: `.xls`, `.xlsx`, `.csv`, `.sav`, `.spss`
* *(Optional)* Add a name for the data source
* Make sure your file includes column headers in the **first row**
* Click **Continue** to proceed
Your file **does not need to match** the previous column order or column count
## Step 3: Match Your Columns
Caplena will guide you through matching the new file’s columns with those already in your project.
**What happens automatically:**
* Columns with the same name are matched
* Order doesn’t matter, Caplena accepts columns in any order
## Step 2: Upload Your File
In the import screen:
* Drag and drop your file, or click to browse
* File types supported: `.xls`, `.xlsx`, `.csv`, `.sav`, `.spss`
* *(Optional)* Add a name for the data source
* Make sure your file includes column headers in the **first row**
* Click **Continue** to proceed
Your file **does not need to match** the previous column order or column count
## Step 3: Match Your Columns
Caplena will guide you through matching the new file’s columns with those already in your project.
**What happens automatically:**
* Columns with the same name are matched
* Order doesn’t matter, Caplena accepts columns in any order
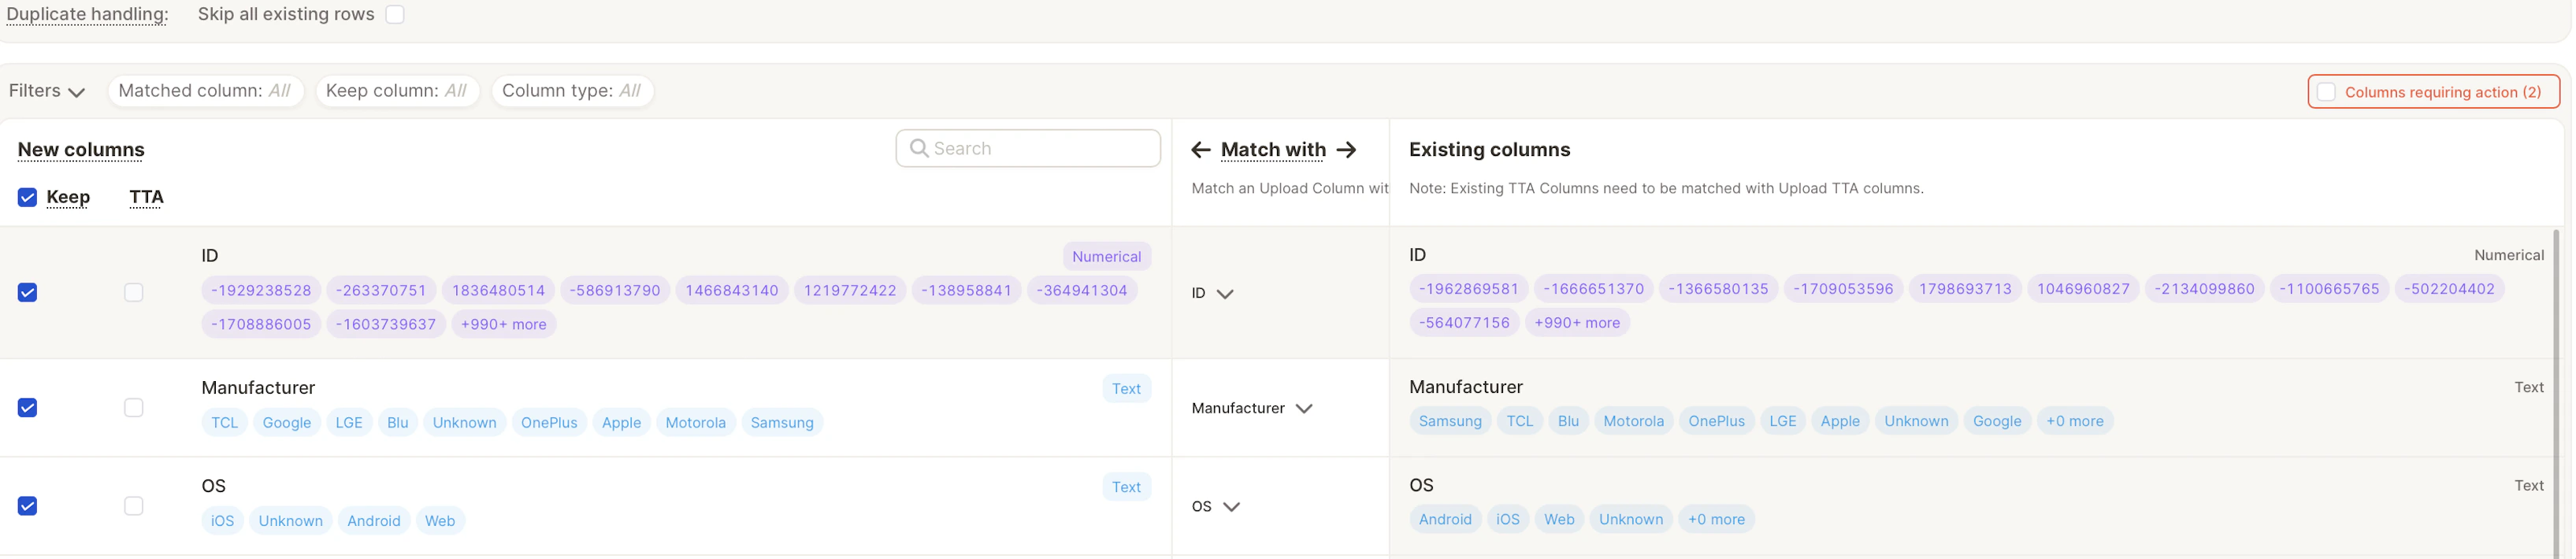 **Additional options:**
* Skip columns you don’t want to import
* Create new columns for unmatched fields
* Manually match columns if needed
**Tip:** Use the filters at the top of the screen to focus on specific column types (text, numeric, date, etc.)
## Step 4: Validate and Finalize
* Click **Validate** to confirm your column mappings
* Click **Finalize** to upload the new rows
Your new data will now be added to the project and analyzed automatically.
### Auto-Translation
If you plan to use **auto-translation**, please enable it when **creating the project**.\
It cannot be activated retroactively for existing projects.
Learn more about auto-translation →
### Duplicate Row Handling
To avoid importing duplicates:
* Enable the **“Skip existing rows based on matched column”** toggle
* Select the column used for deduplication, usually an \*\*ID field
**Additional options:**
* Skip columns you don’t want to import
* Create new columns for unmatched fields
* Manually match columns if needed
**Tip:** Use the filters at the top of the screen to focus on specific column types (text, numeric, date, etc.)
## Step 4: Validate and Finalize
* Click **Validate** to confirm your column mappings
* Click **Finalize** to upload the new rows
Your new data will now be added to the project and analyzed automatically.
### Auto-Translation
If you plan to use **auto-translation**, please enable it when **creating the project**.\
It cannot be activated retroactively for existing projects.
Learn more about auto-translation →
### Duplicate Row Handling
To avoid importing duplicates:
* Enable the **“Skip existing rows based on matched column”** toggle
* Select the column used for deduplication, usually an \*\*ID field
 This ensures that already-uploaded rows are not imported again. You can select multiple columns to match by. A row is considered a **duplicate** if **all column values are identical**.