The bot can only query projects that have been set to Live. Learn how to set a project to Live →
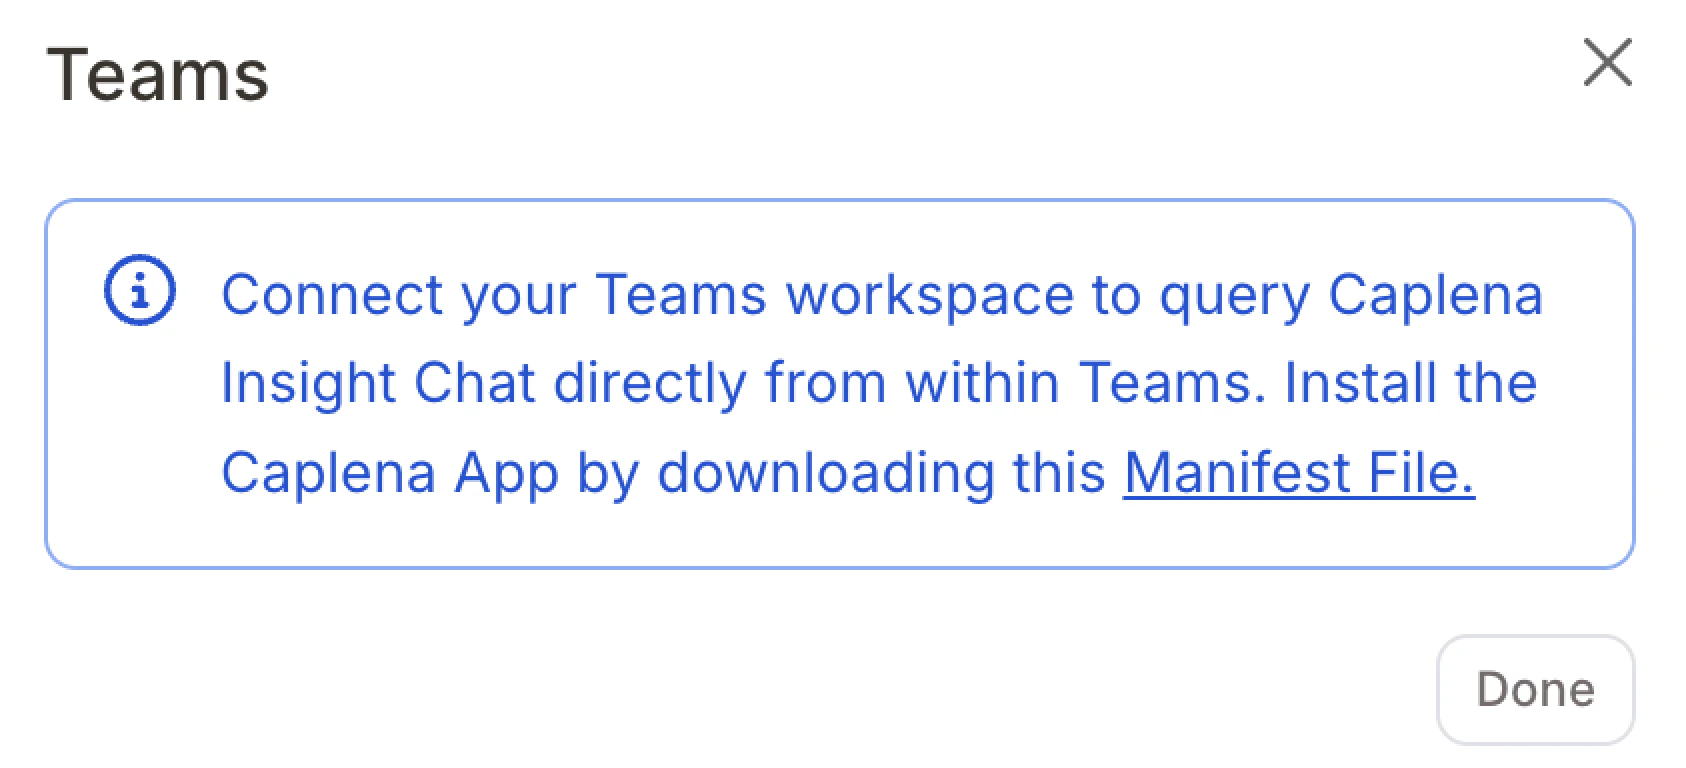
Microsoft Teams
Enable the Integration
Before the bot can answer questions in Teams, set the project to Live. Learn how →Go to your global Integrations page and click Connect under the Microsoft Teams section.
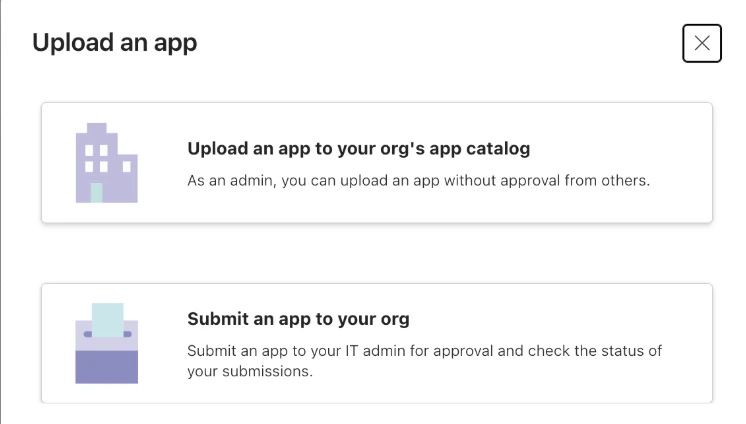
Install the Caplena App in Microsoft Teams

Link Your Teams Account to Caplena
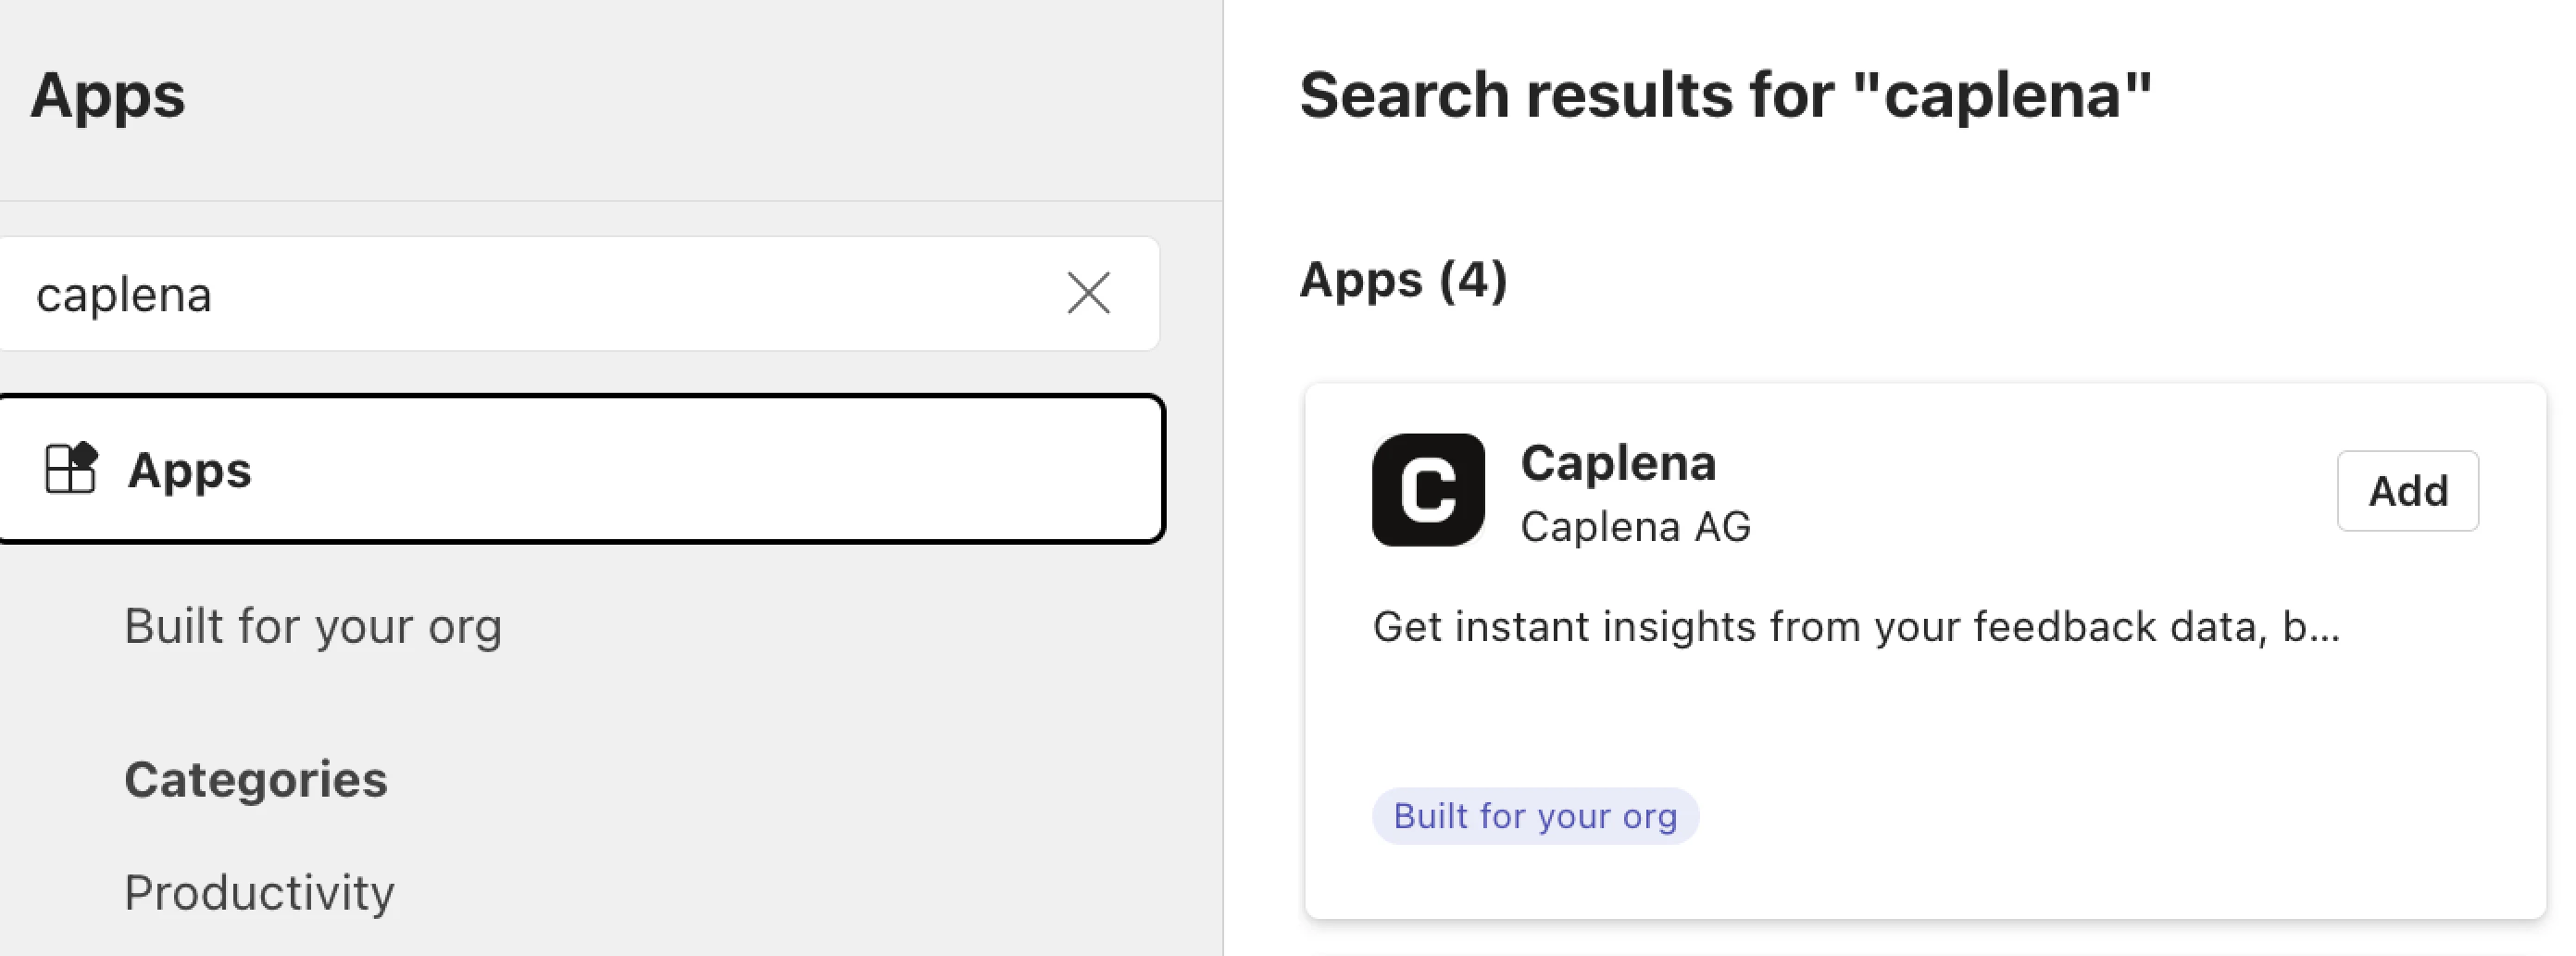
Once the app is approved, go to Apps in Microsoft Teams and search for Caplena.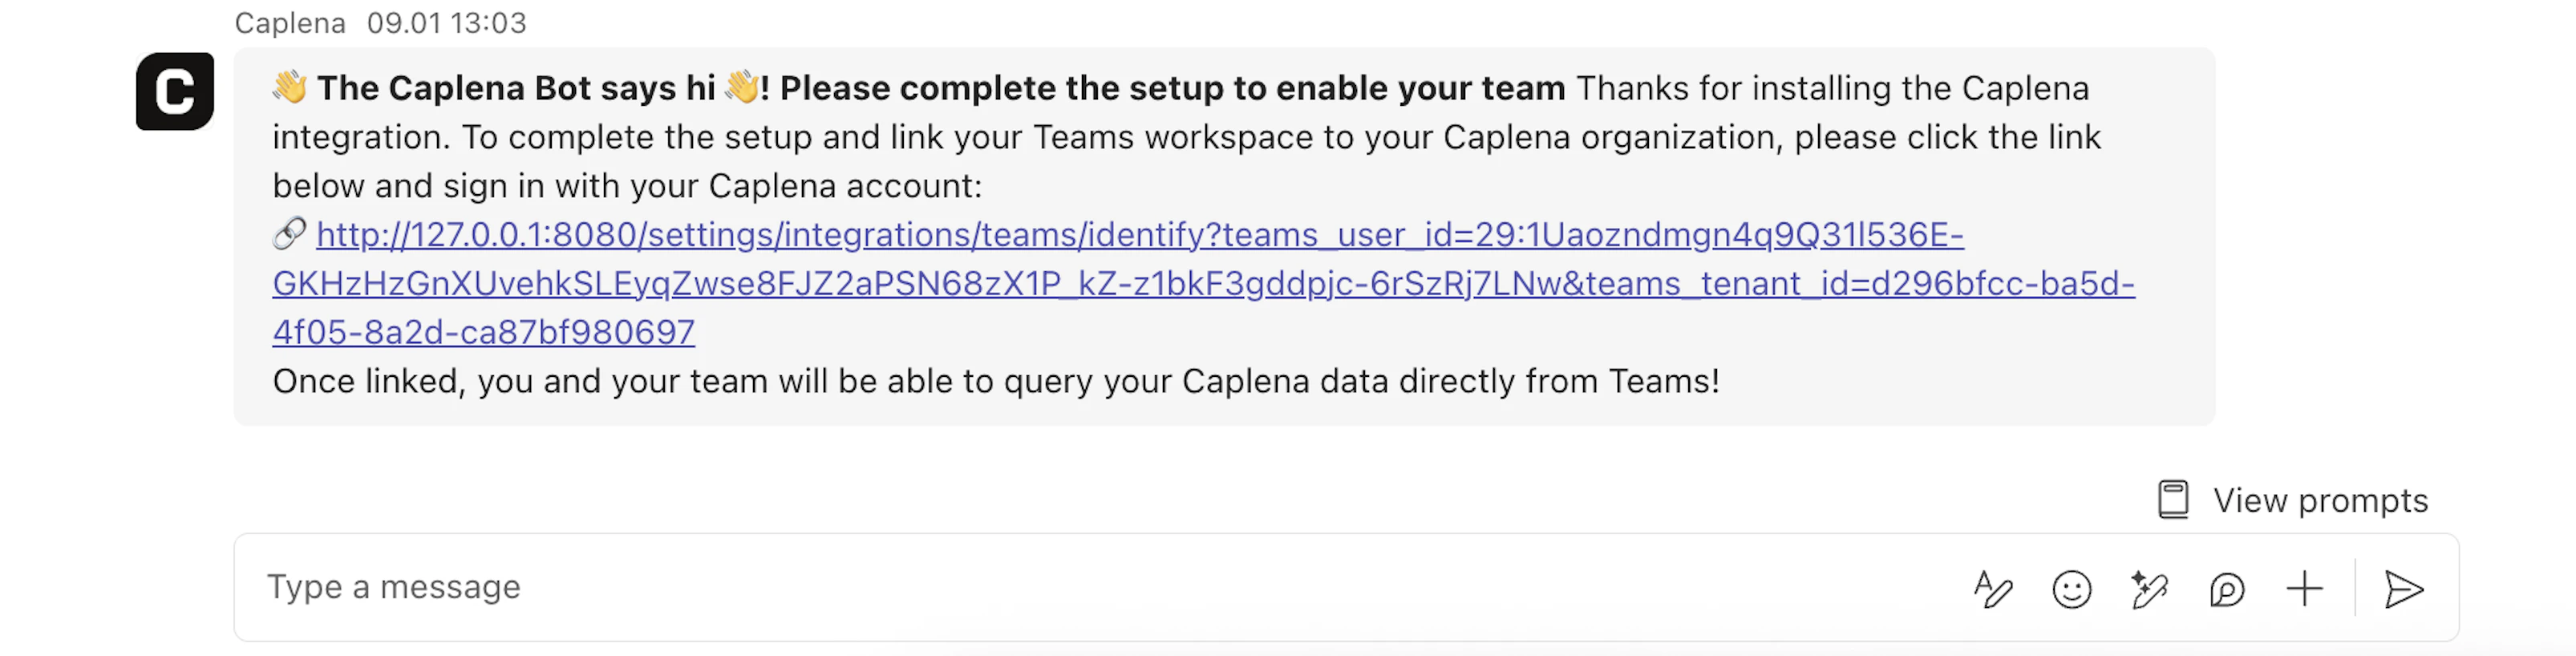
- If you see Add → click it.
- If you see Open → you’re already good to go.
Slack
Connect Your Slack Workspace
Open Caplena and navigate to Settings → Integrations. Find the Slack integration and click Connect.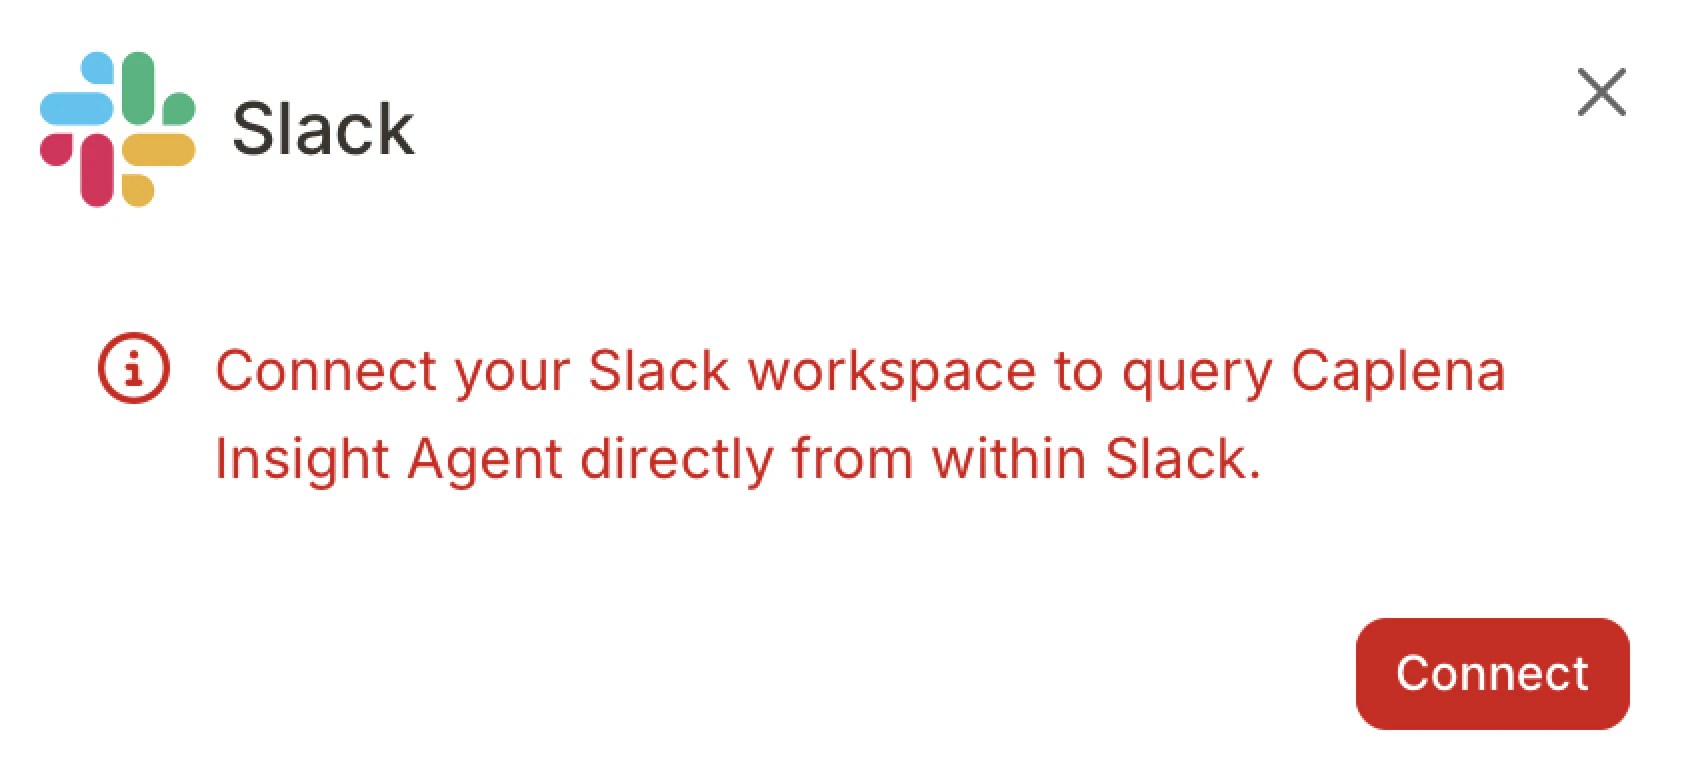
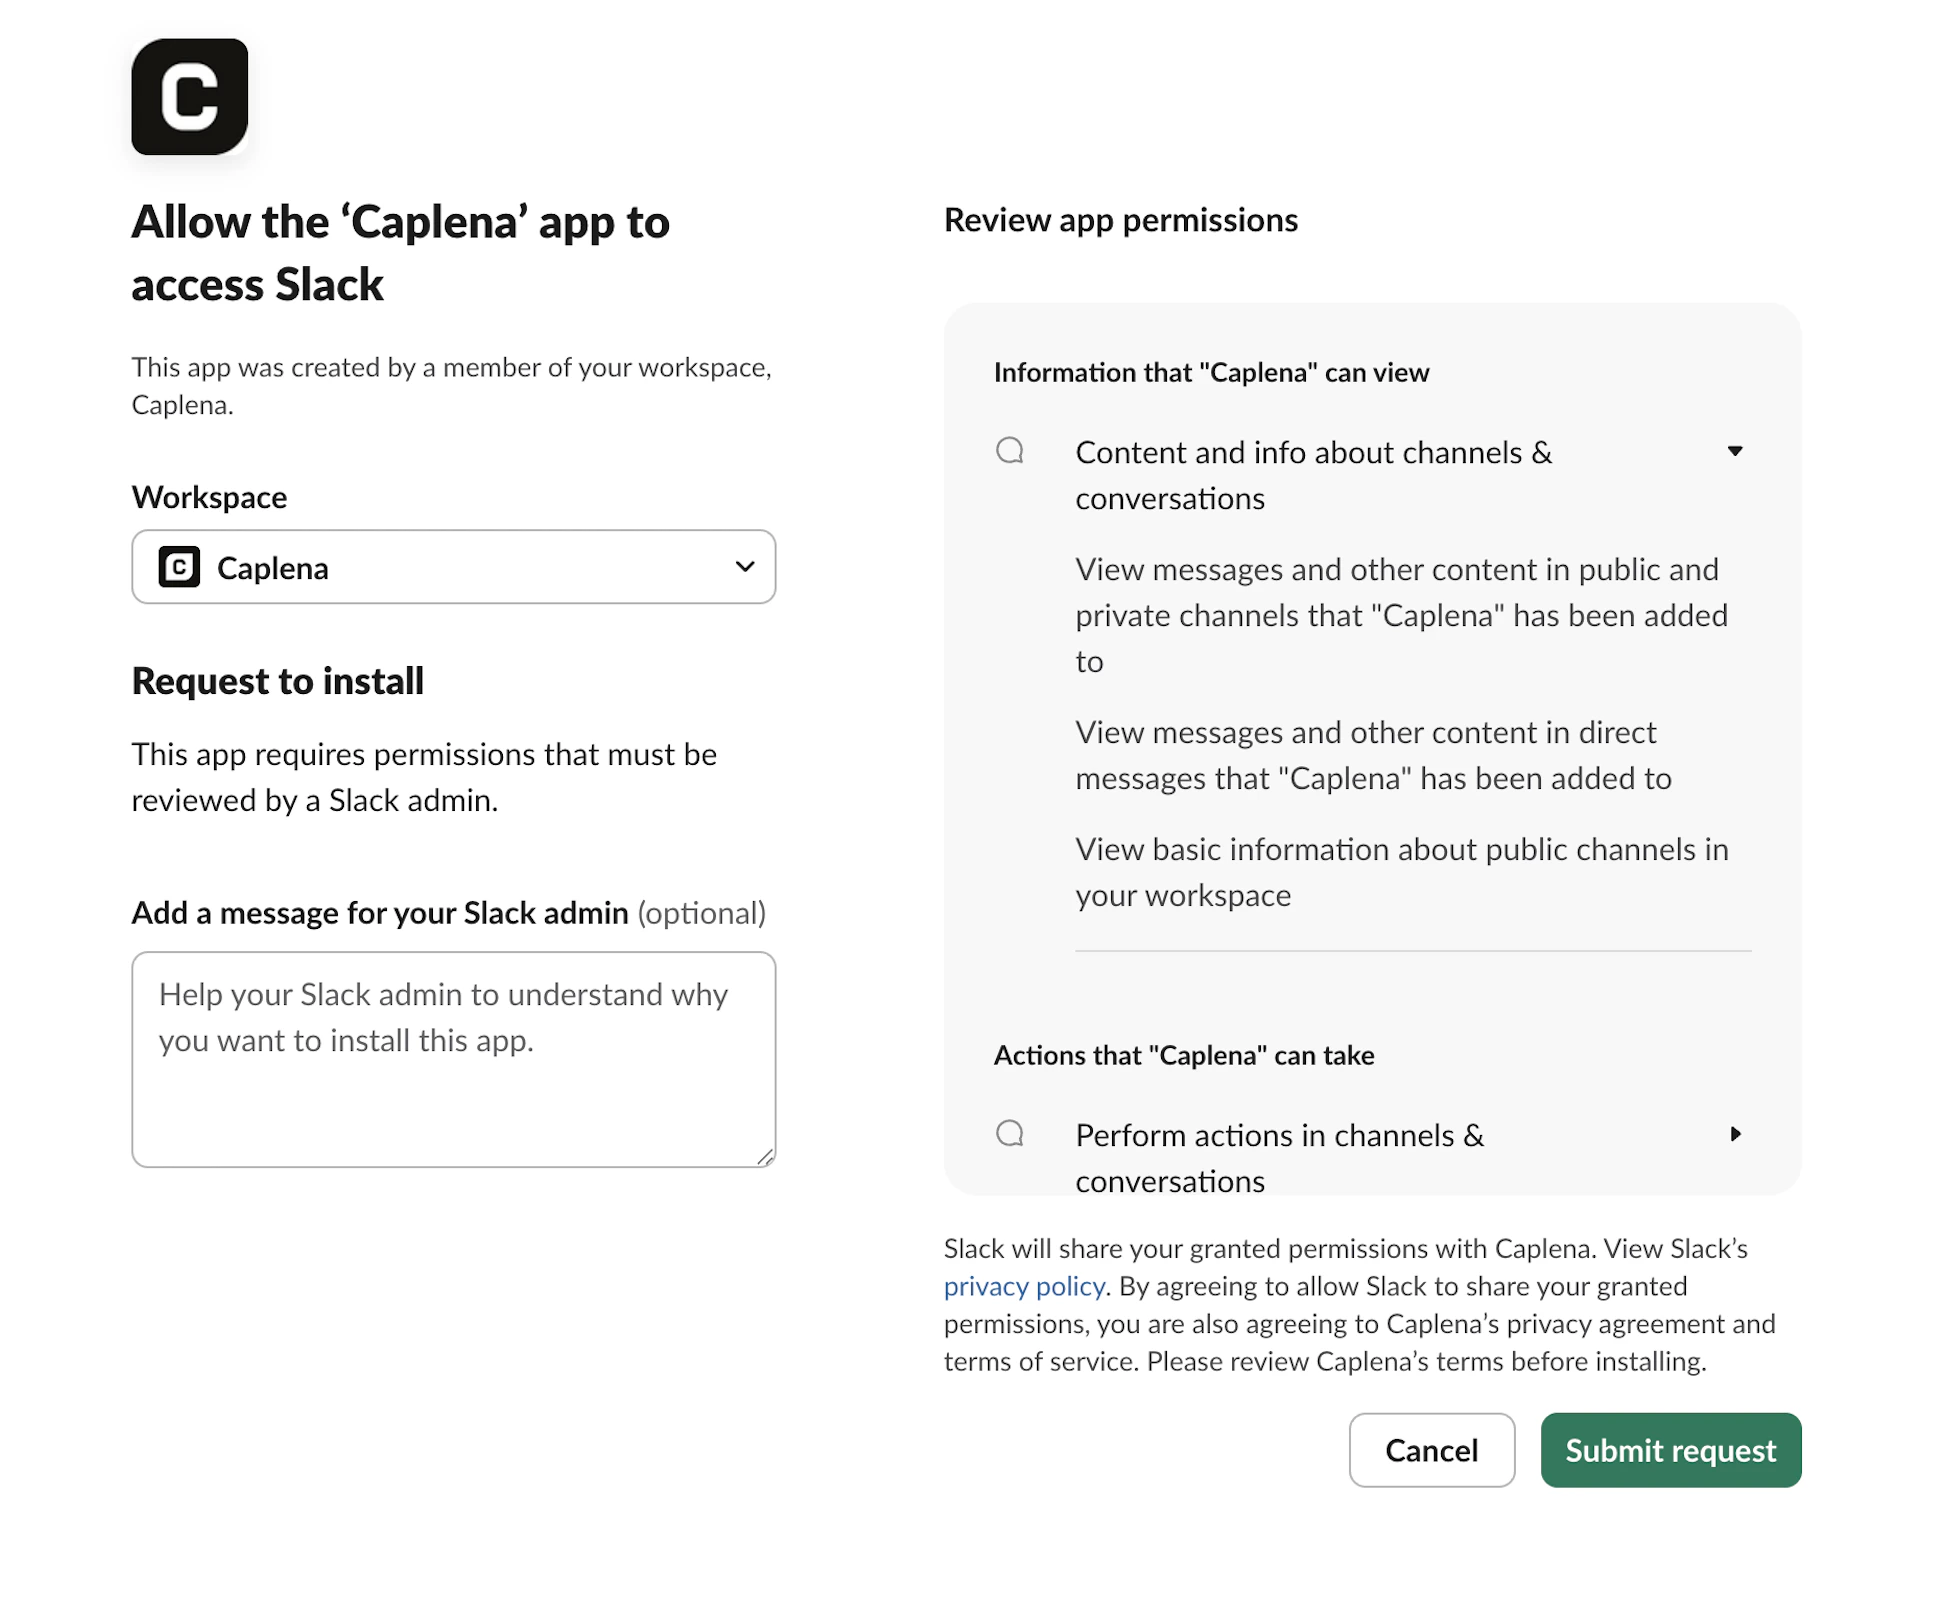
If you see a “Request to install” button, it means your Slack admin must approve Caplena before you can use it. You can optionally leave a message explaining why you want to install the app.
Wait for Admin Approval (if required)
If your Slack workspace restricts app installations, your admin will need to review your request. Once approved, the Caplena app will appear in Slack under Apps. If apps are not restricted, Slack will install the app automatically after permission confirmation.
Link Your Slack User to Your Caplena Account
After the app is installed, open Slack → Apps → Caplena. You should automatically receive a welcome message prompting you to connect your account.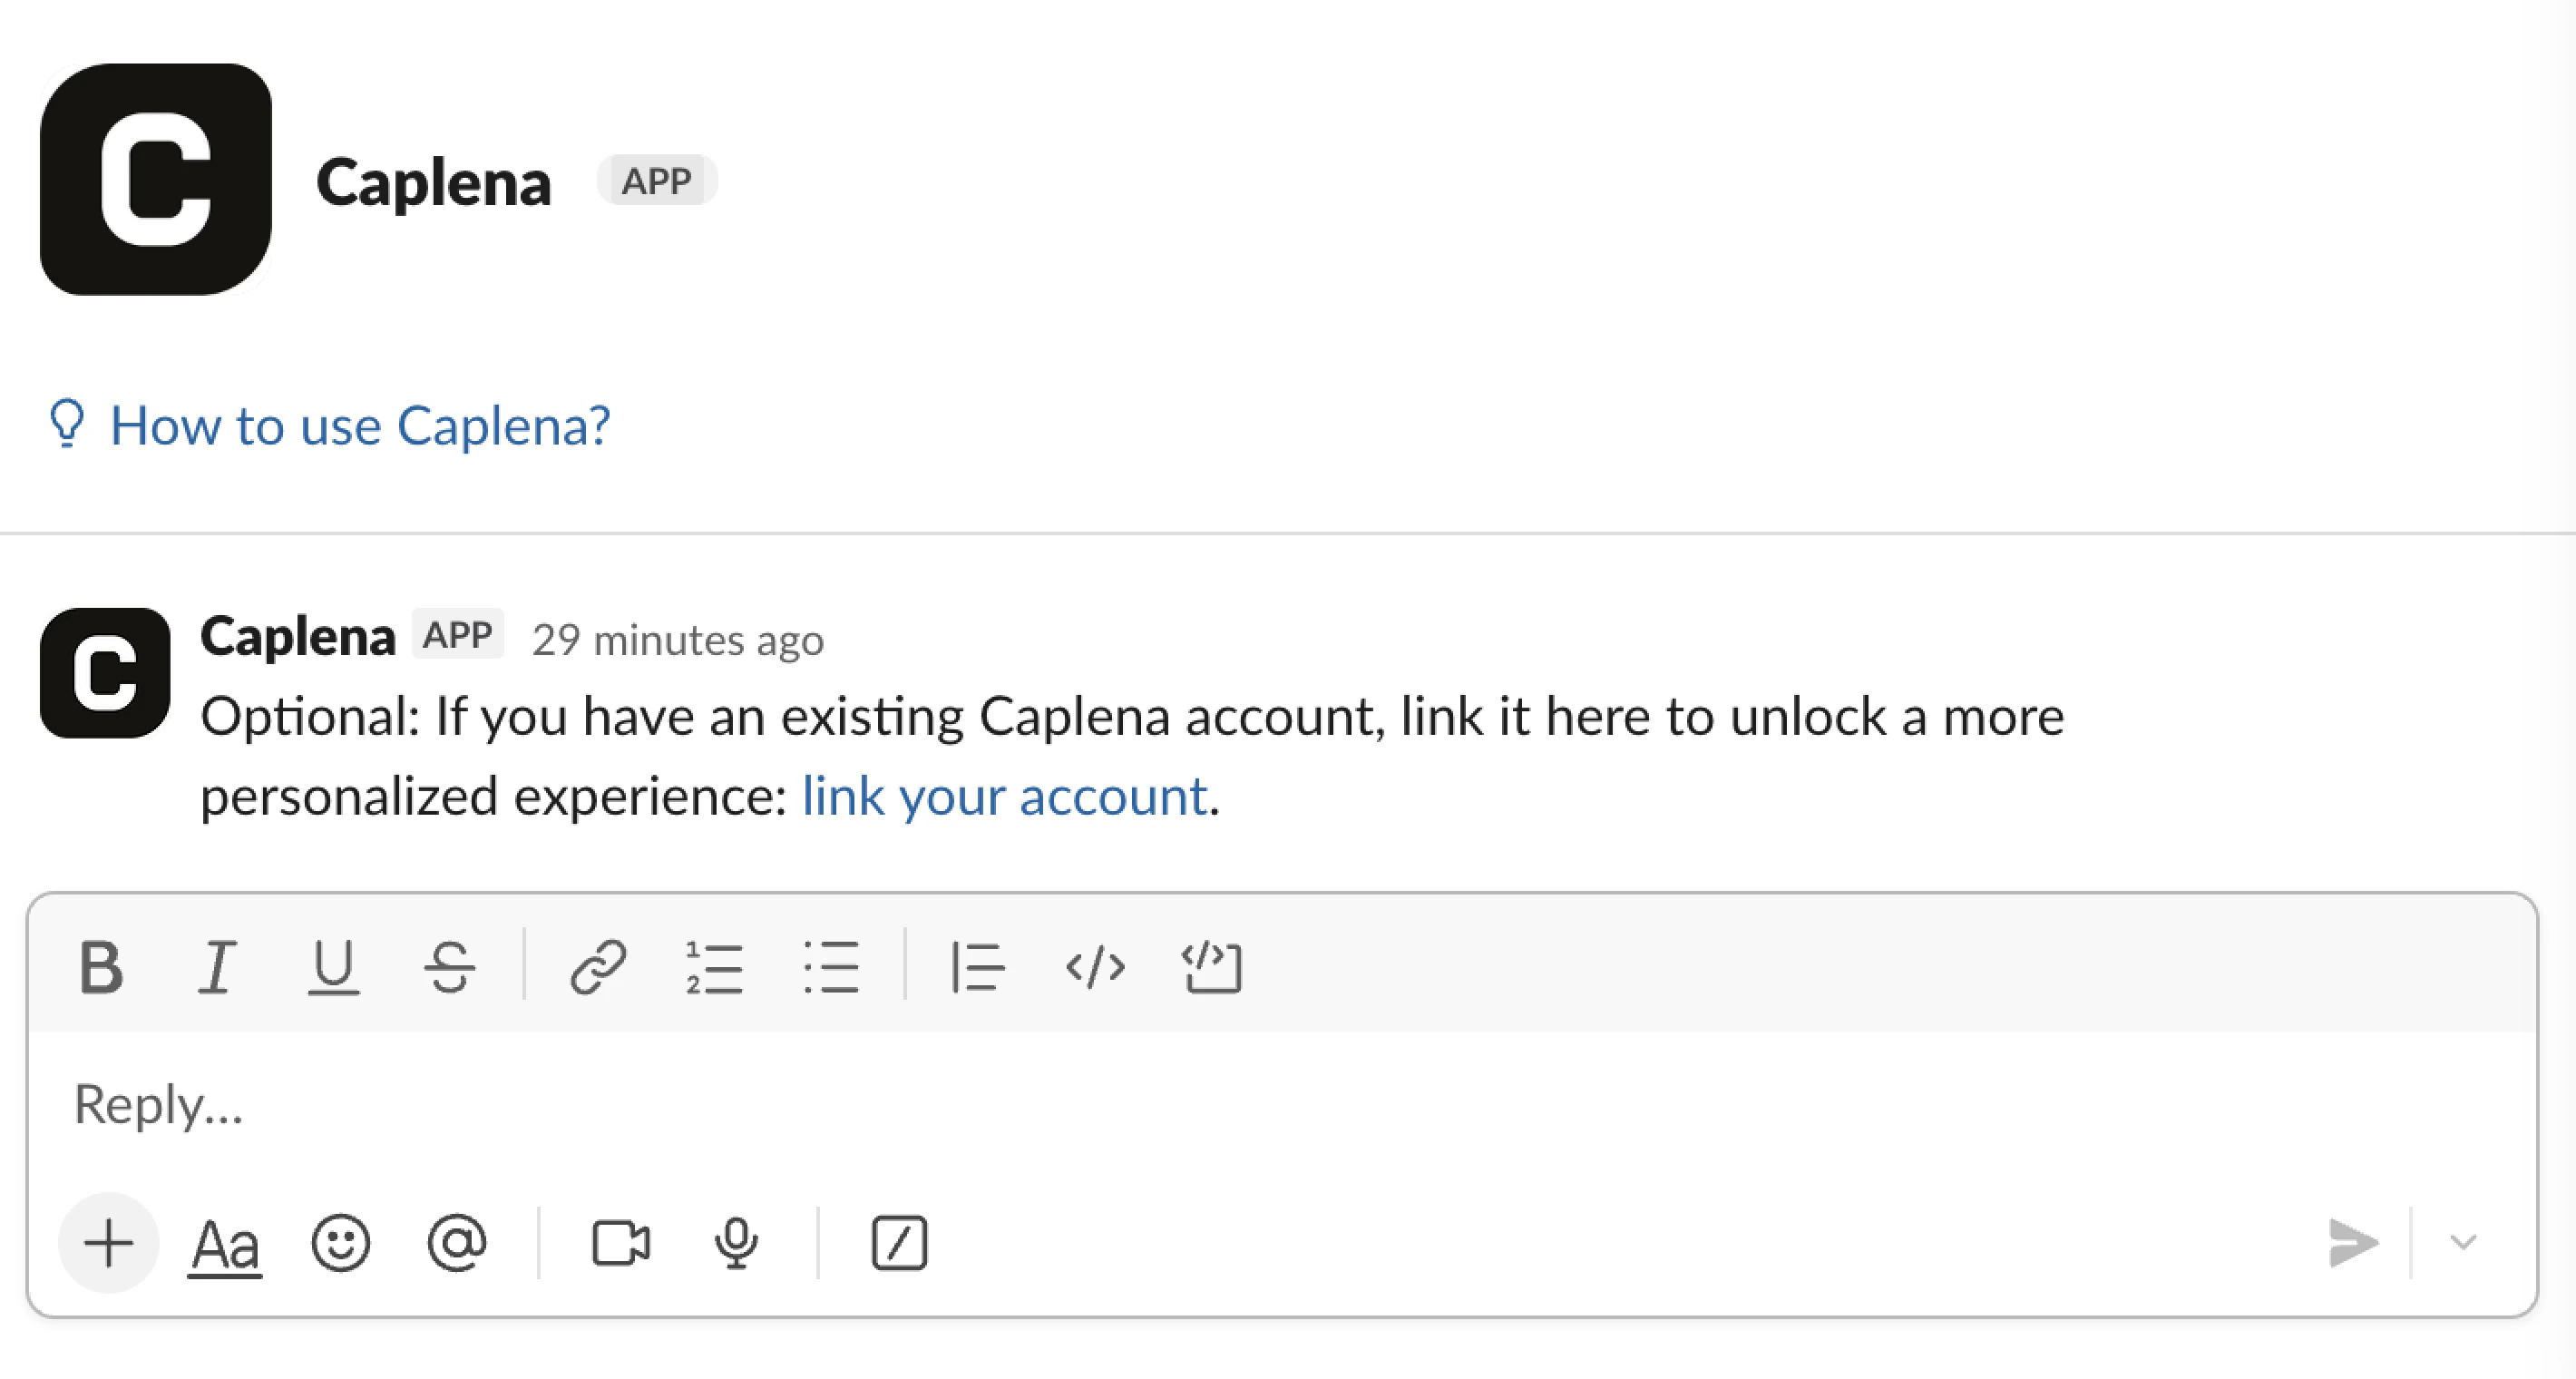
Enable Project Access in Caplena
Slack can only query insights from projects that have been explicitly approved. Learn how to set a project to Live →
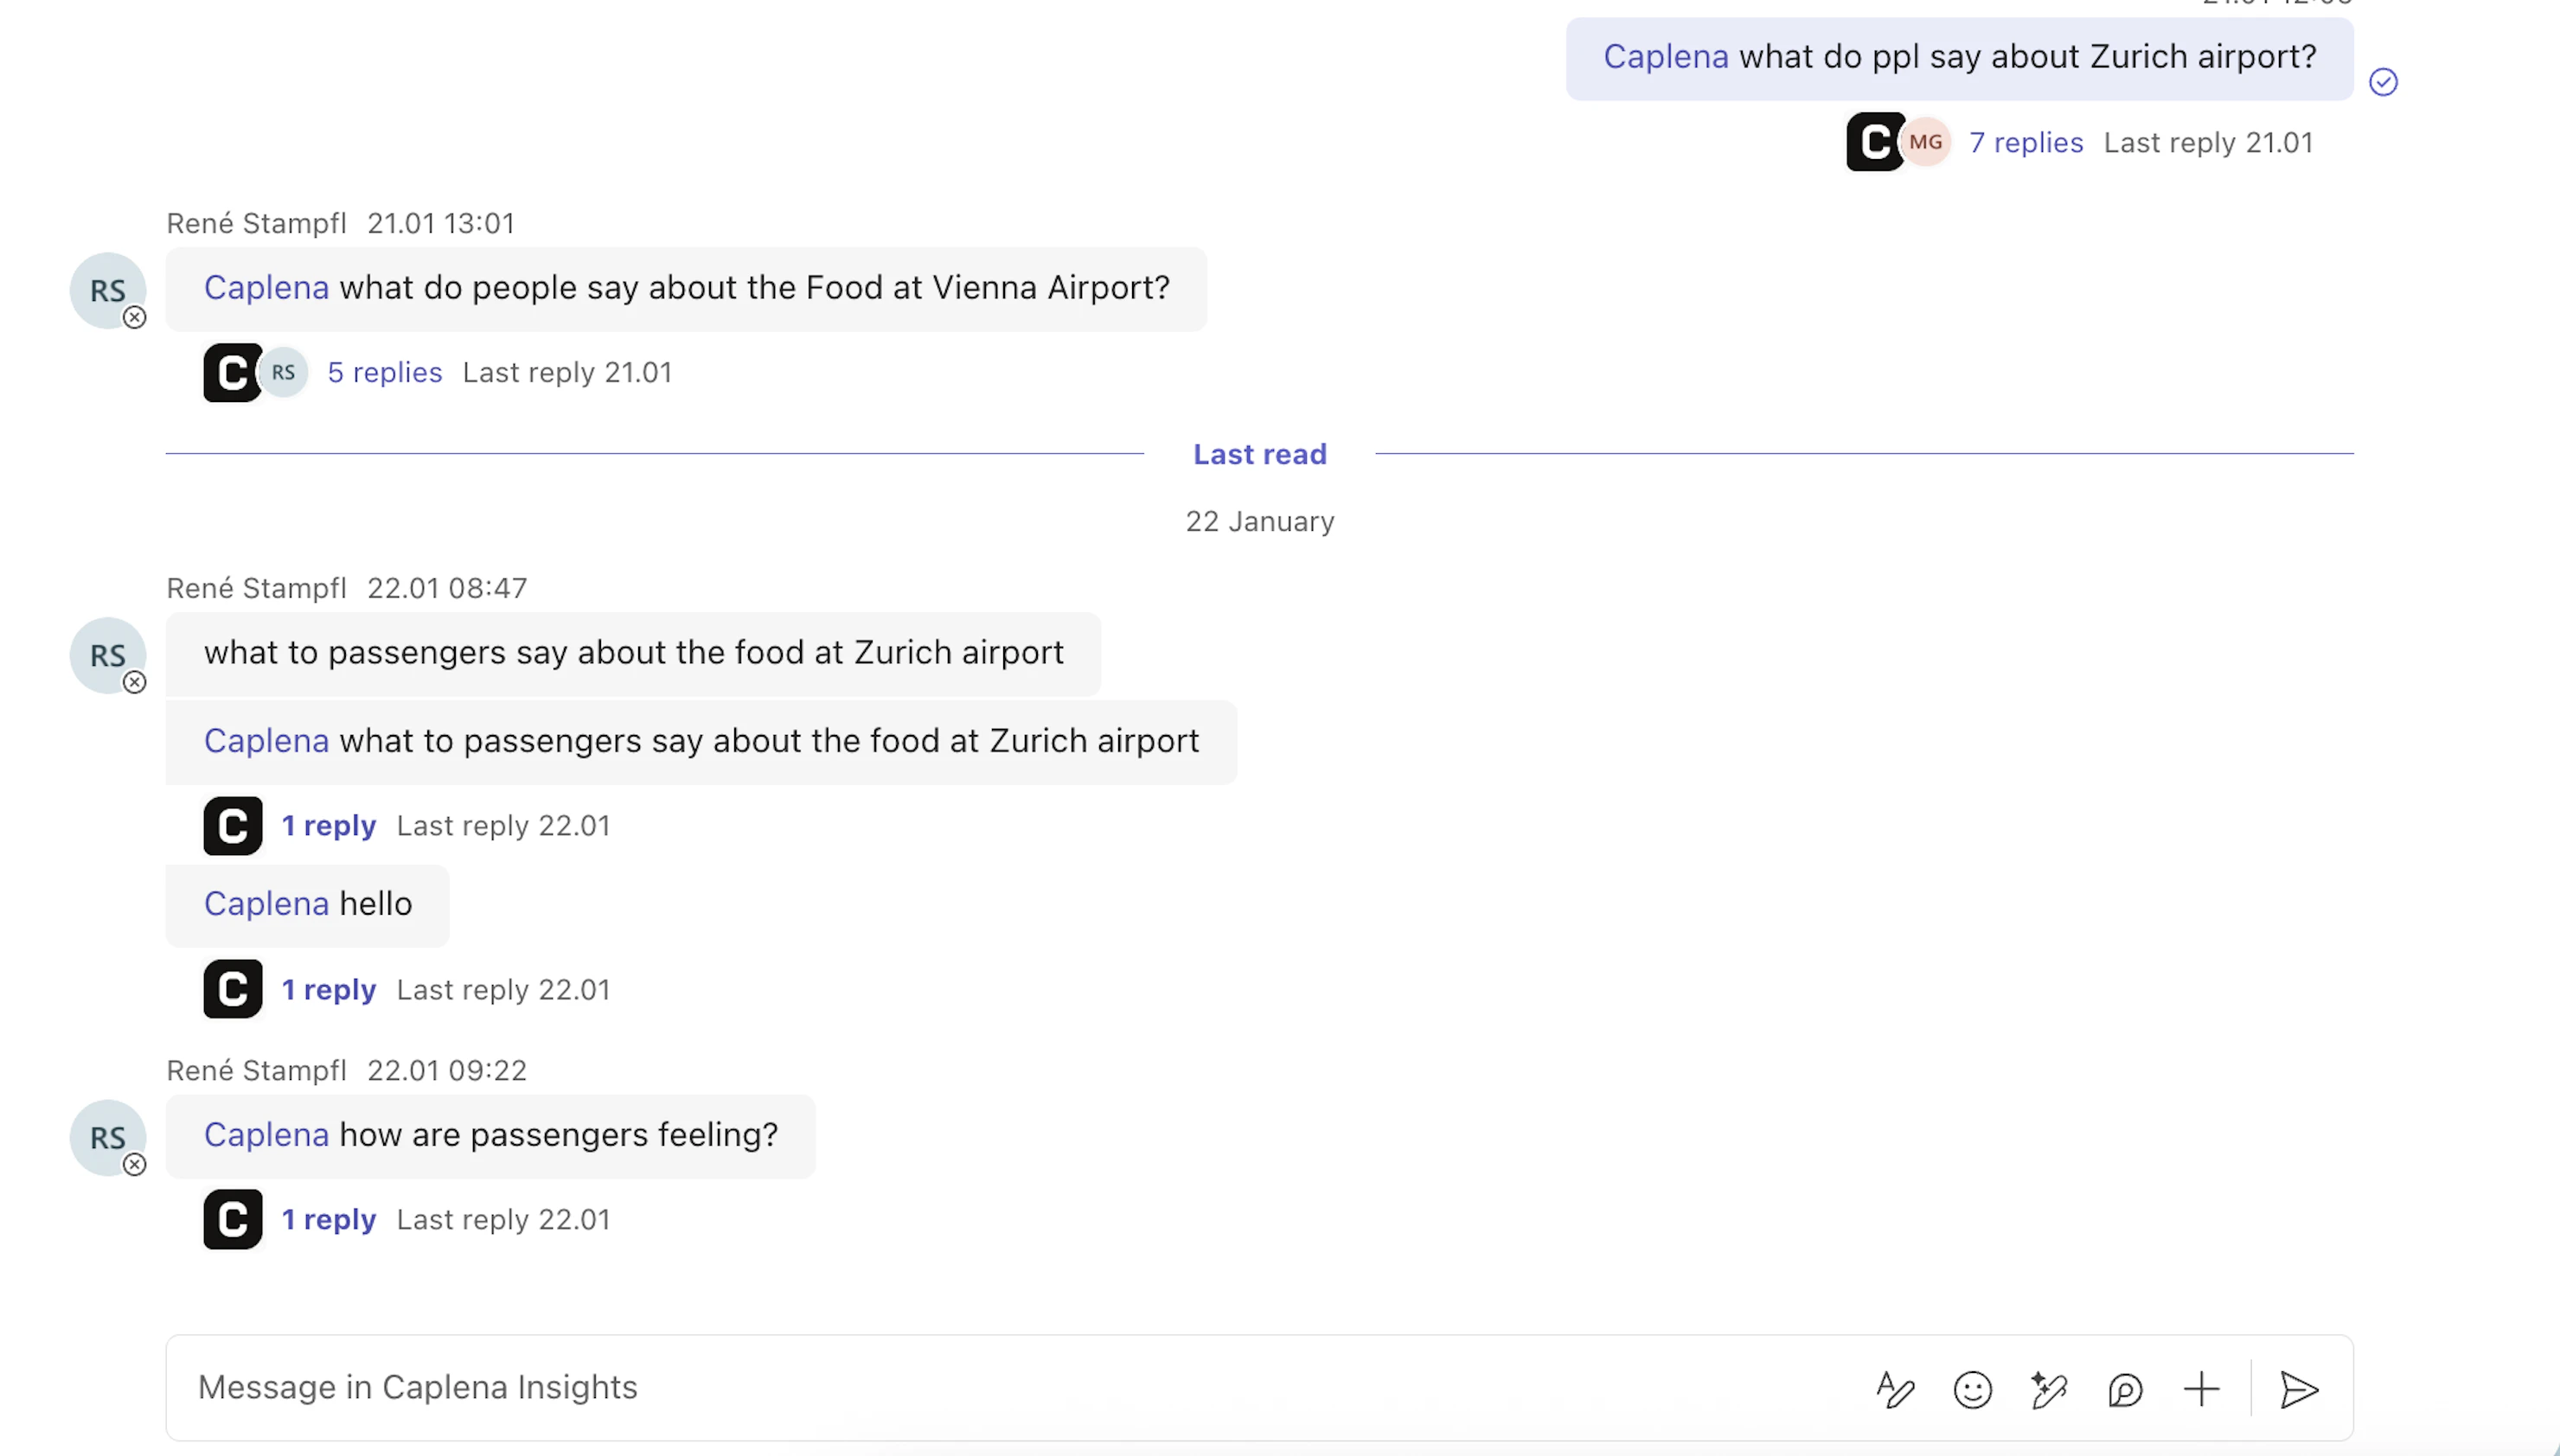
Configuring Access Mode (Slack & Teams)
After connecting your workspace, you’ll be guided to the Access Mode setting automatically. You can also return to it at any time from Settings → Integrations by clicking on the integration.
Live. No individual Caplena account authentication is required.
Per-user Access — Users must sign in with their Caplena account the first time they interact with the Caplena bot. From then on, they can only query projects, reports, and views they have permission to access.
Best Practices for Microsoft Teams & Slack
Create a public #insights channel Set up a shared “Insights” channel where team members can query Caplena for findings. This helps everyone discover what the bot can do, learn from each other’s use cases, discuss insights together, and keep knowledge accessible across the team.