

What This Lets You Do
Instead of opening Caplena, building filters, and reading through charts, you just ask a question and get an answer. For example:- “What are the top complaints in my NPS project this week?”
- “How has sentiment changed over the past month in my support feedback project?”
- “Summarize the most common themes across my Q1 and Q2 projects.”
- “Get the top 3 issues in Germany, France and the US and create a 4-slide PowerPoint deck from this with our corporate template.”
- “Find app issues mentioned in the past 2 days and create a Jira ticket for every one of them.”
- “For each of the three strategic priorities outlined in the Strategy.docx file, create an executive summary of the voice of the customer related to the initiative, both qualitative and quantitative.”
- Stakeholders and non-analysts who use an MCP client but don’t work in Caplena day-to-day — they can get answers without needing to know how to navigate the platform.
- Combining Caplena data with other context — the client can look at your feedback data alongside a document, spreadsheet, or email in the same conversation.
Before You Start
- You have a Caplena account with at least one project set to Live.
- You have Claude Desktop installed. (Using a different MCP client? The same steps apply — just look for the equivalent “custom connector” setting.)
Step 1: Enable MCP in Caplena
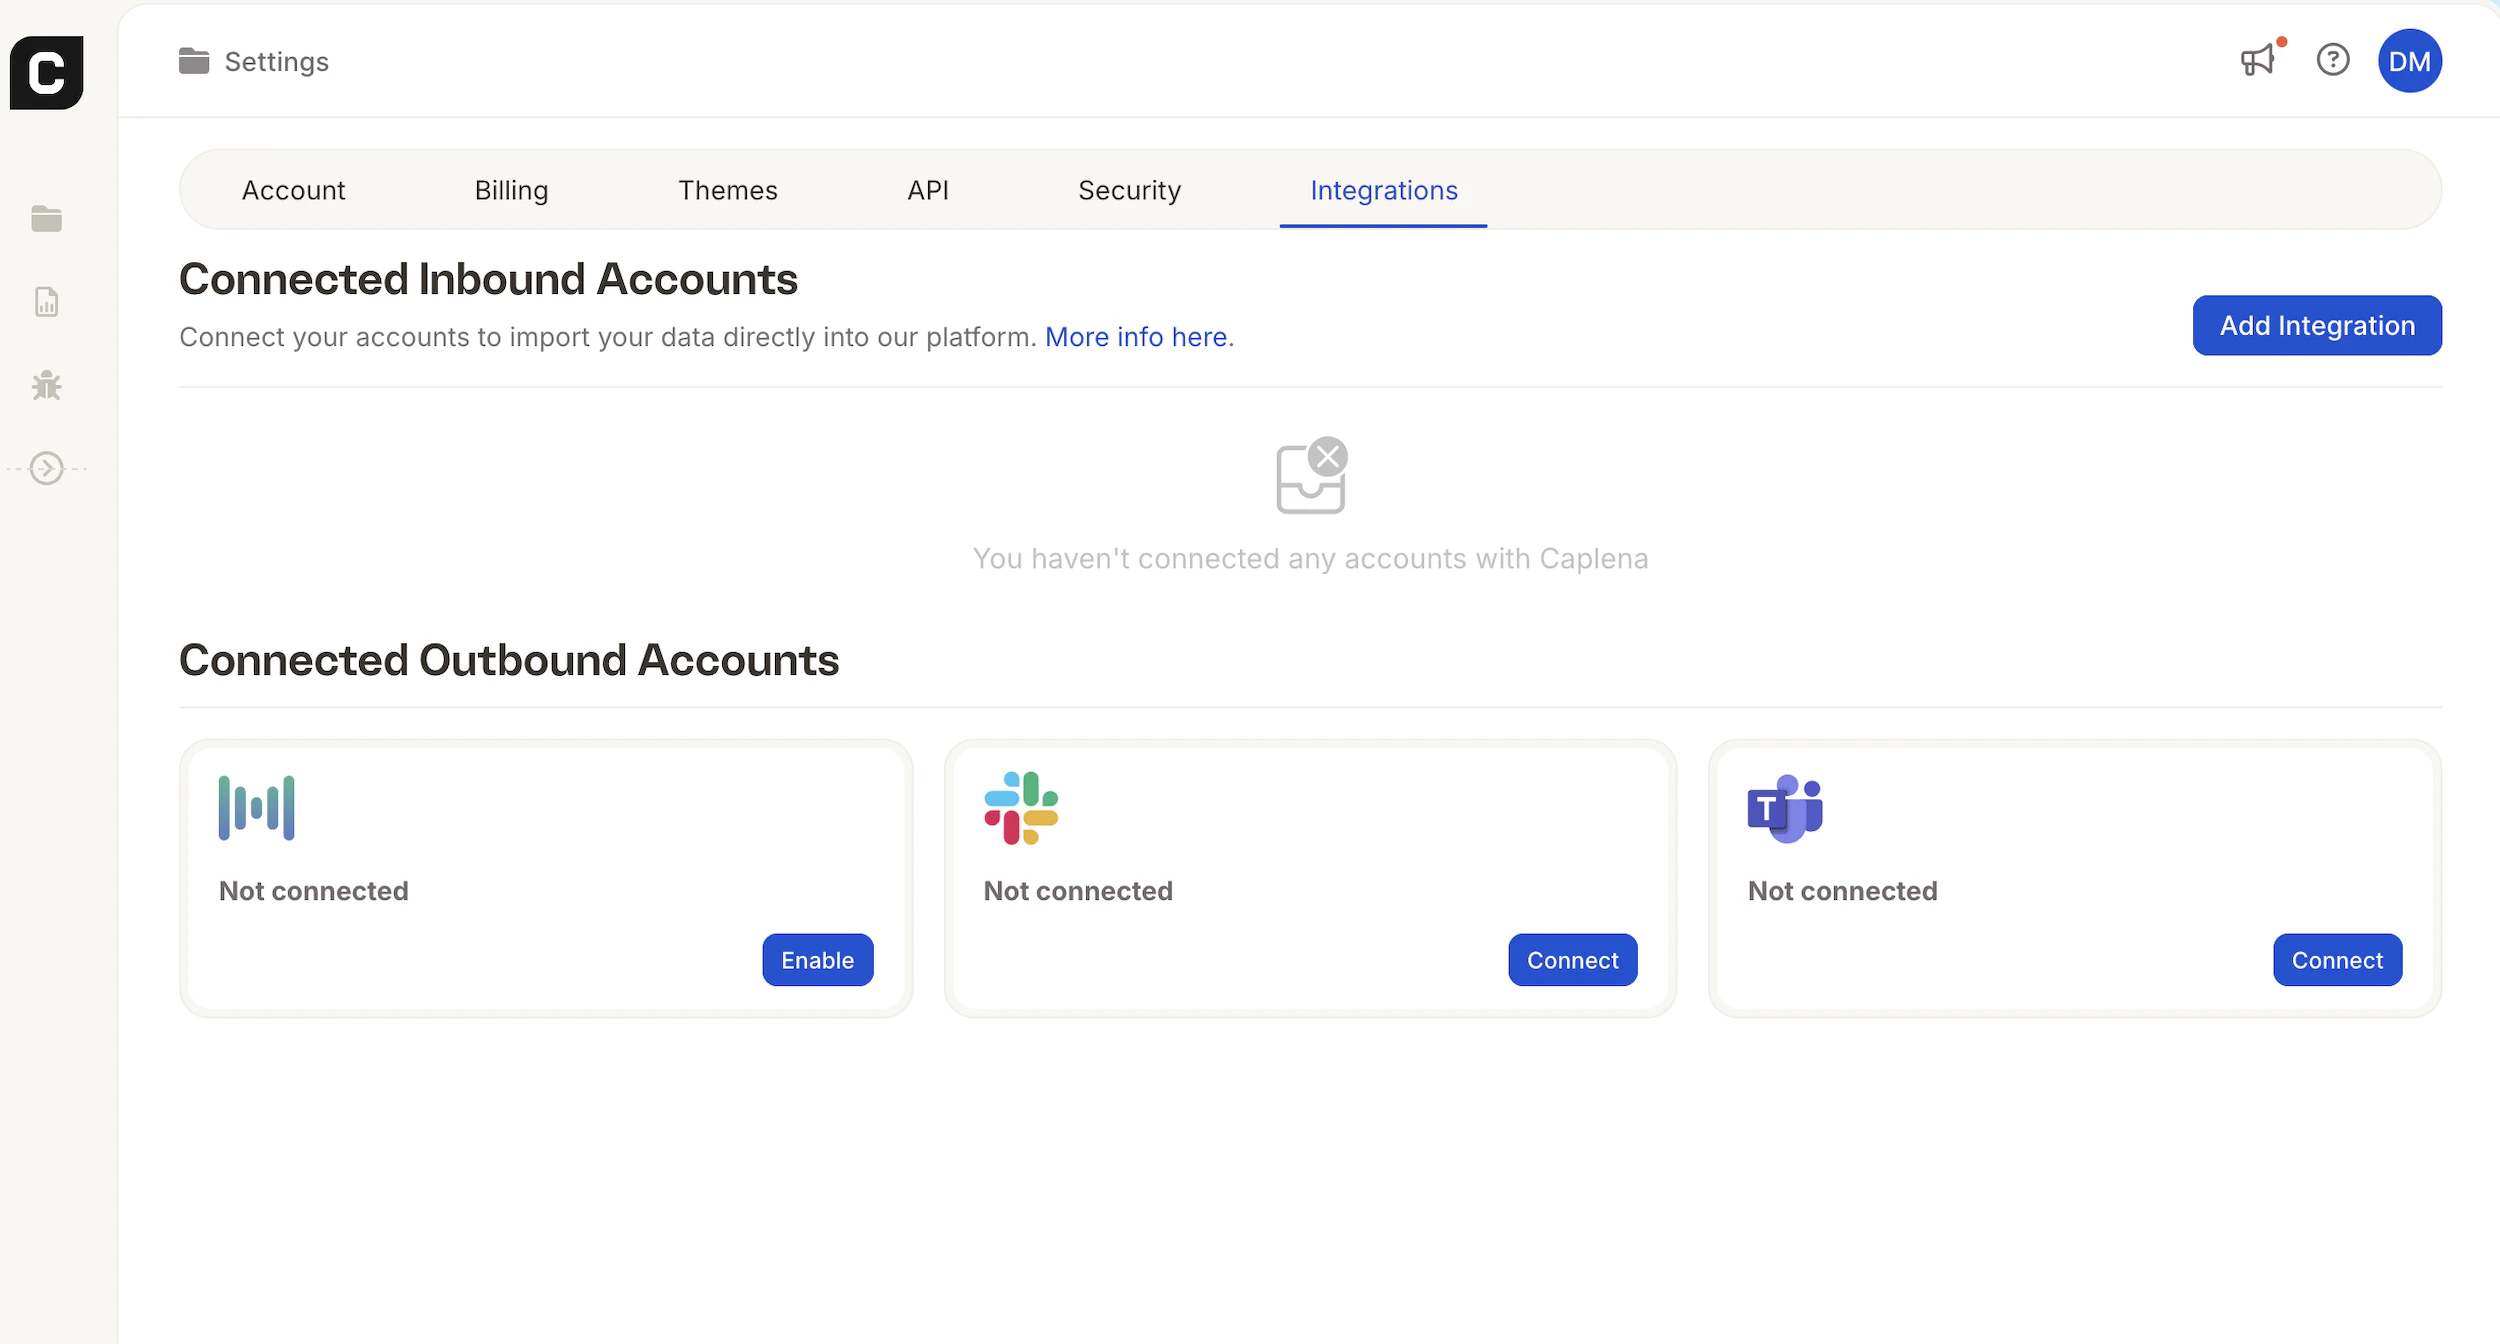
- In Caplena, go to Settings → Integrations.
- Under Connected Outbound Accounts, find the MCP tile and click Enable.
- A modal appears. Click Enable again to confirm.
- Copy the MCP URL shown in the modal. This is the URL you’ll add to your MCP client.
Step 2: Add Caplena as a Custom Connector
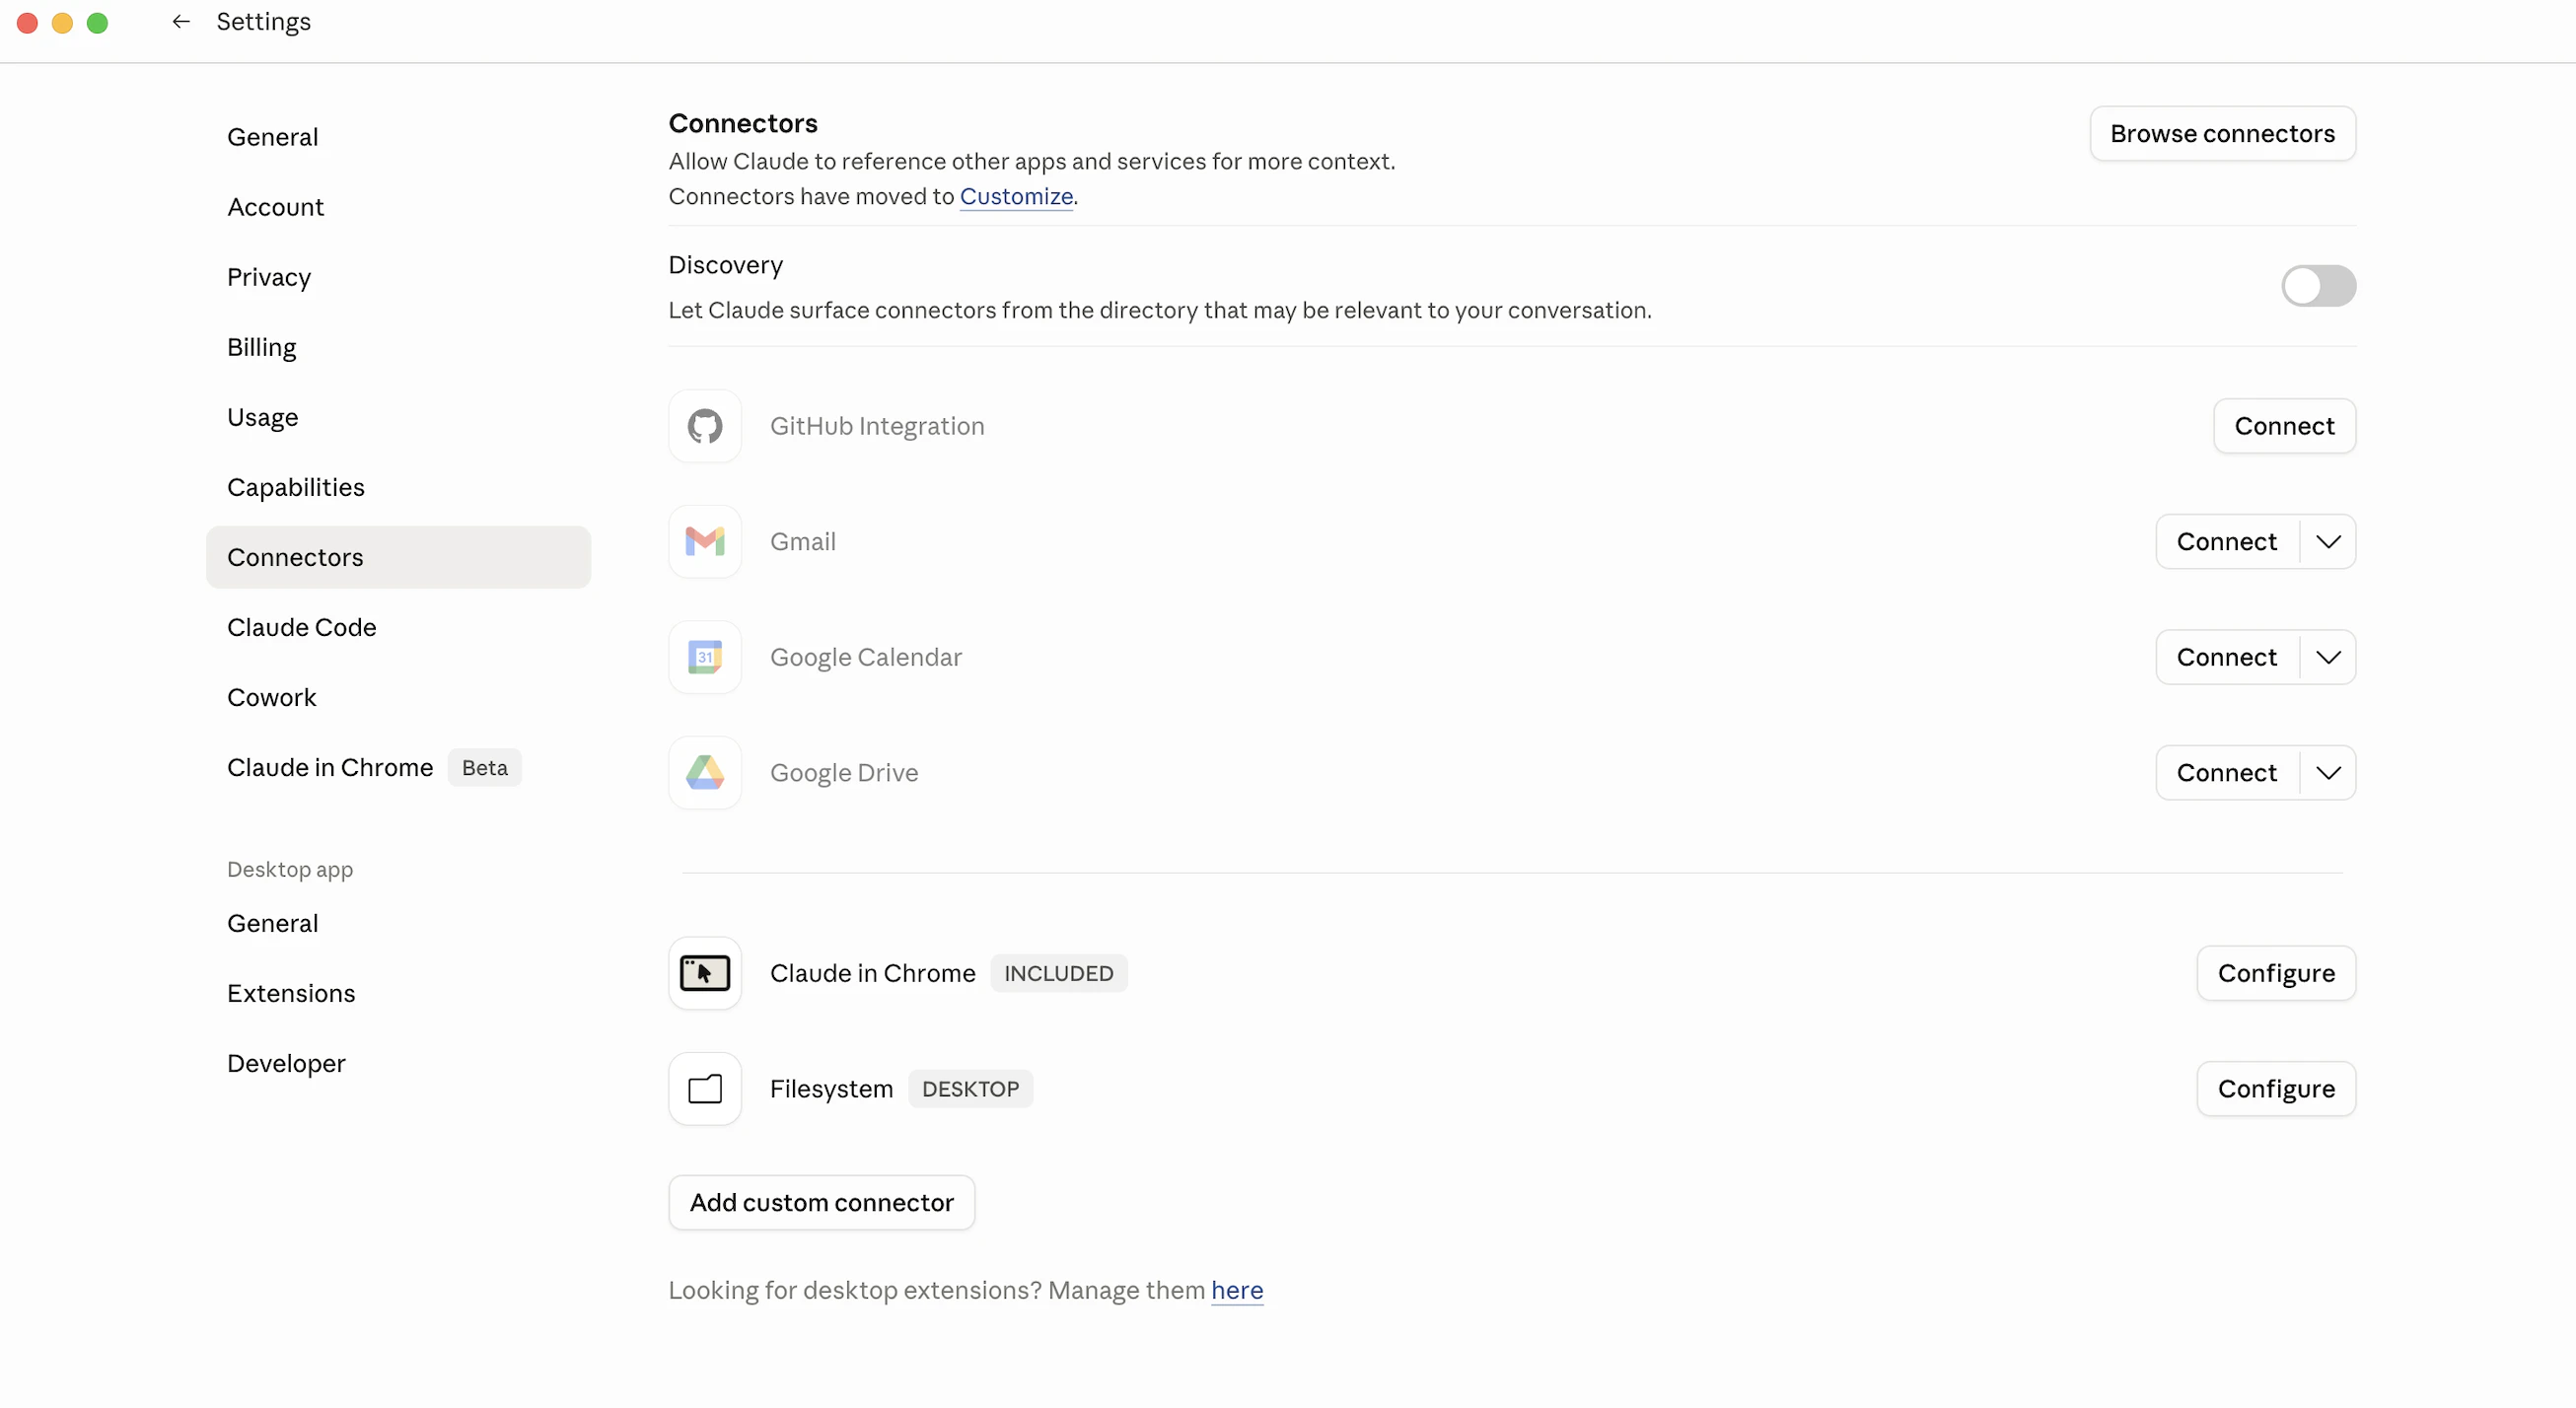
- Open Claude Desktop and go to Settings → Connectors.
- Click Add custom connector.
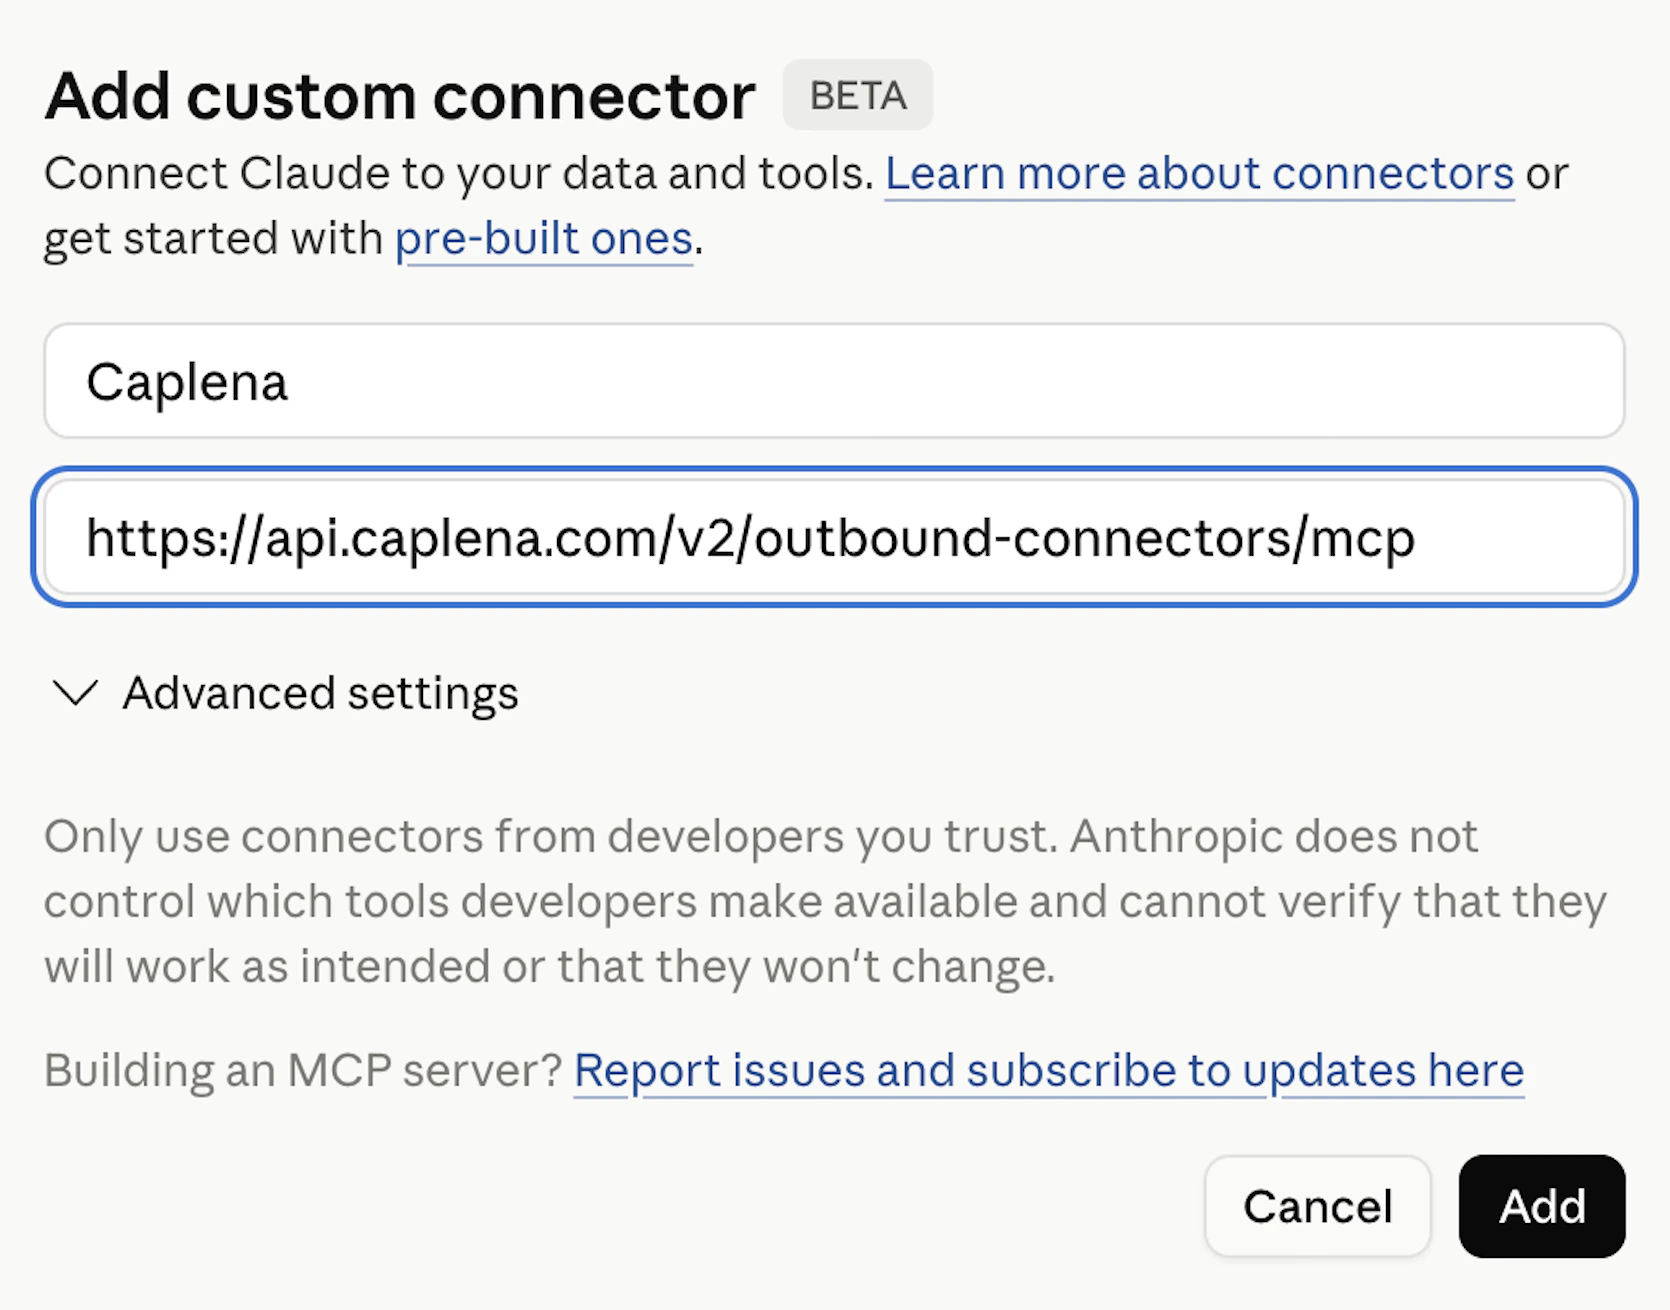
- In the modal that appears, fill in:
- Name: Caplena
- URL: the MCP URL you copied in Step 1
- Click Add.
Step 3: Authorize the Connection
- Caplena appears in your connectors list. Click Connect.
- You’ll be redirected to Caplena. If you’re not already logged in, you’ll be asked to sign in.
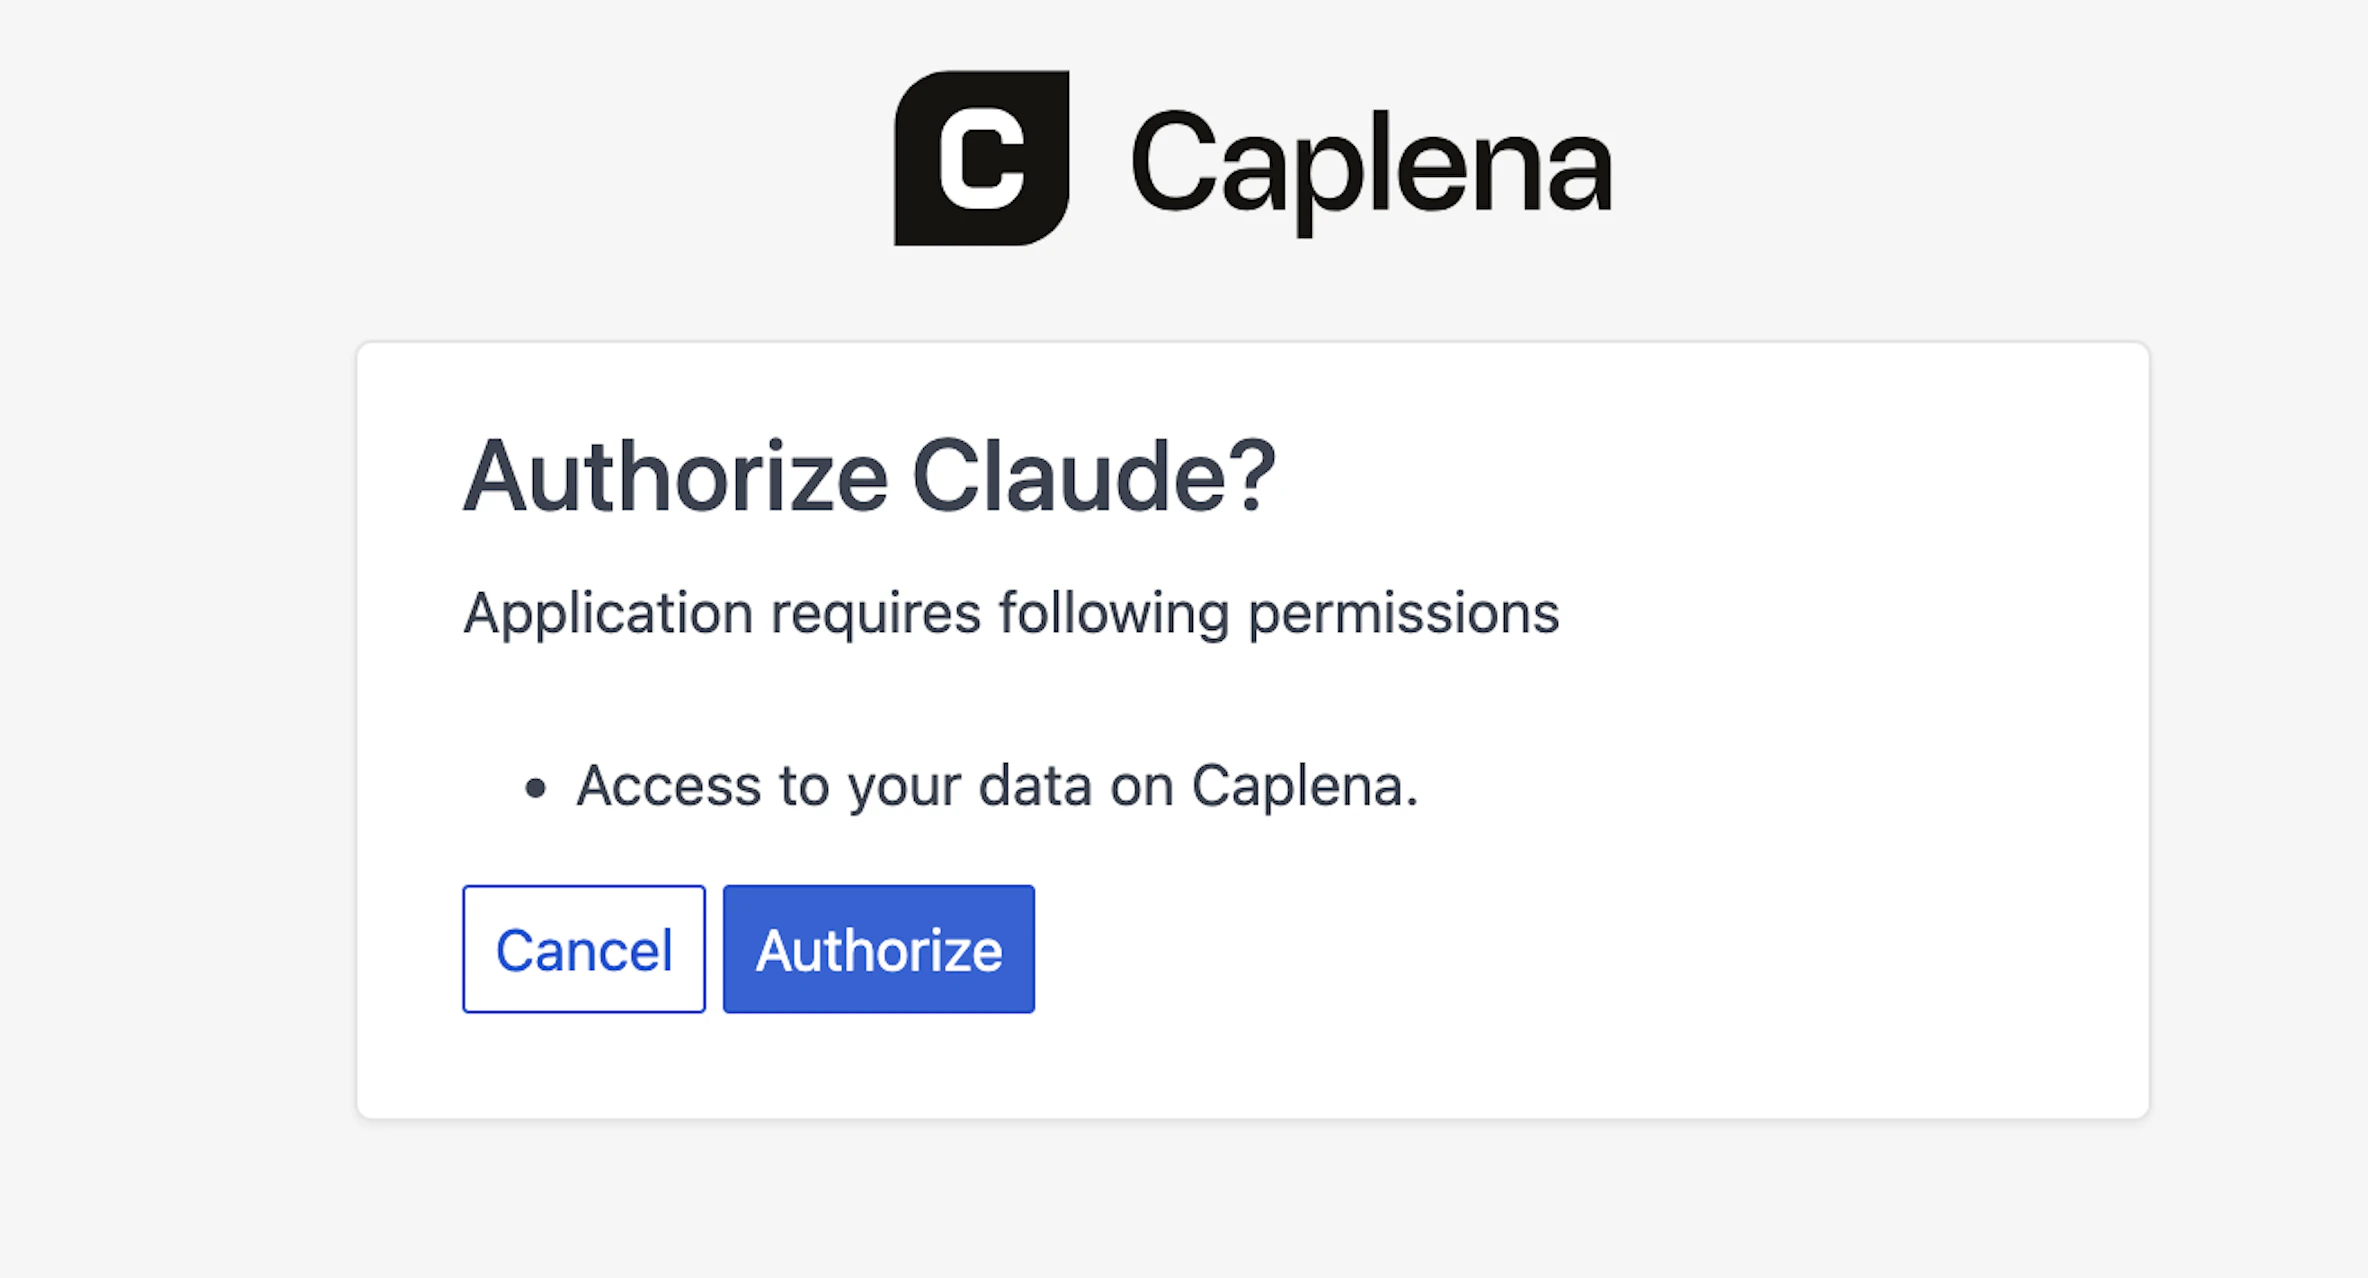
- An authorization screen appears asking you to grant the client access to your Caplena data. In Claude Desktop this reads Authorize Claude? — click Authorize.
- You’ll be sent back to your client and should see a “Connected to Caplena” confirmation message.
Step 4: Start Querying Your Data
In your MCP client, try: “List the projects that you can access on Caplena.” The client will ask for your permission to use its Caplena tools. Grant access when prompted — in Claude Desktop, click Always allow (you may be asked twice: once to query Caplena, once to use the Retrieve tool).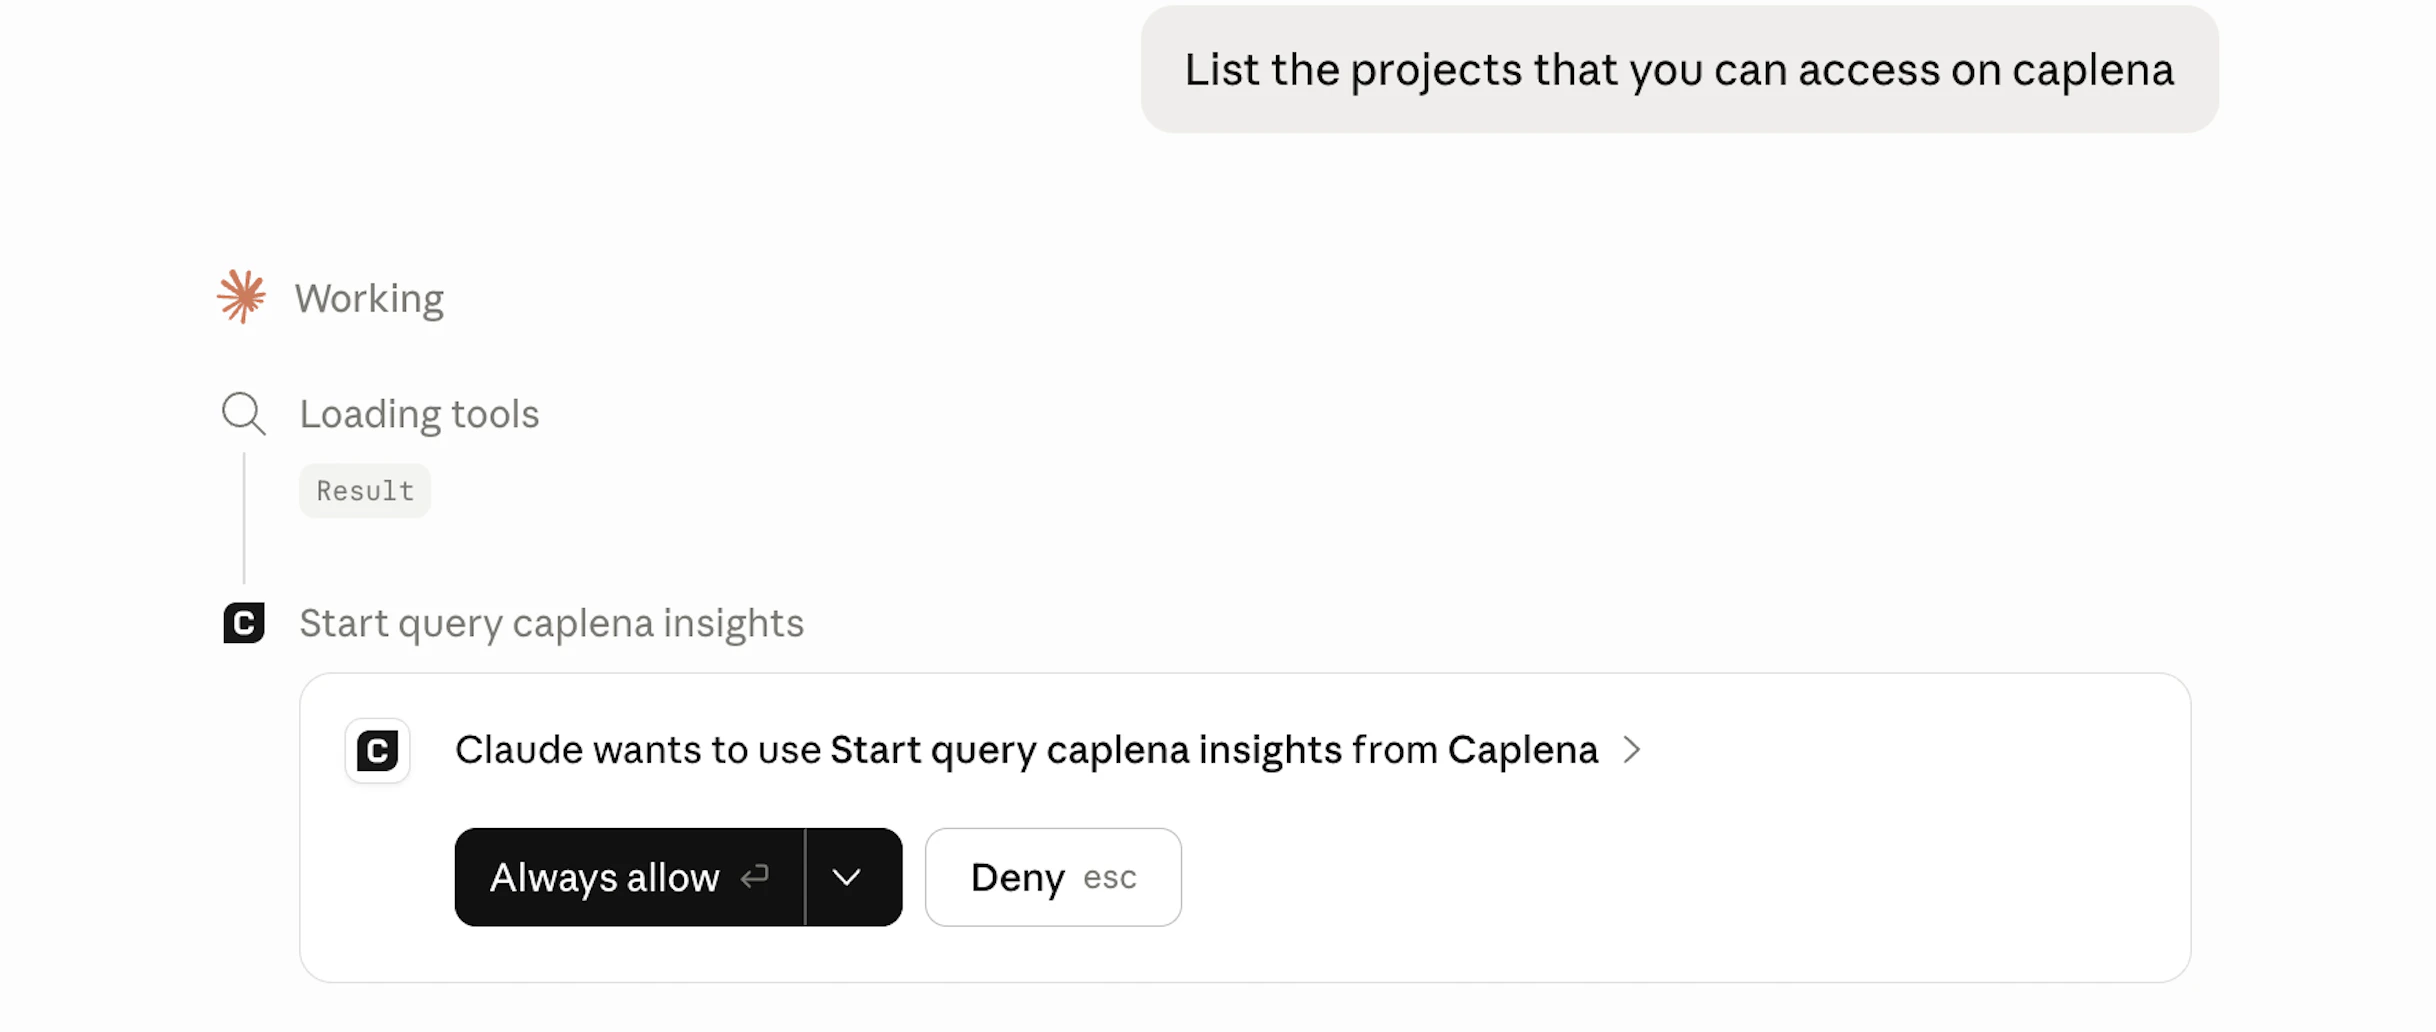
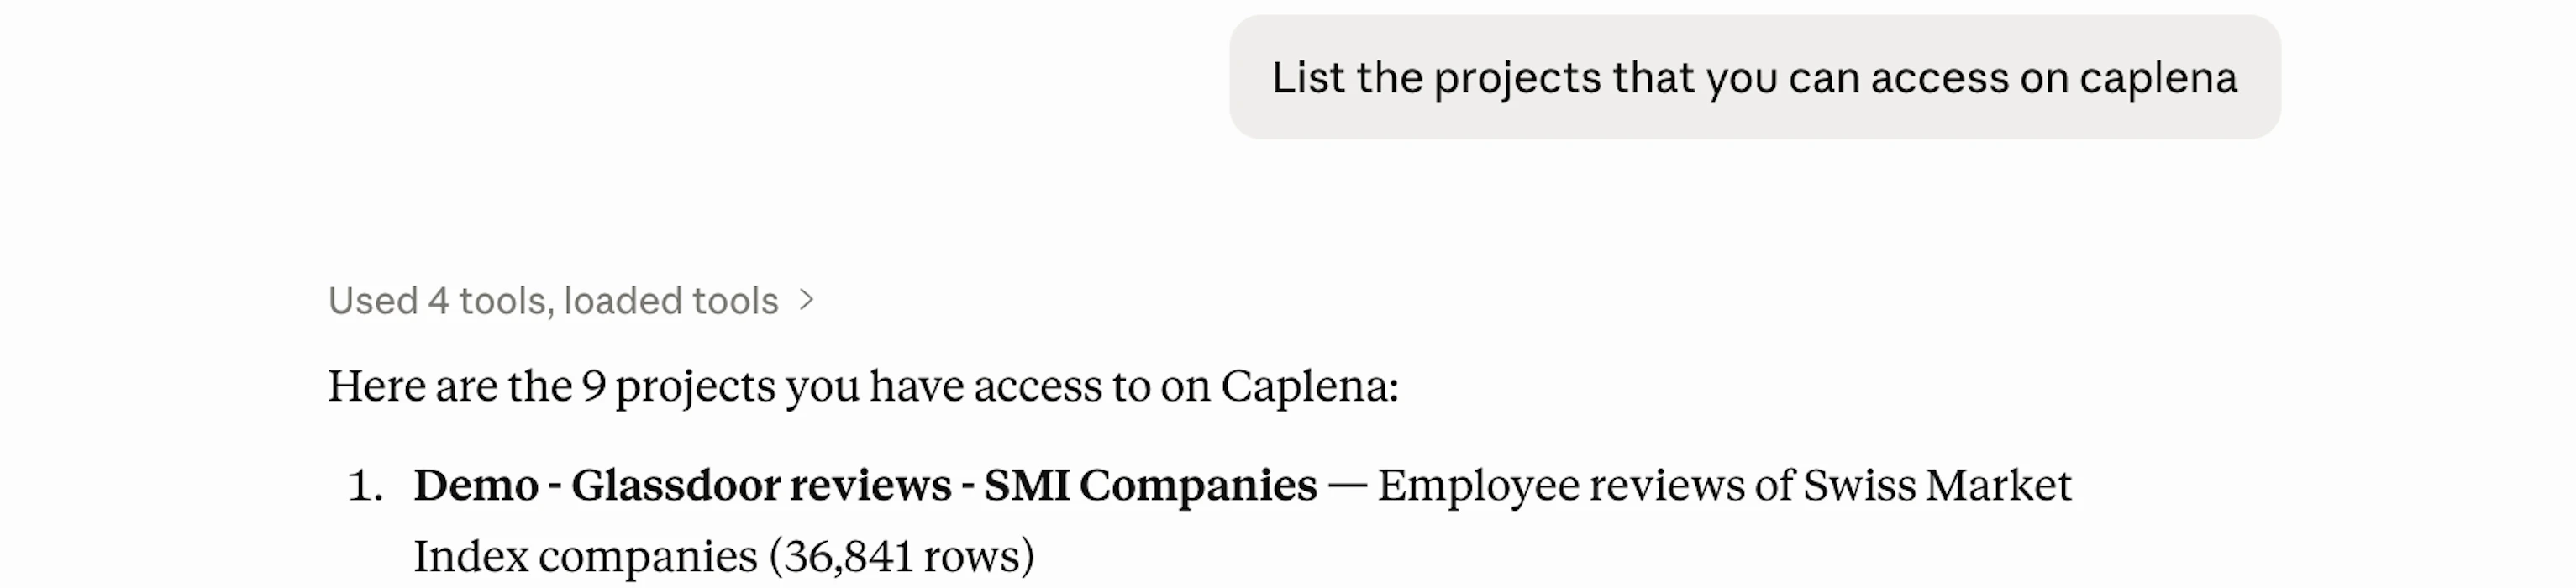
By default, your MCP client may ask for your approval each time it queries Caplena. You can change this to Always allow to skip the confirmation on every request.