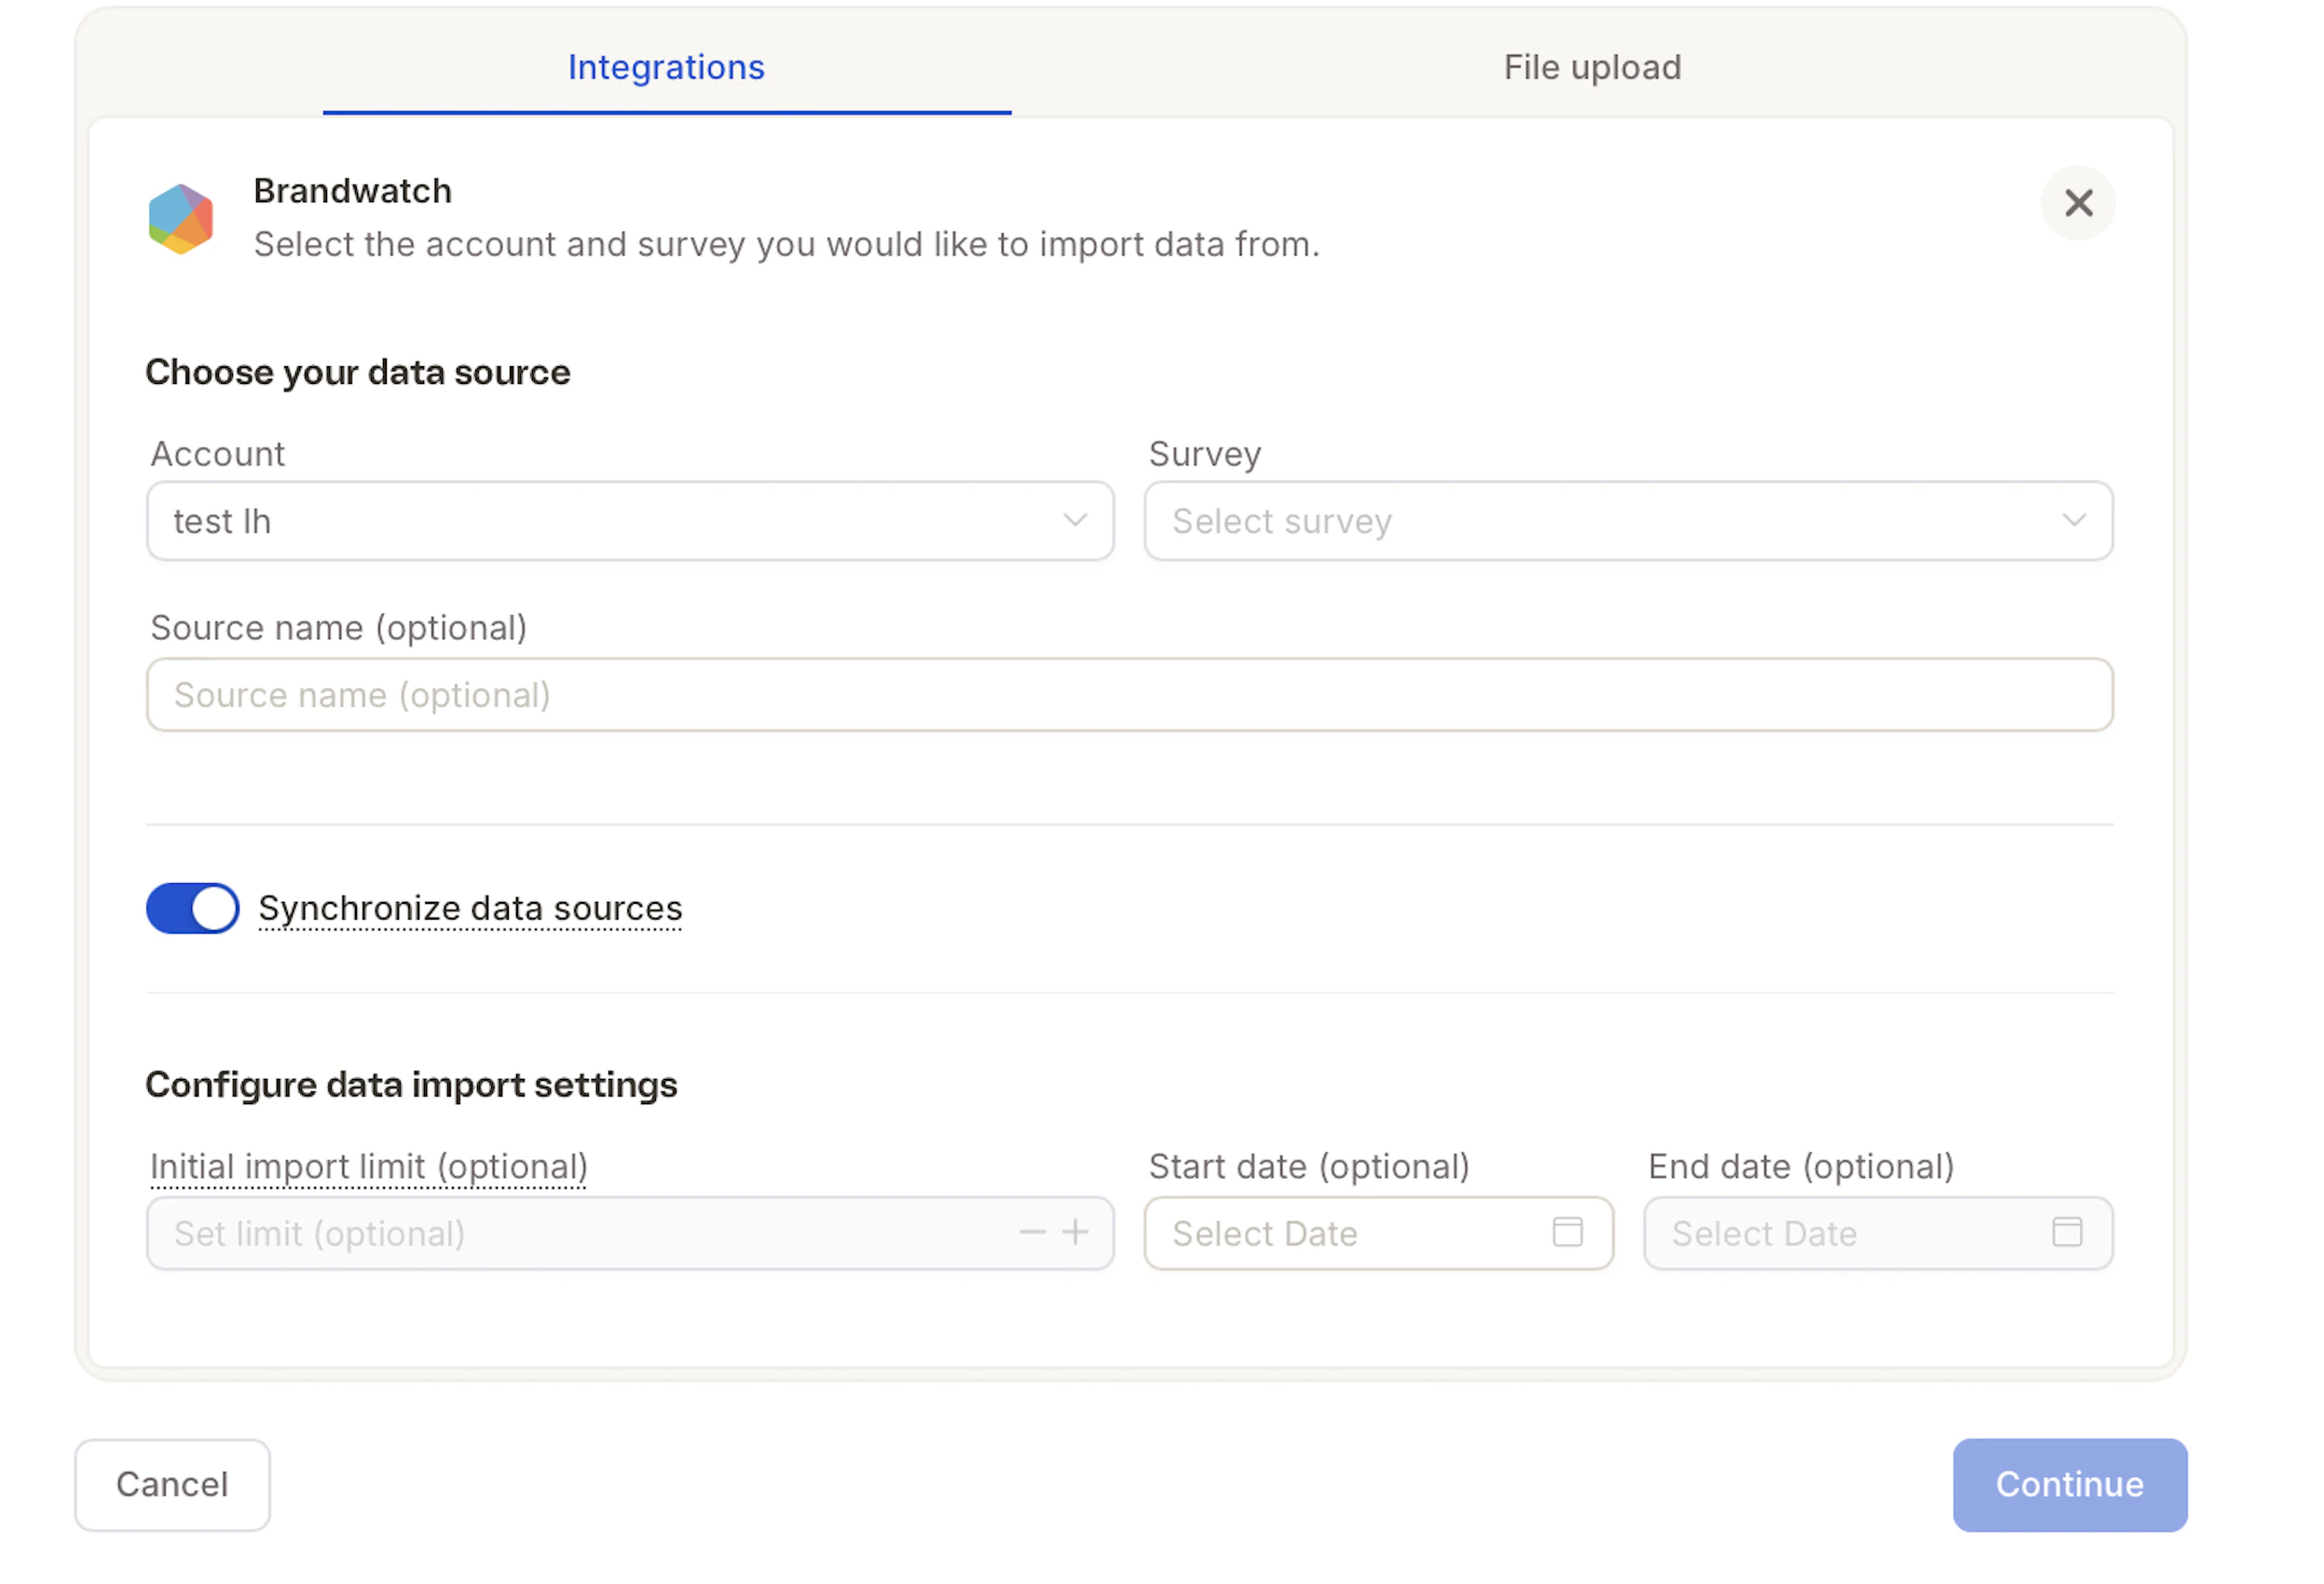
Brandwatch
Our Brandwatch integration allows you to seamlessly import social media query results directly into Caplena for analysis.Open Integrations Settings
Add Your Brandwatch Account
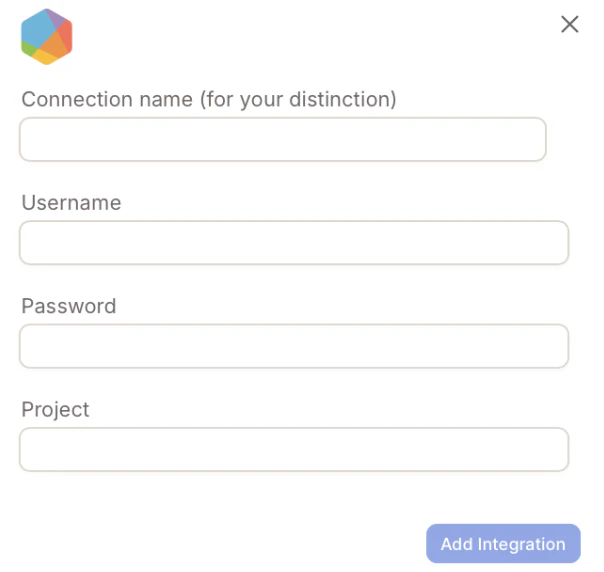
- Connection name – Give your connection a unique name
- Username – Your Brandwatch username
- Password – Your Brandwatch password
- Project name – You can find this in your Brandwatch account
Connect the Account
Import Brandwatch Data
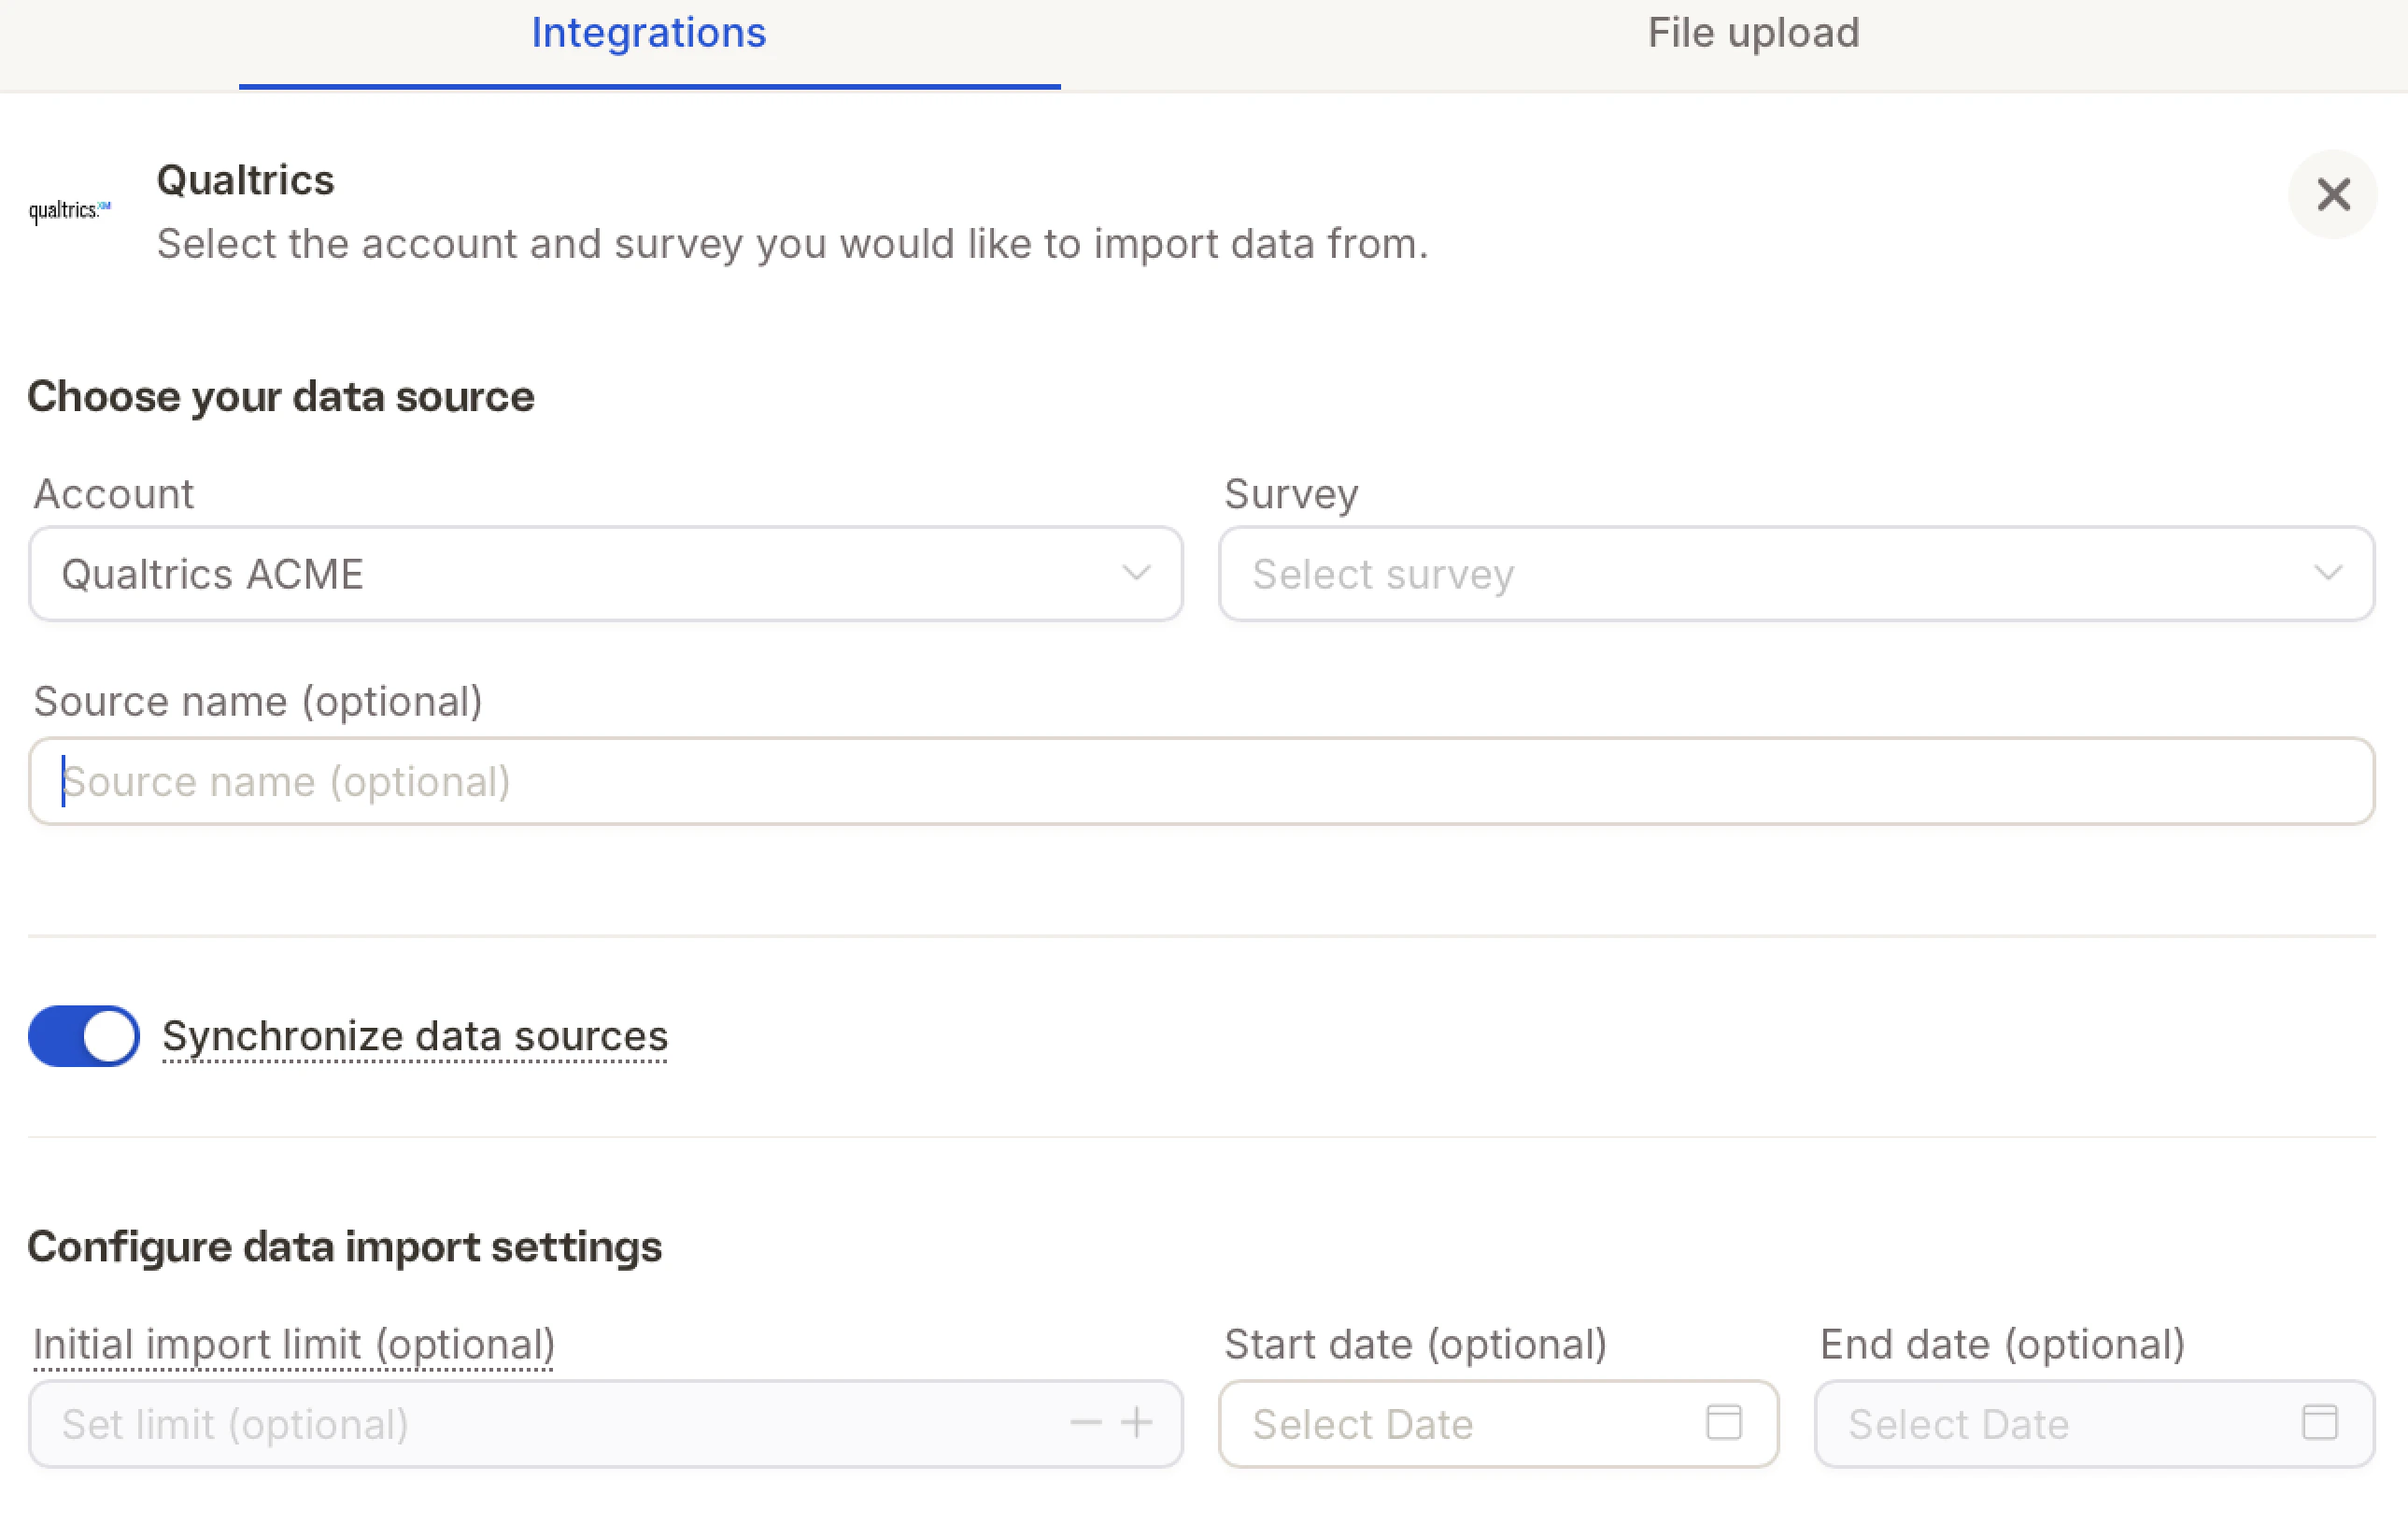
Qualtrics
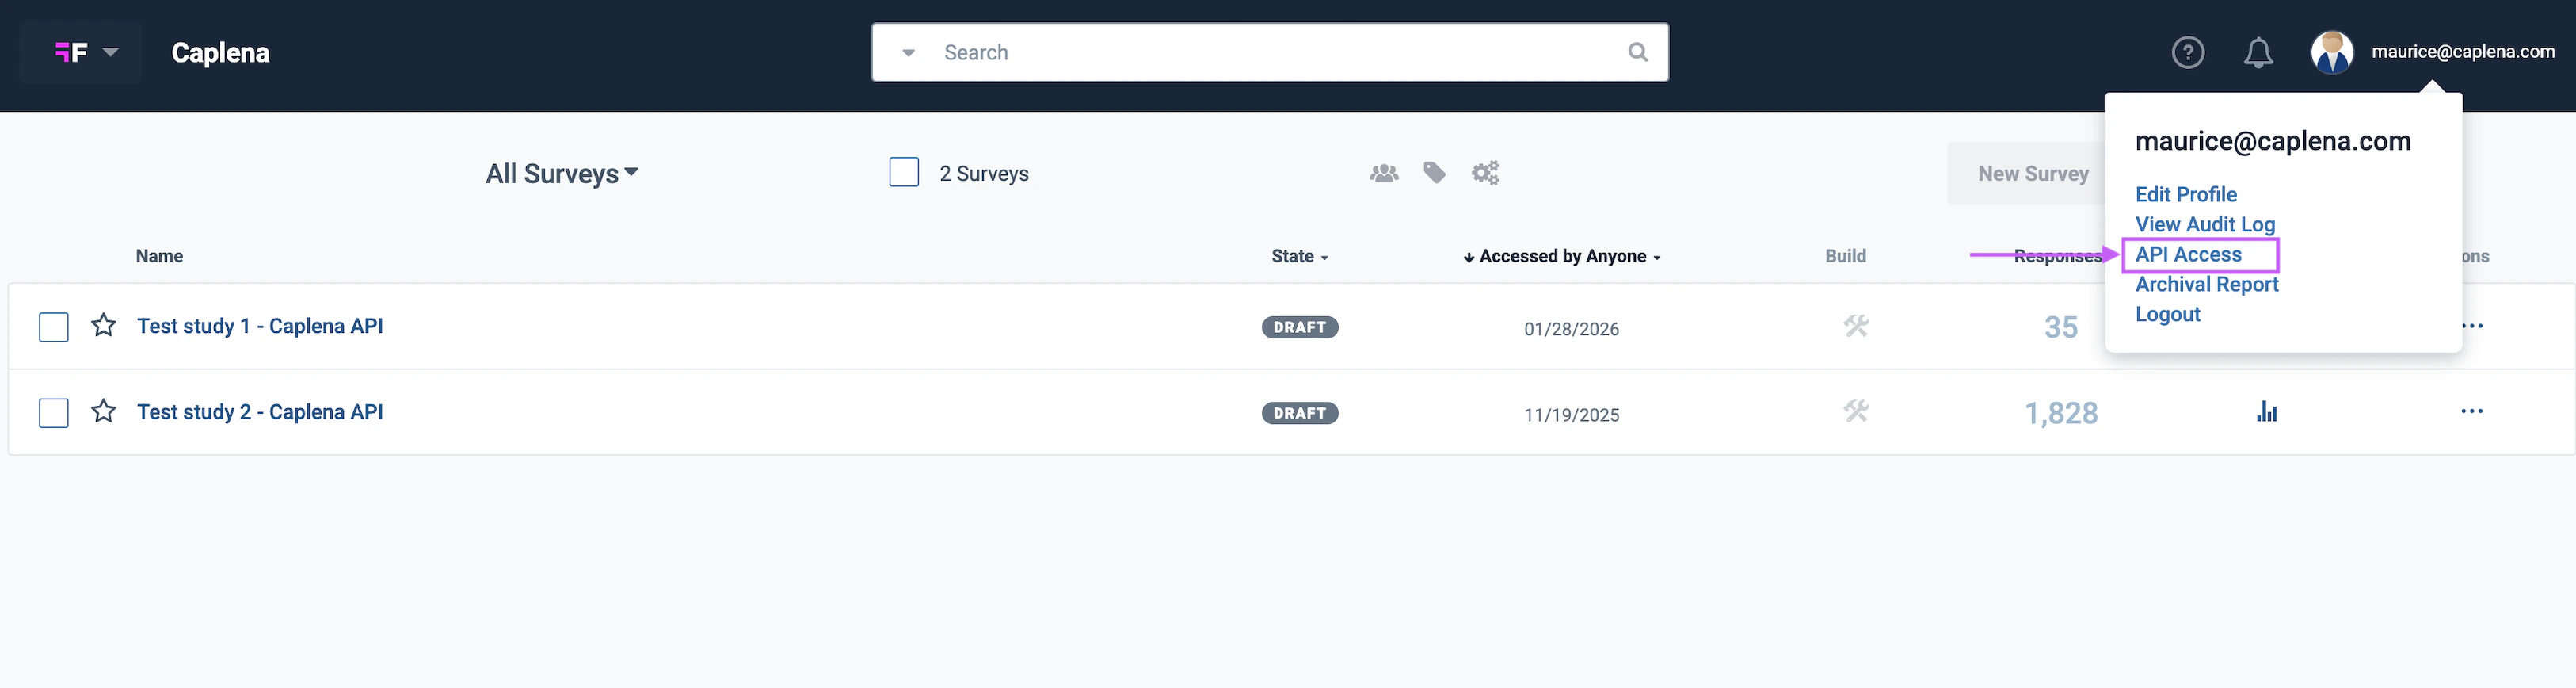
Access Integration Settings
Set Up OAuth in Qualtrics
read:users, read:surveys, read:survey_responses.Fill in Connection Details
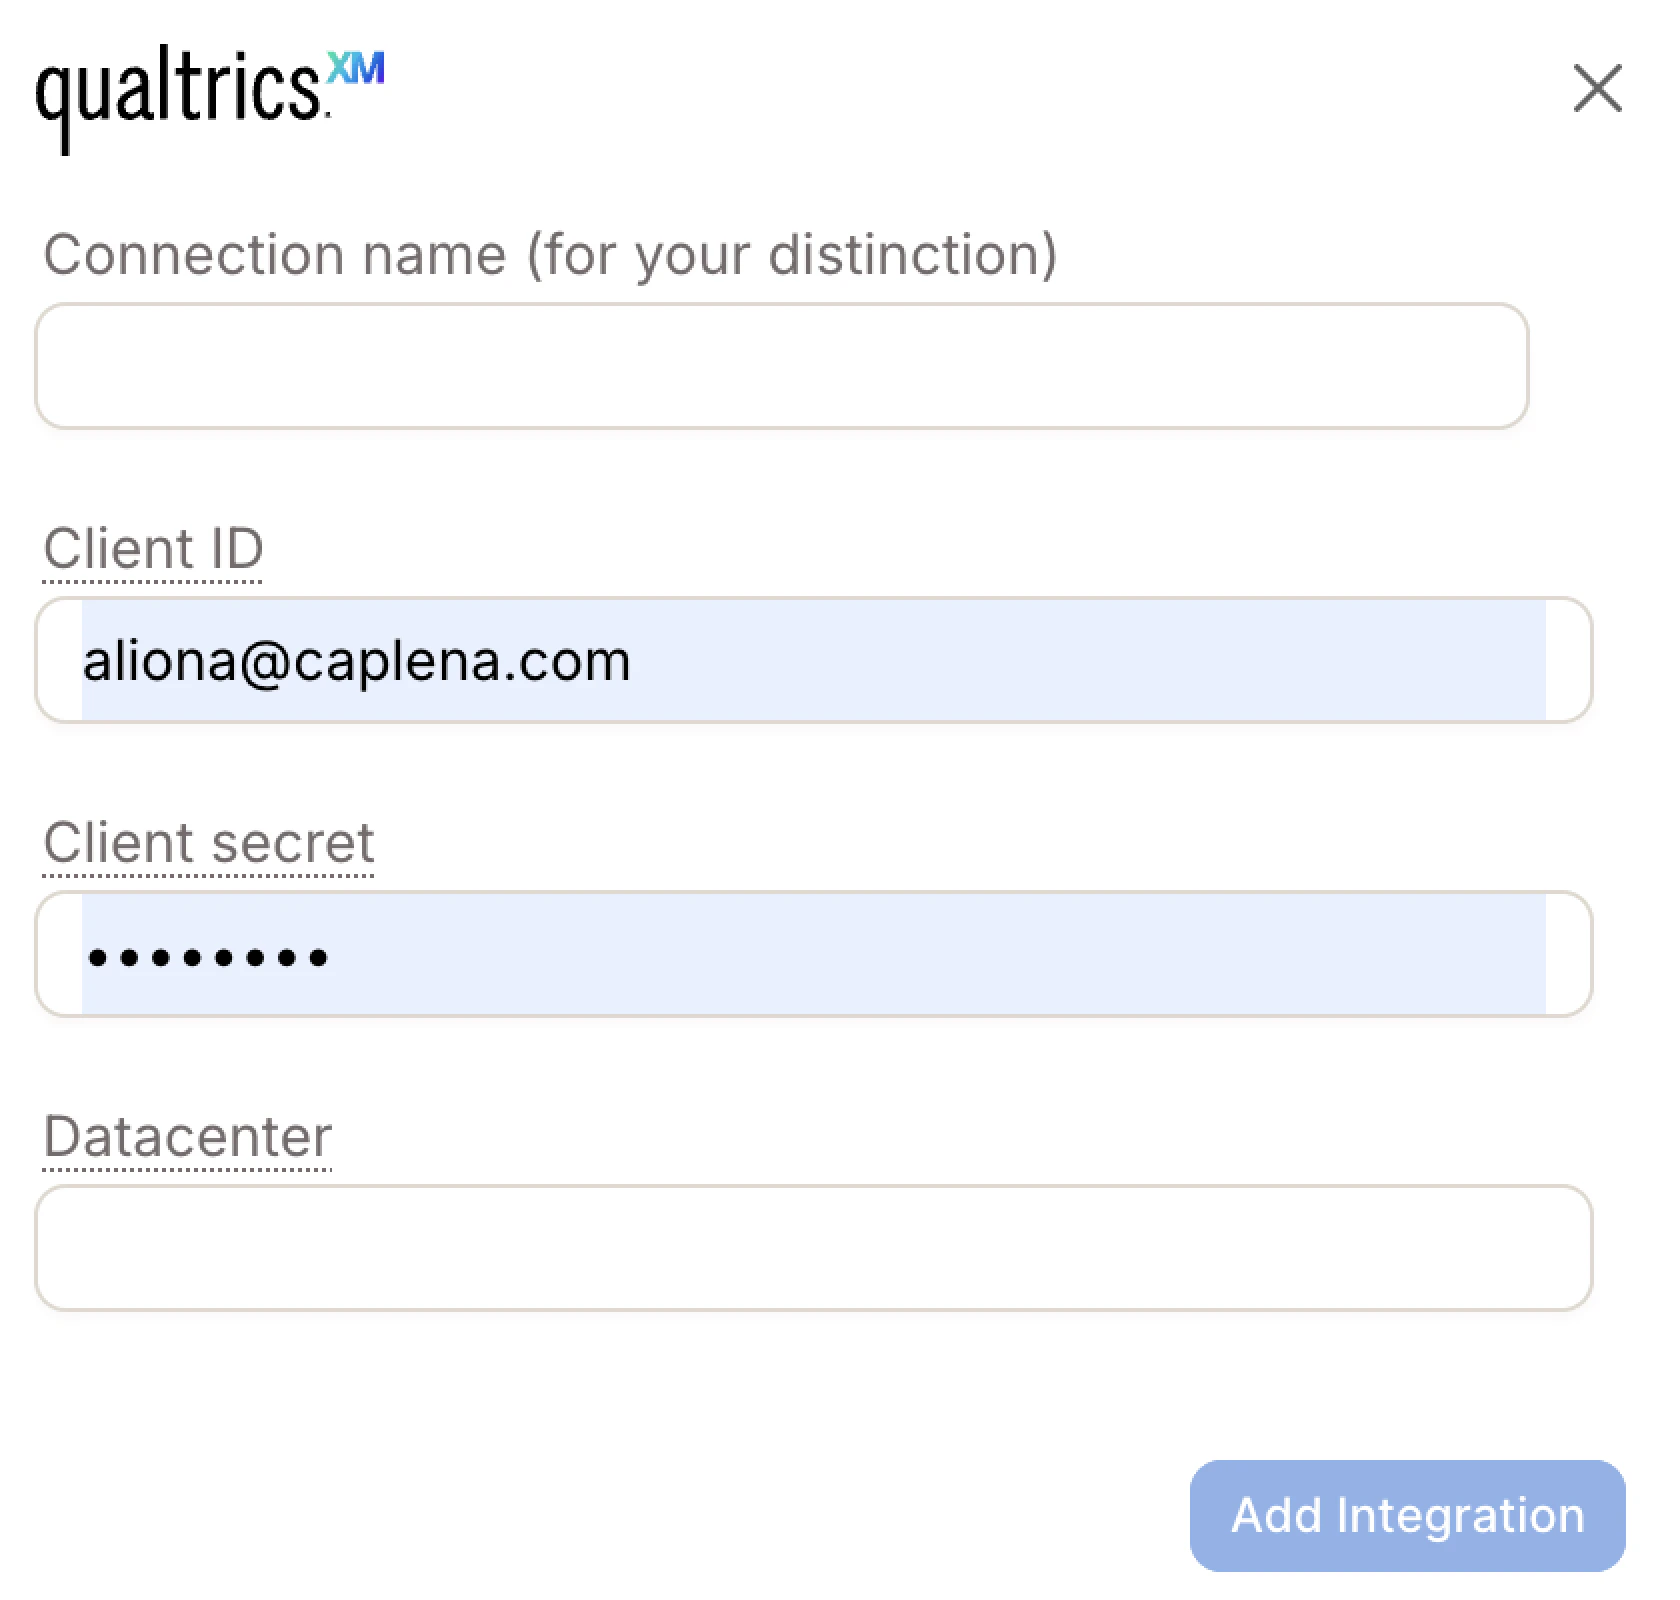
- Connection Name – A custom label (e.g. “Client A – Q Feedback”)
- Client ID – From your Qualtrics OAuth setup
- Client Secret – From your Qualtrics OAuth setup
- Datacenter – Found in Account Settings → Qualtrics IDs → User
Connect and Import
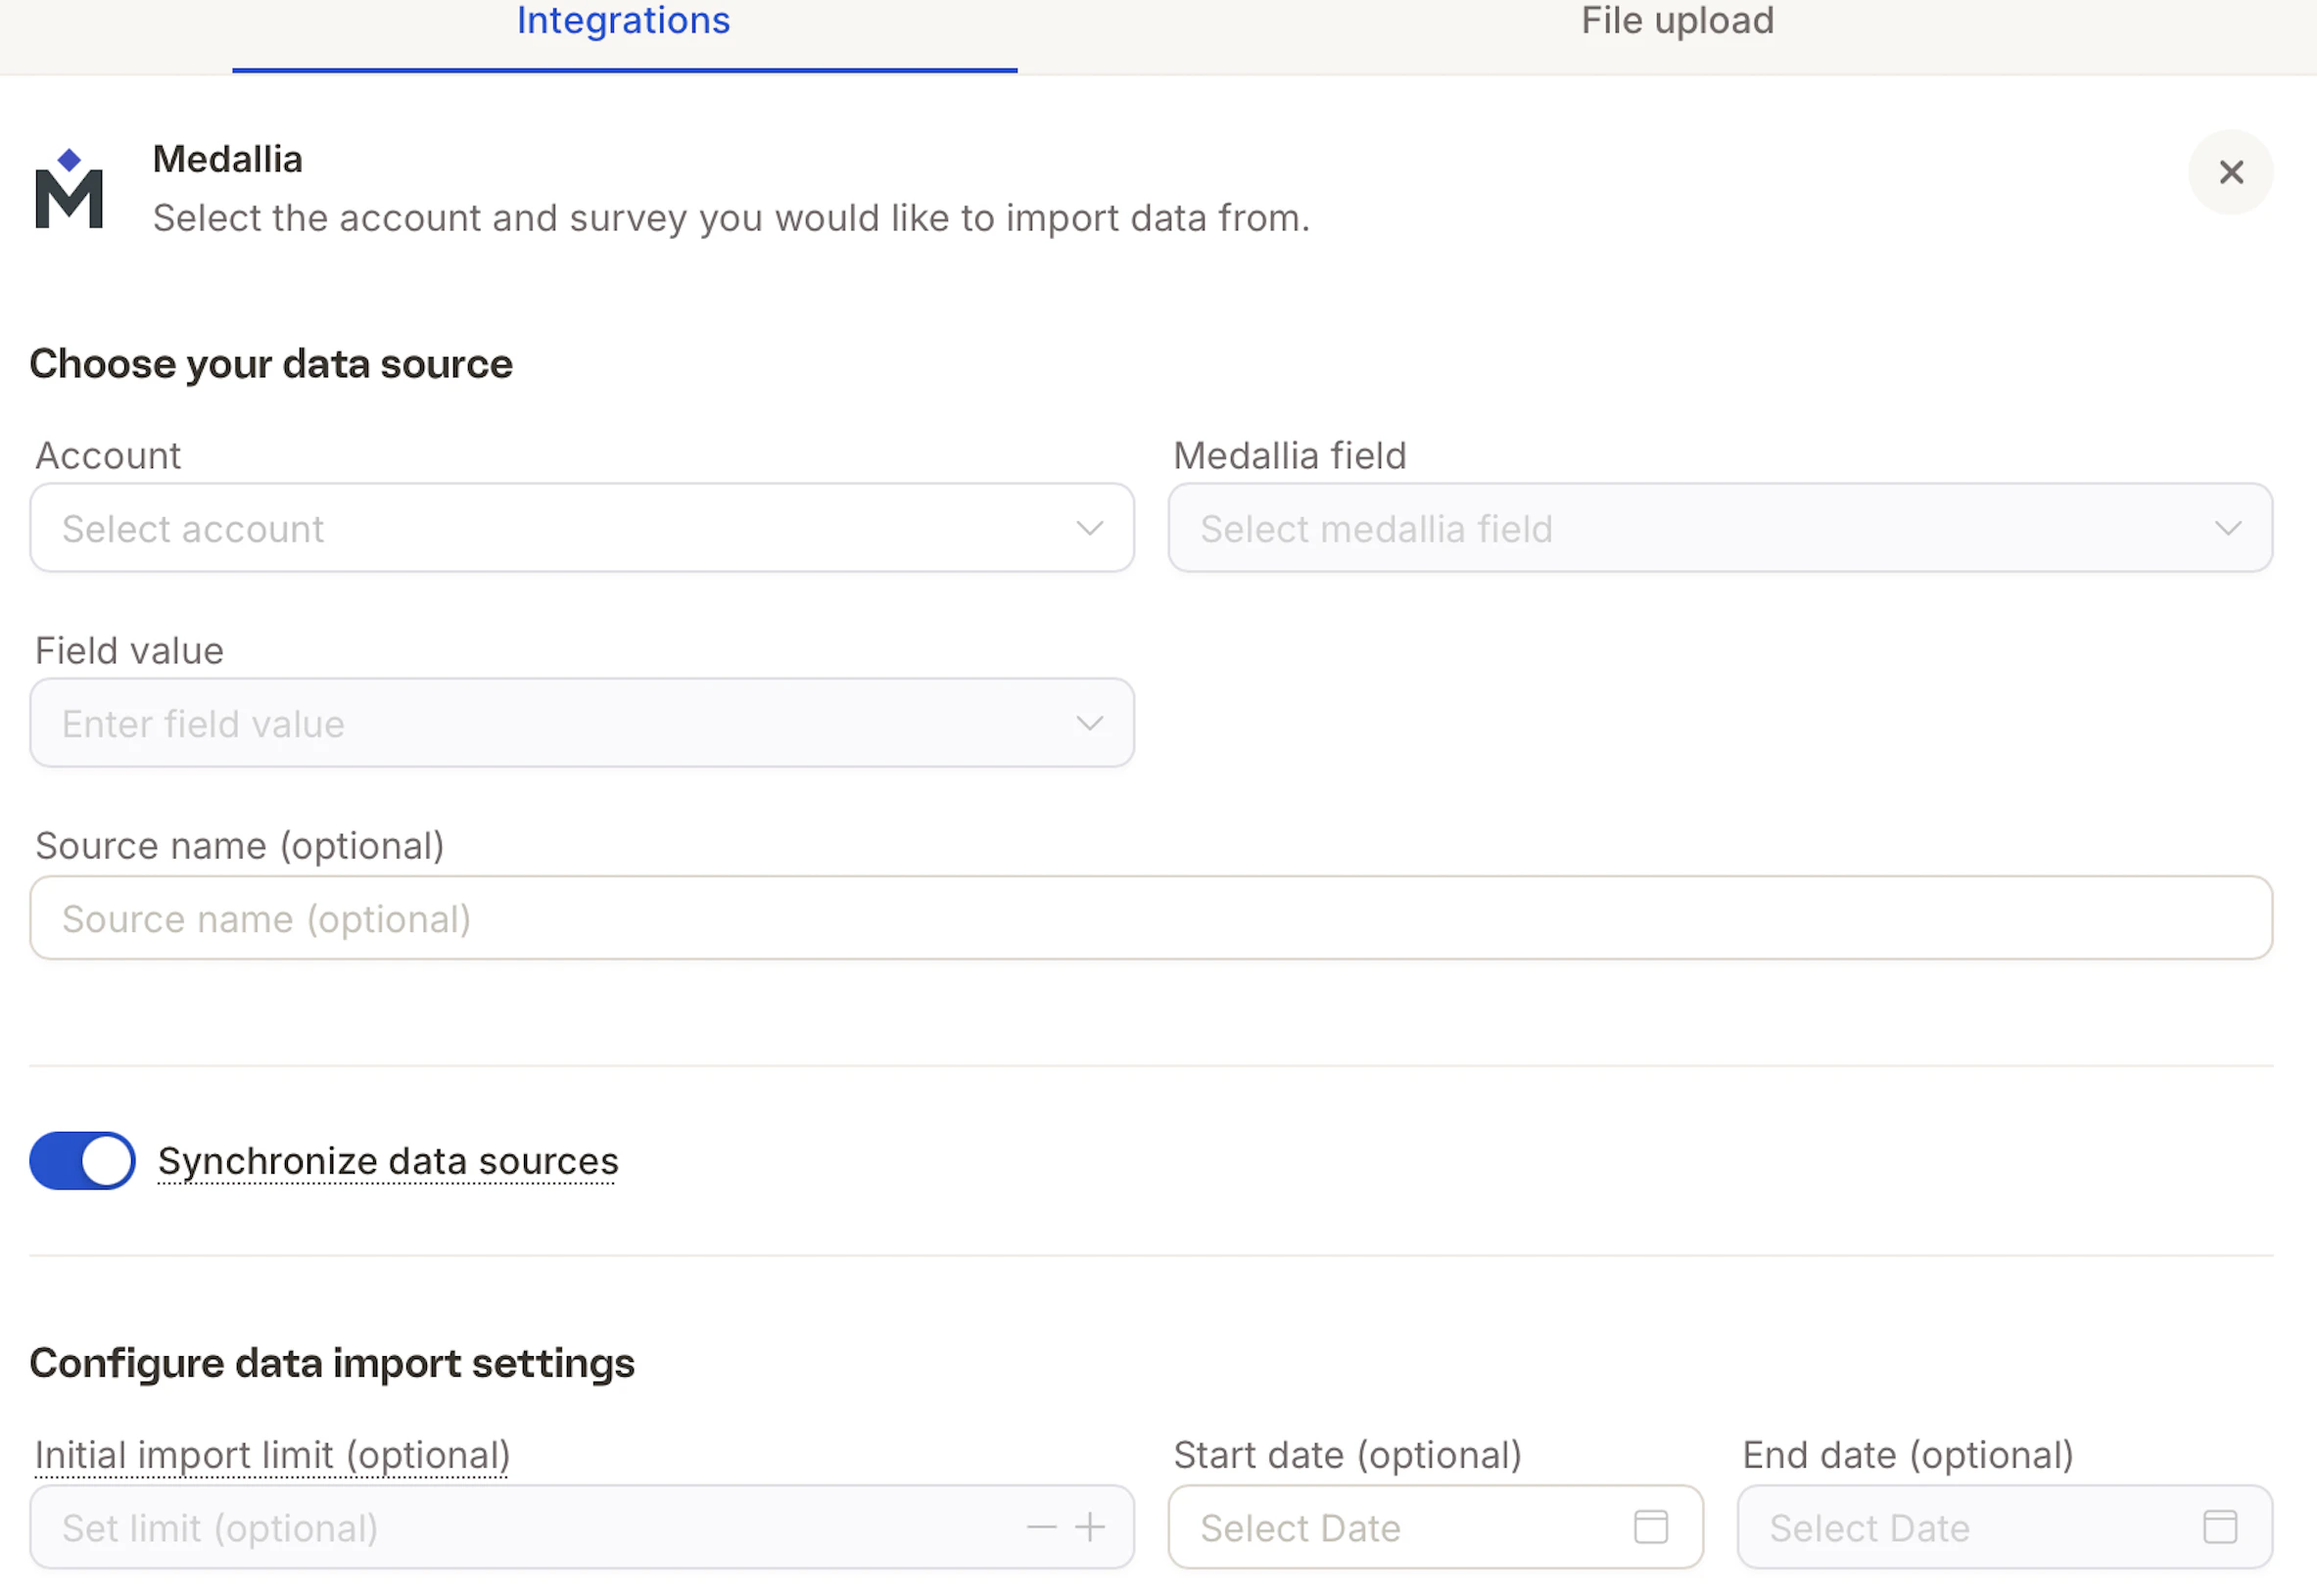
Medallia
Access Integration Settings
Fill in Connection Details
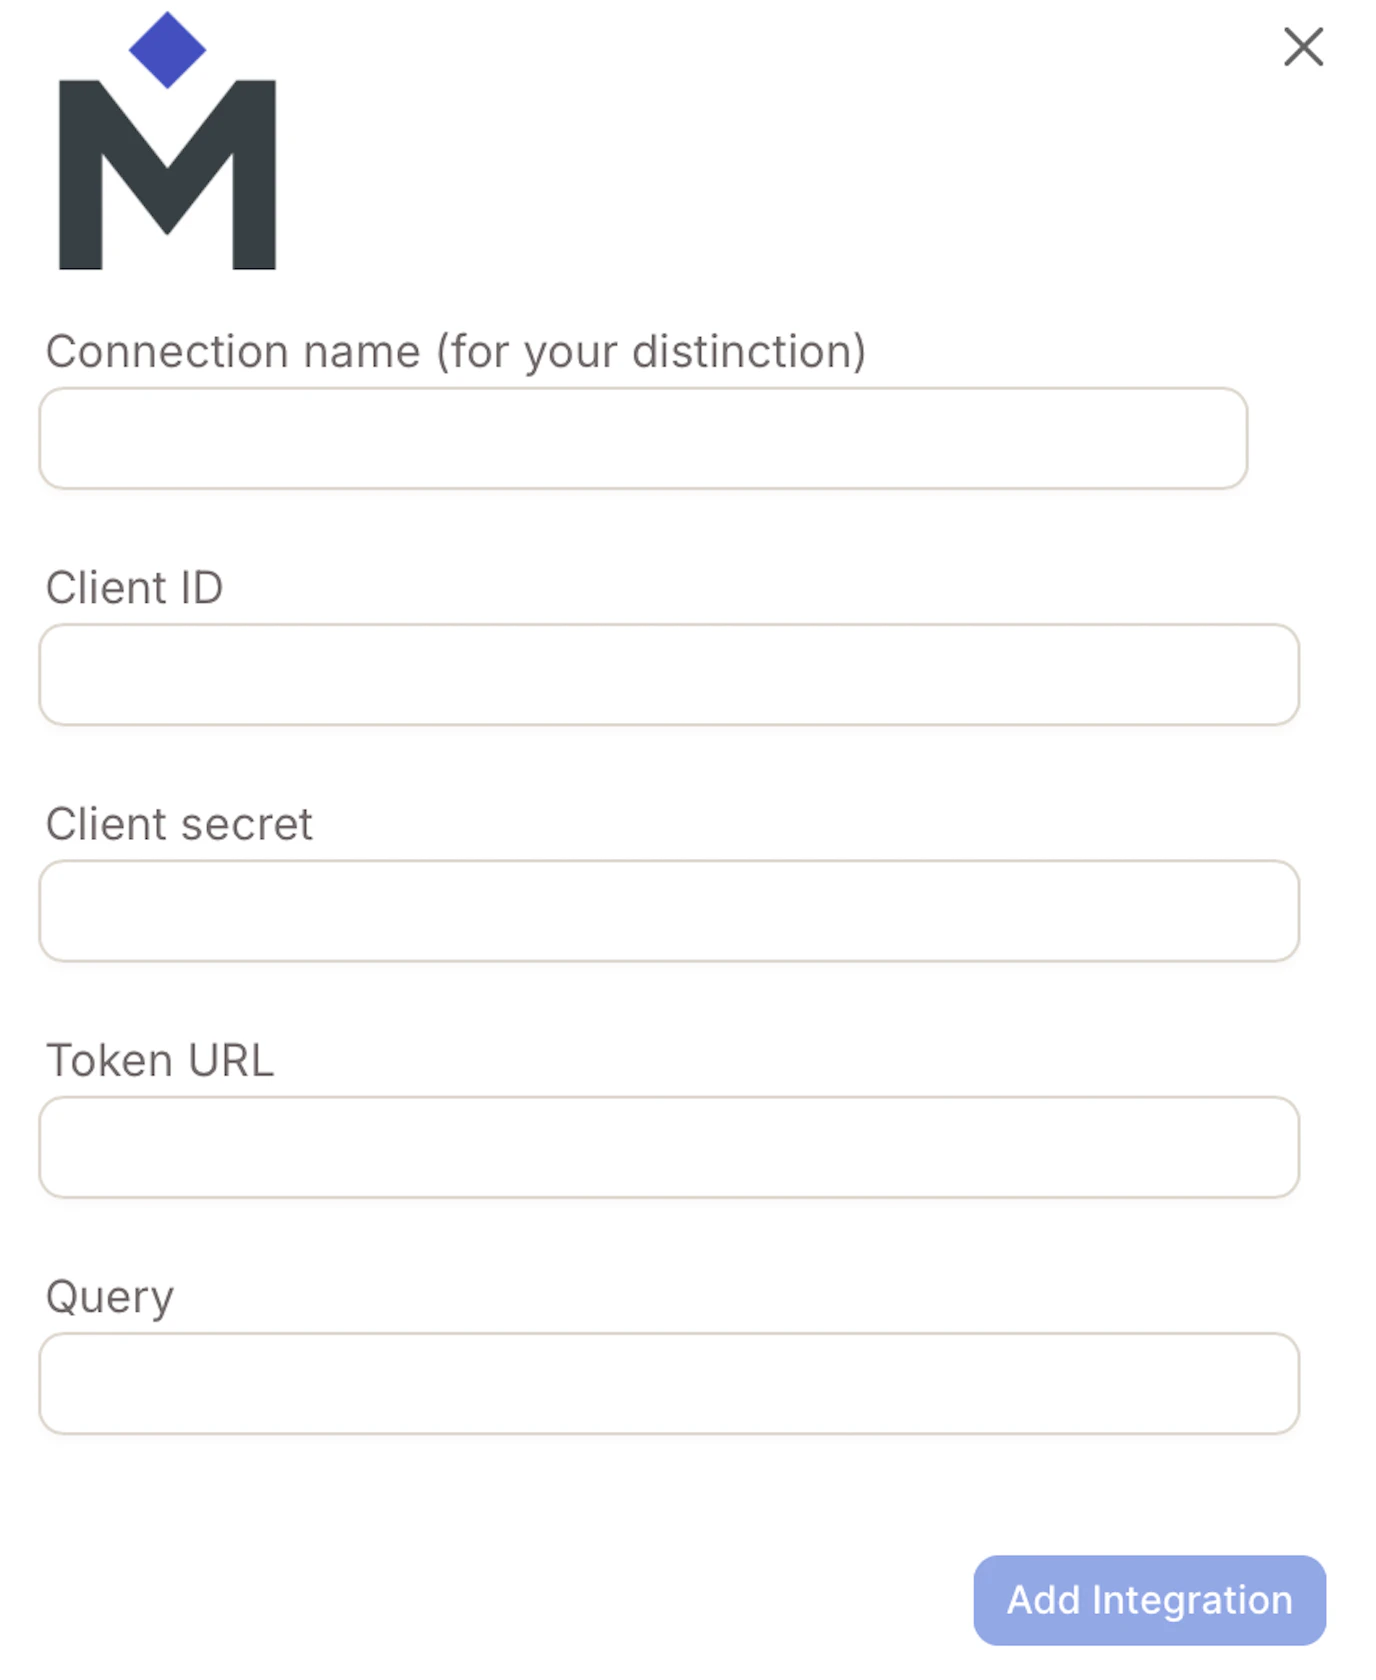
- Connection Name – e.g.
Medallia_NPS_Q4_2025 - Client ID – Provided by your Medallia administrator
- Client Secret – A secure key that works with your Client ID
- Token URL – e.g.
https://login.medallia.com/oauth/token - Query – The specific API endpoint to retrieve your feedback data
Connect and Import
QuestionPro
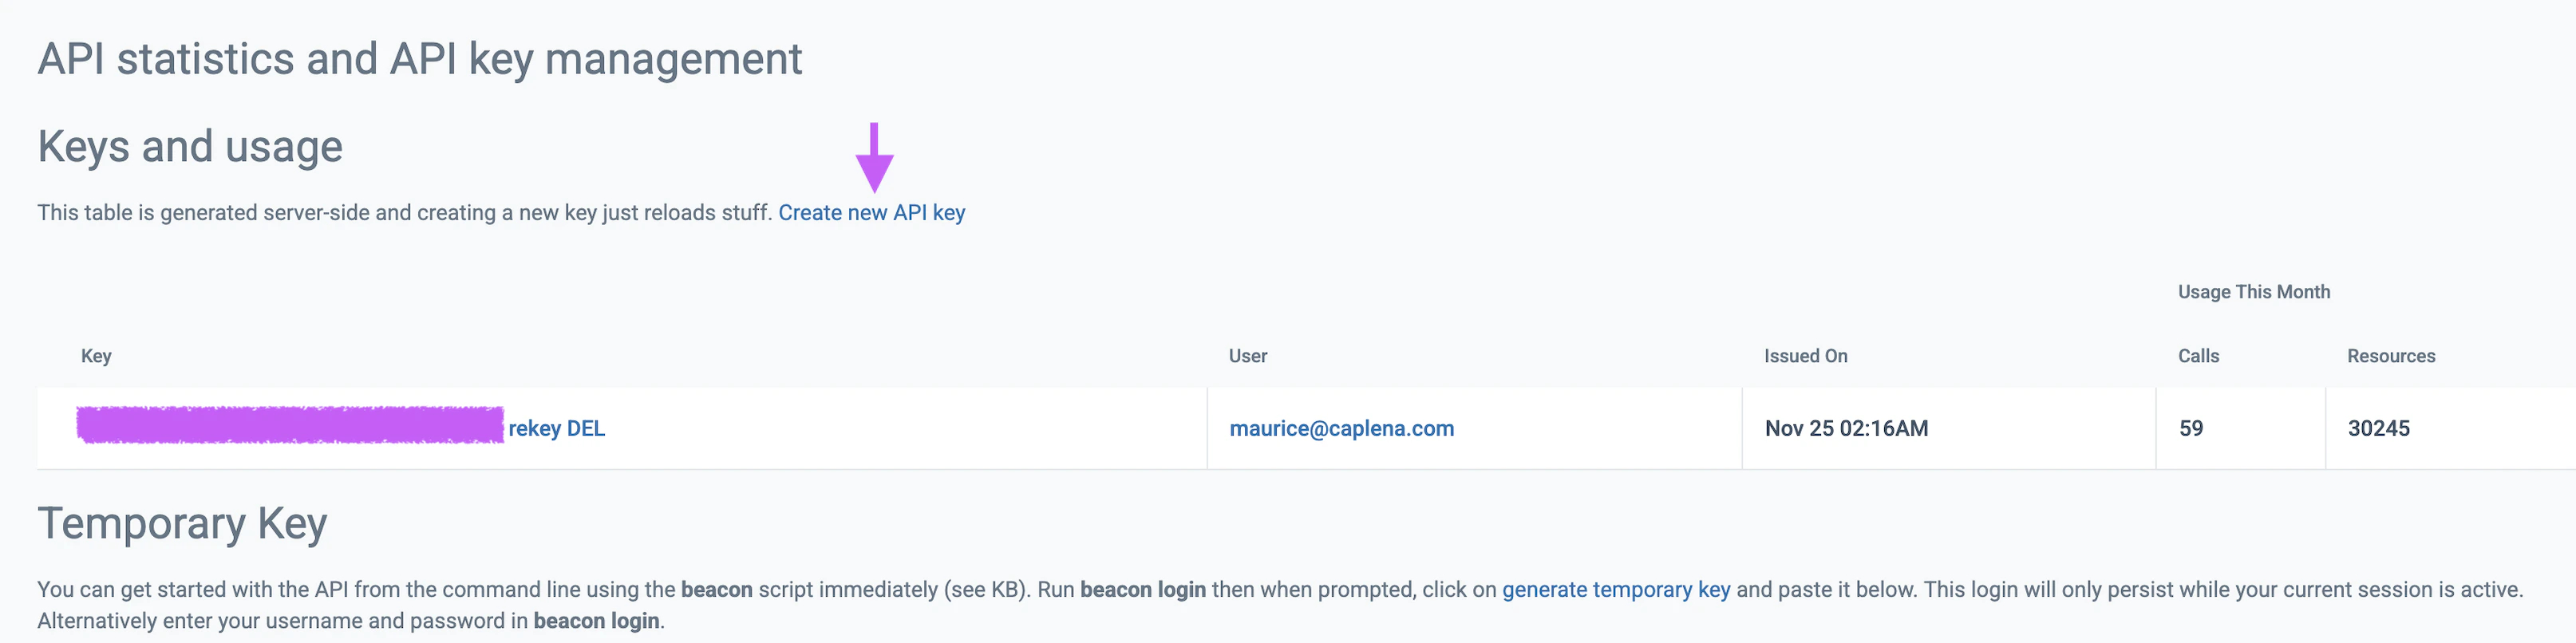
Get your API Key and User ID
Connect in Caplena
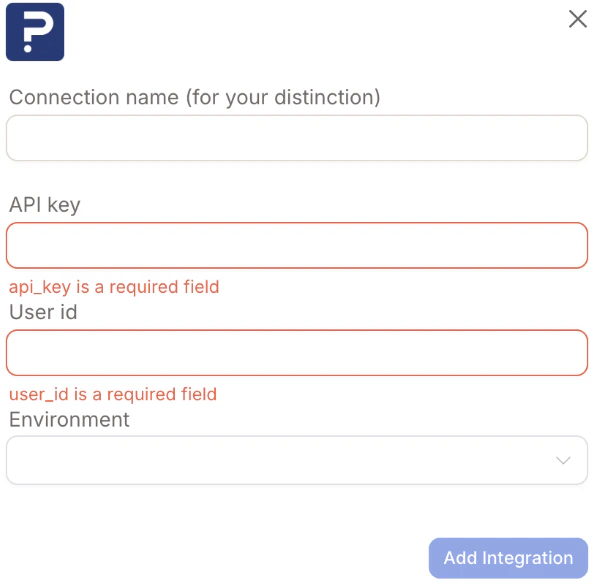
- Connection name – Any name to help you recognize the integration
- API key – Paste the API key you generated
- User ID – Paste your QuestionPro Customer ID
- Environment – Choose Production unless using a sandbox
SurveyMonkey
Create an App in SurveyMonkey
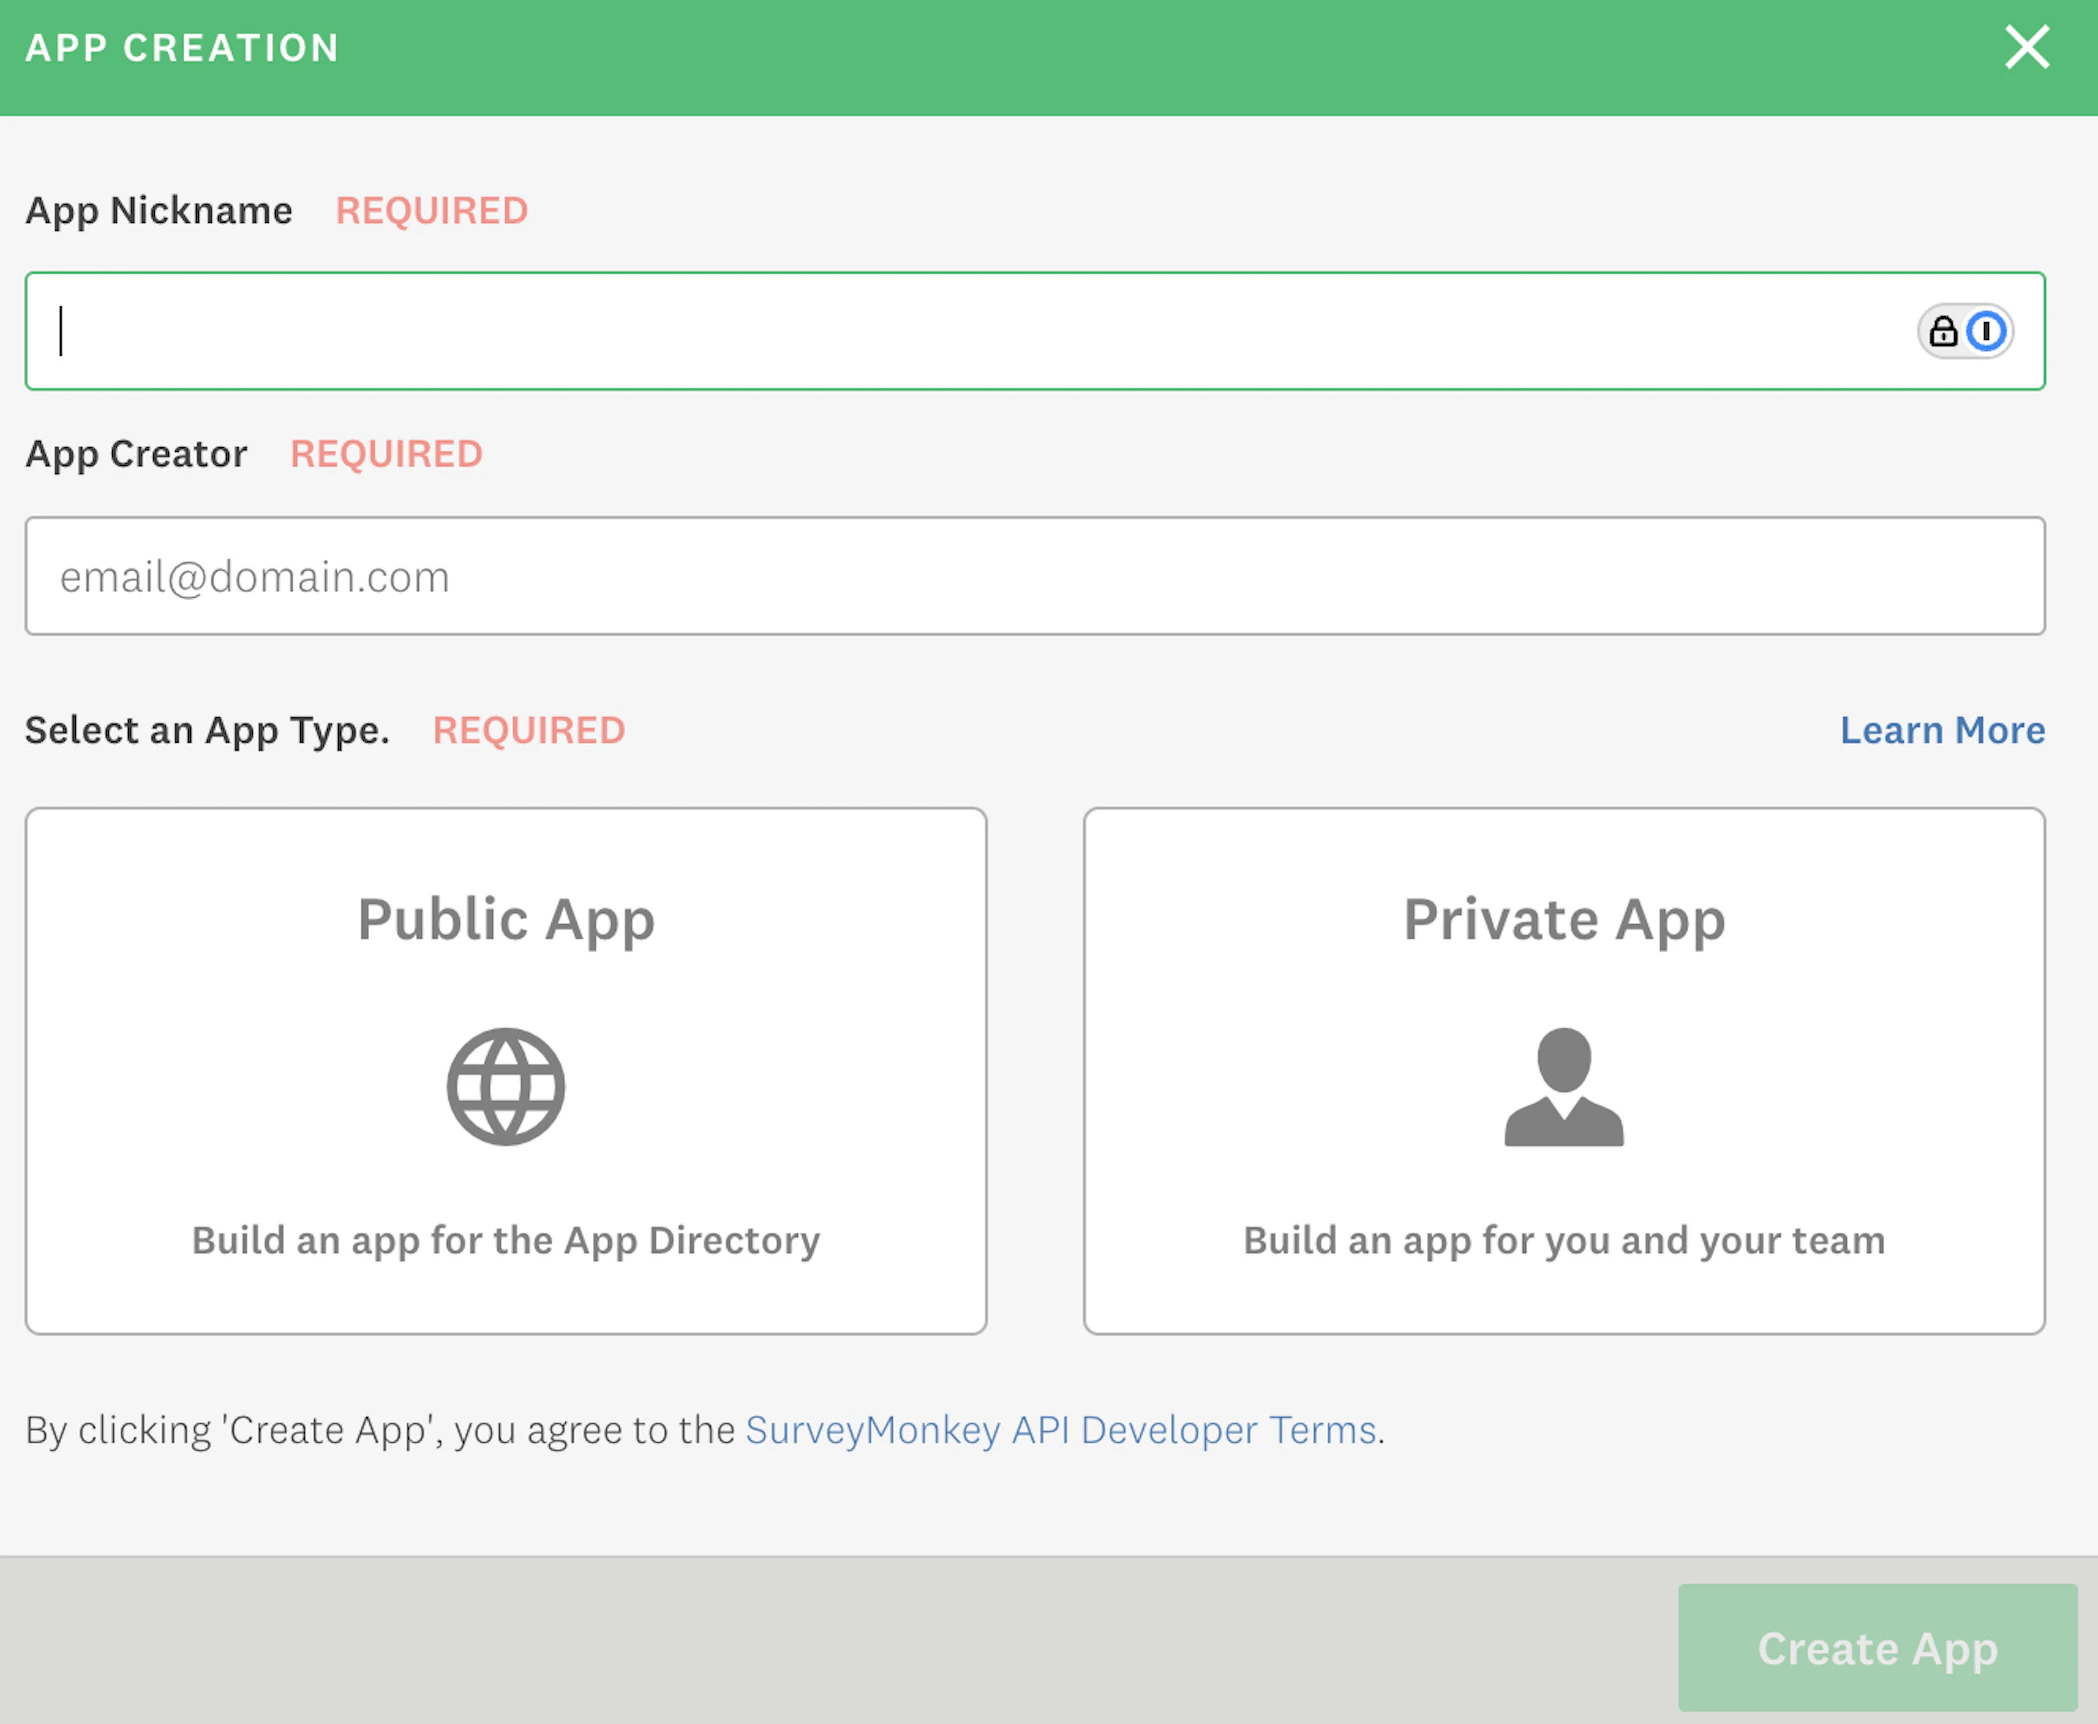
Configure Scopes

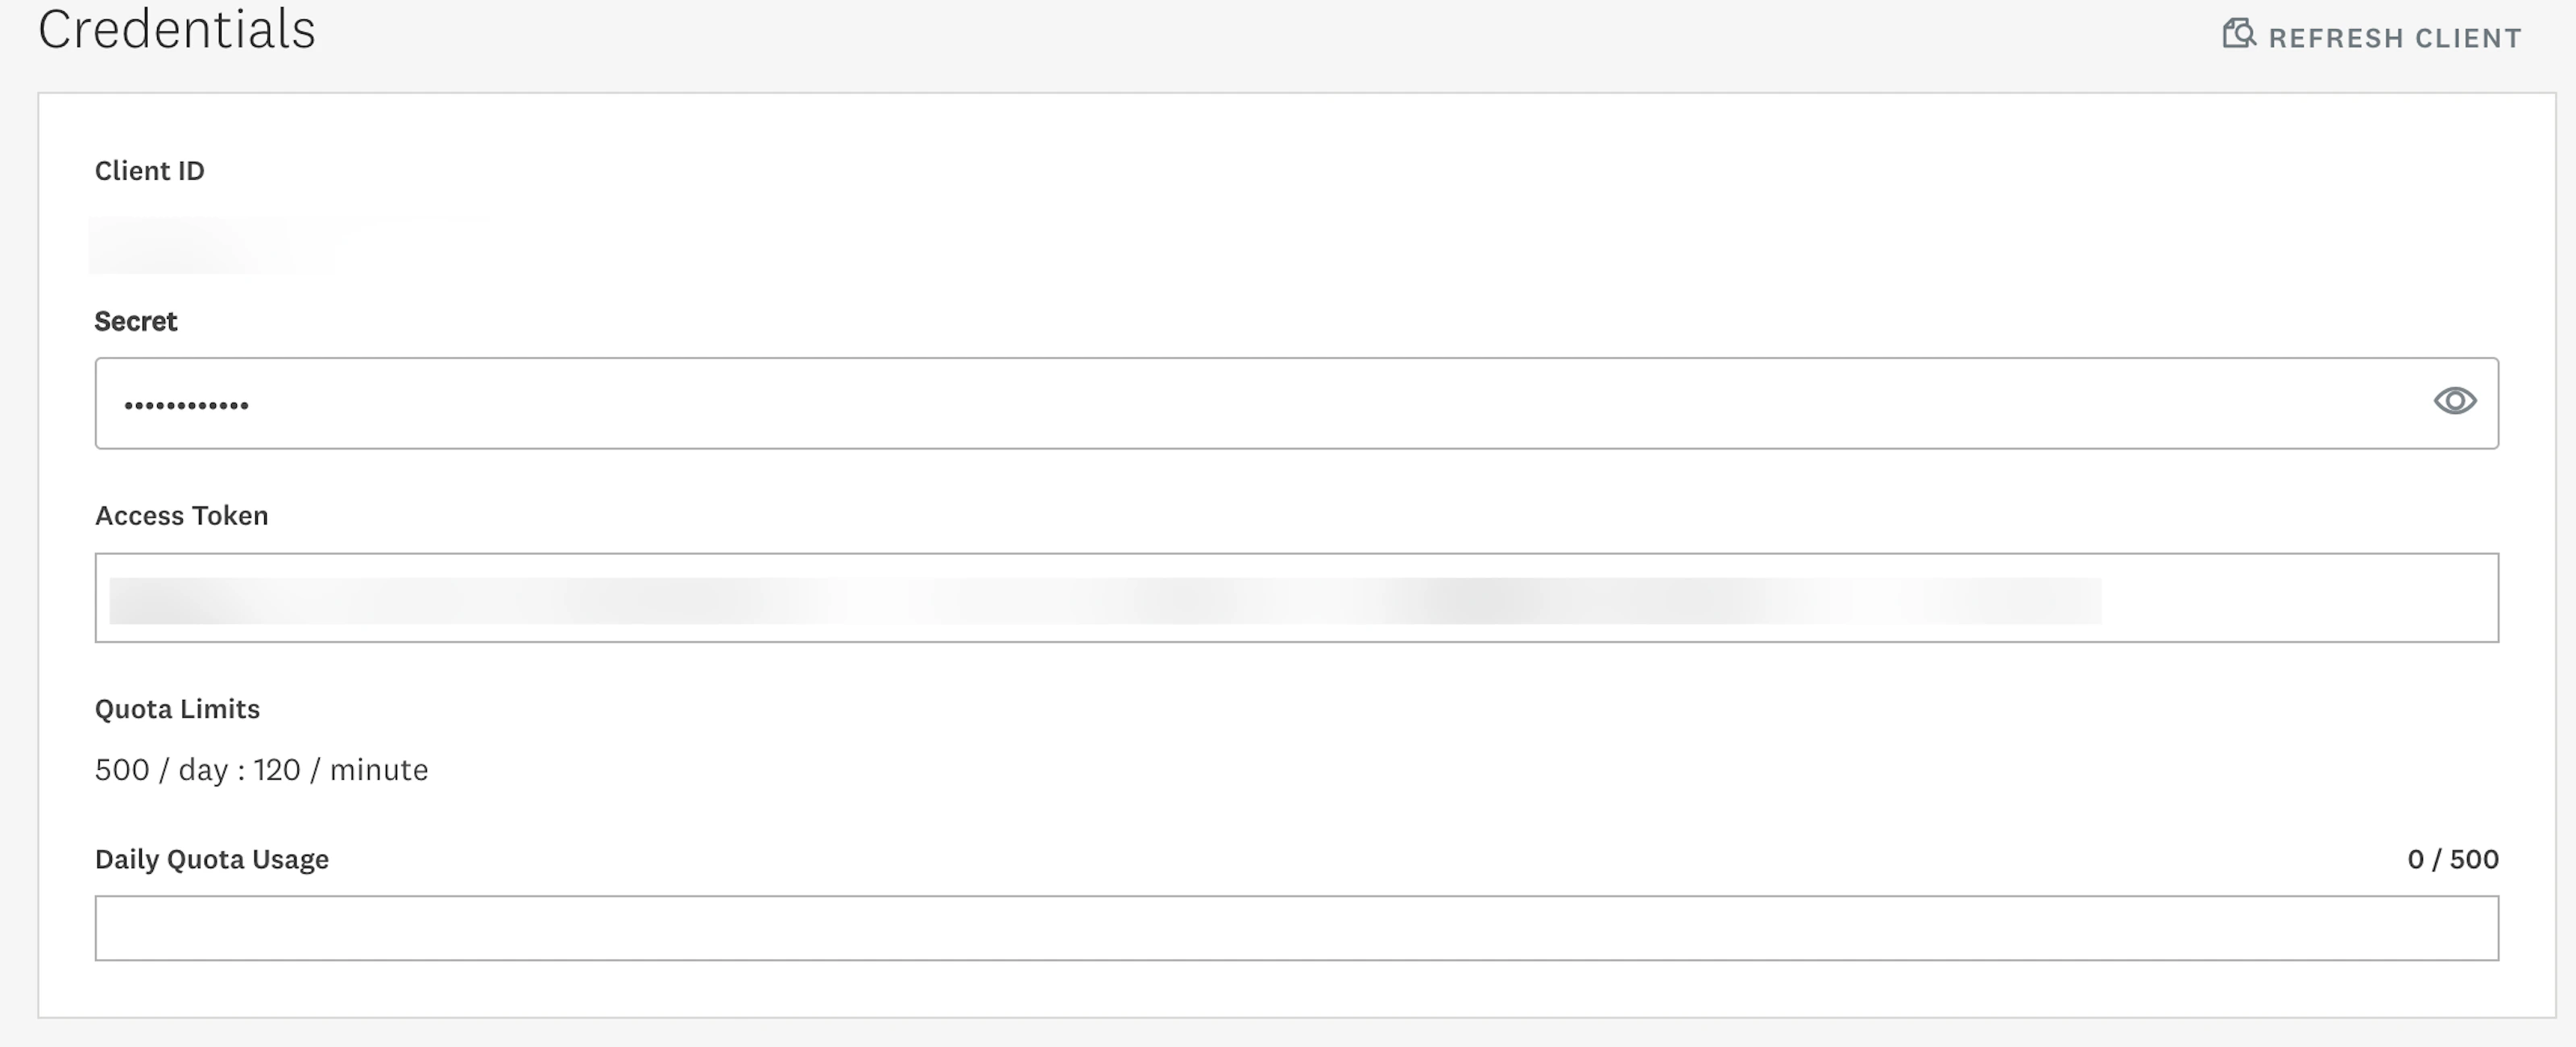
Generate and Copy Your Access Token
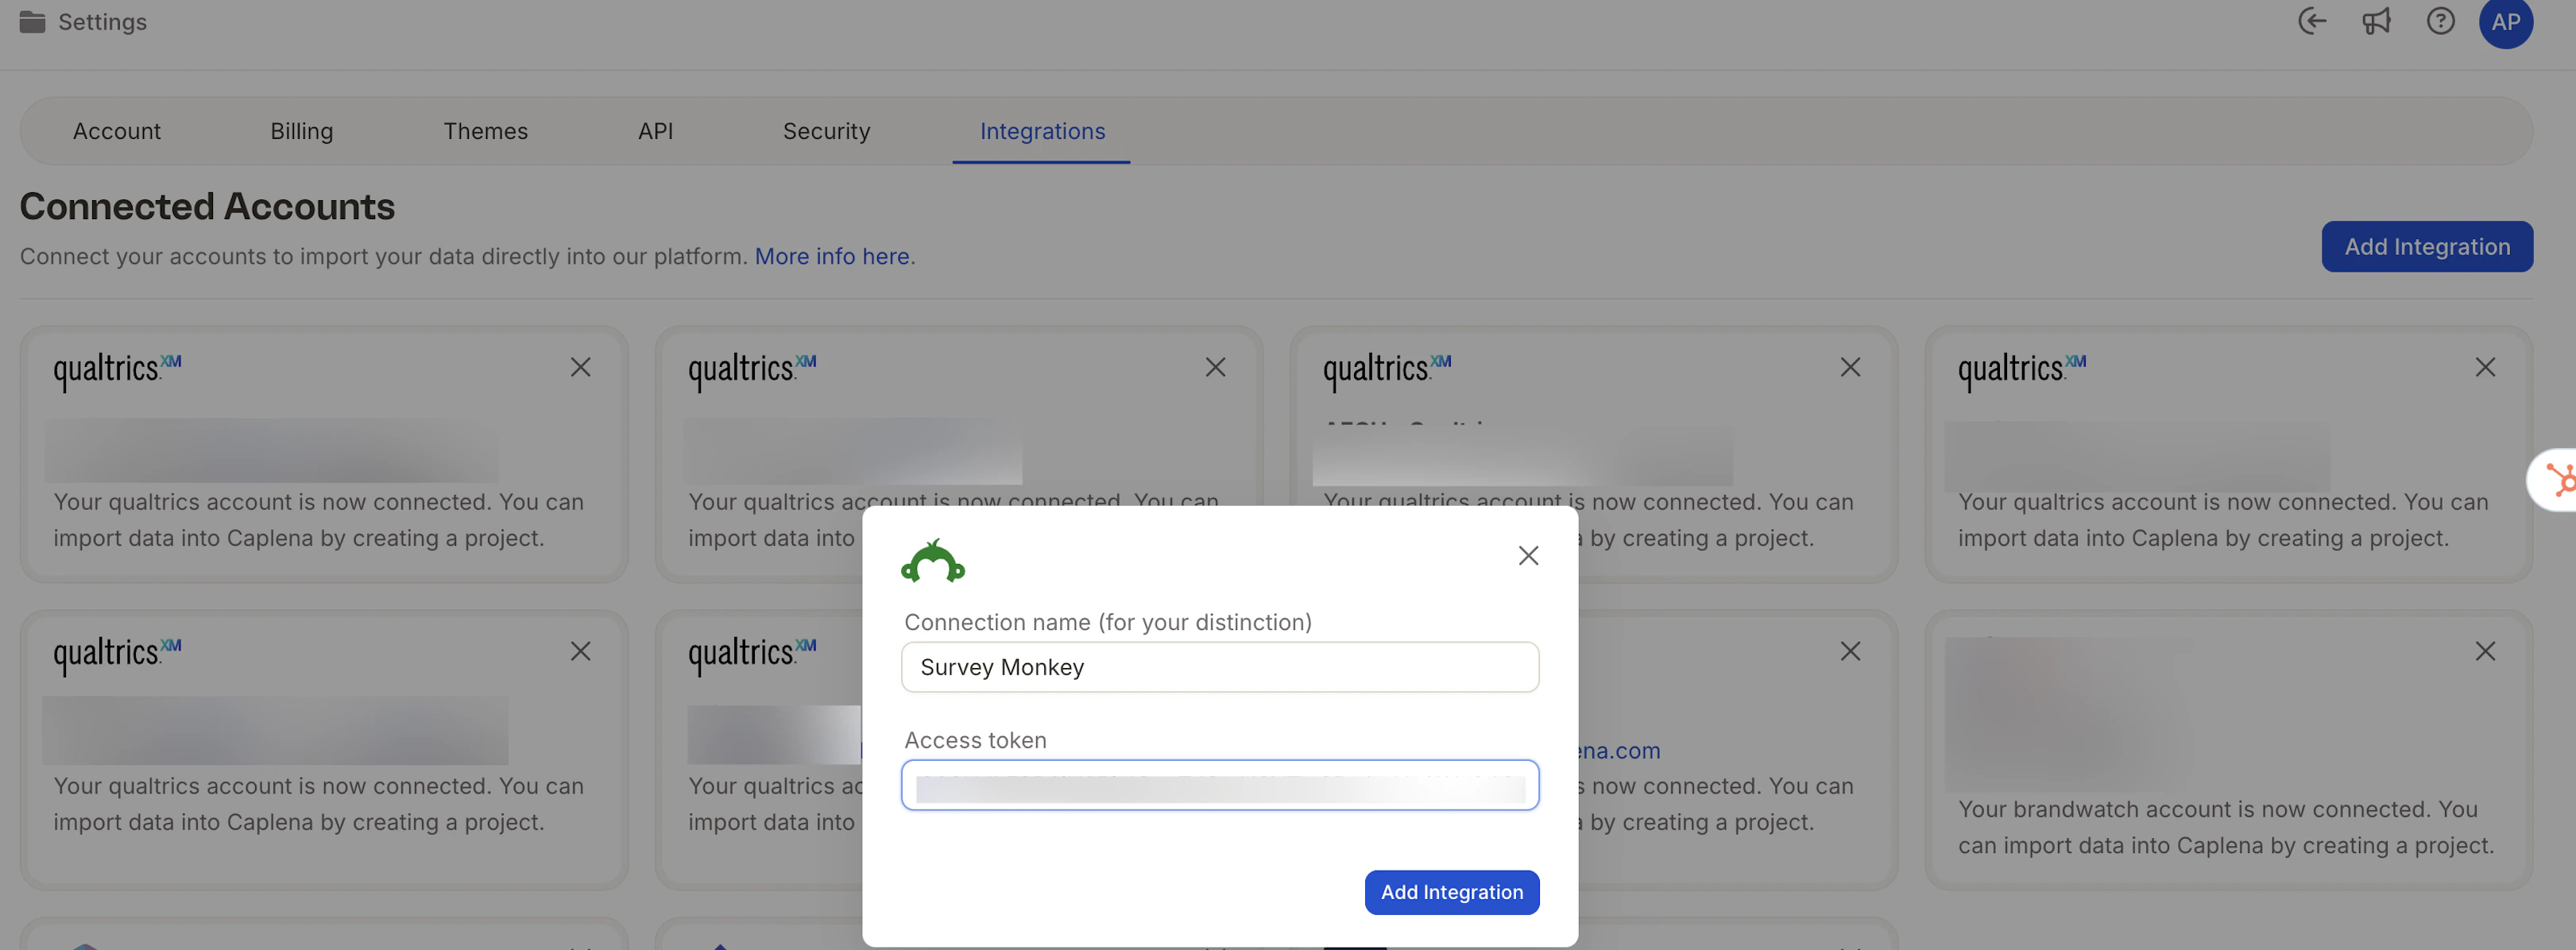
Connect in Caplena
Google Cloud Storage (GCS)
Connect a file stored in GCS so your project refreshes automatically overnight.Set Up Google Cloud Storage
- Create a bucket
- Create a Service Account and JSON Key
- Grant the Service Account access to your bucket
- Copy your file’s GCS URI (e.g.
gs://your-bucket-name/path/to/file.csv)
.csv and .parquet. Your file must include an identifier column and a date column.Set Up Google Cloud Storage
- Create a bucket
- Create a Service Account and JSON Key
- Grant the Service Account access to your bucket
- Copy your file’s GCS URI (e.g.
gs://your-bucket-name/path/to/file.csv)
.csv and .parquet. Your file must include an identifier column. On each sync, Caplena scans the full file and imports any new rows.Connect in Caplena
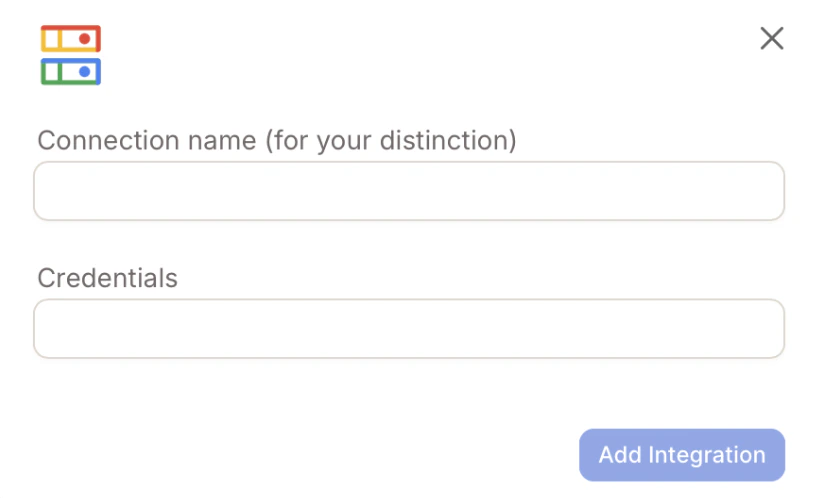
- Connection name – Any name to help you recognize this connection
- Credentials – Paste the entire JSON content of your service account key (do not upload a file — paste the JSON text)
Configure Data Import
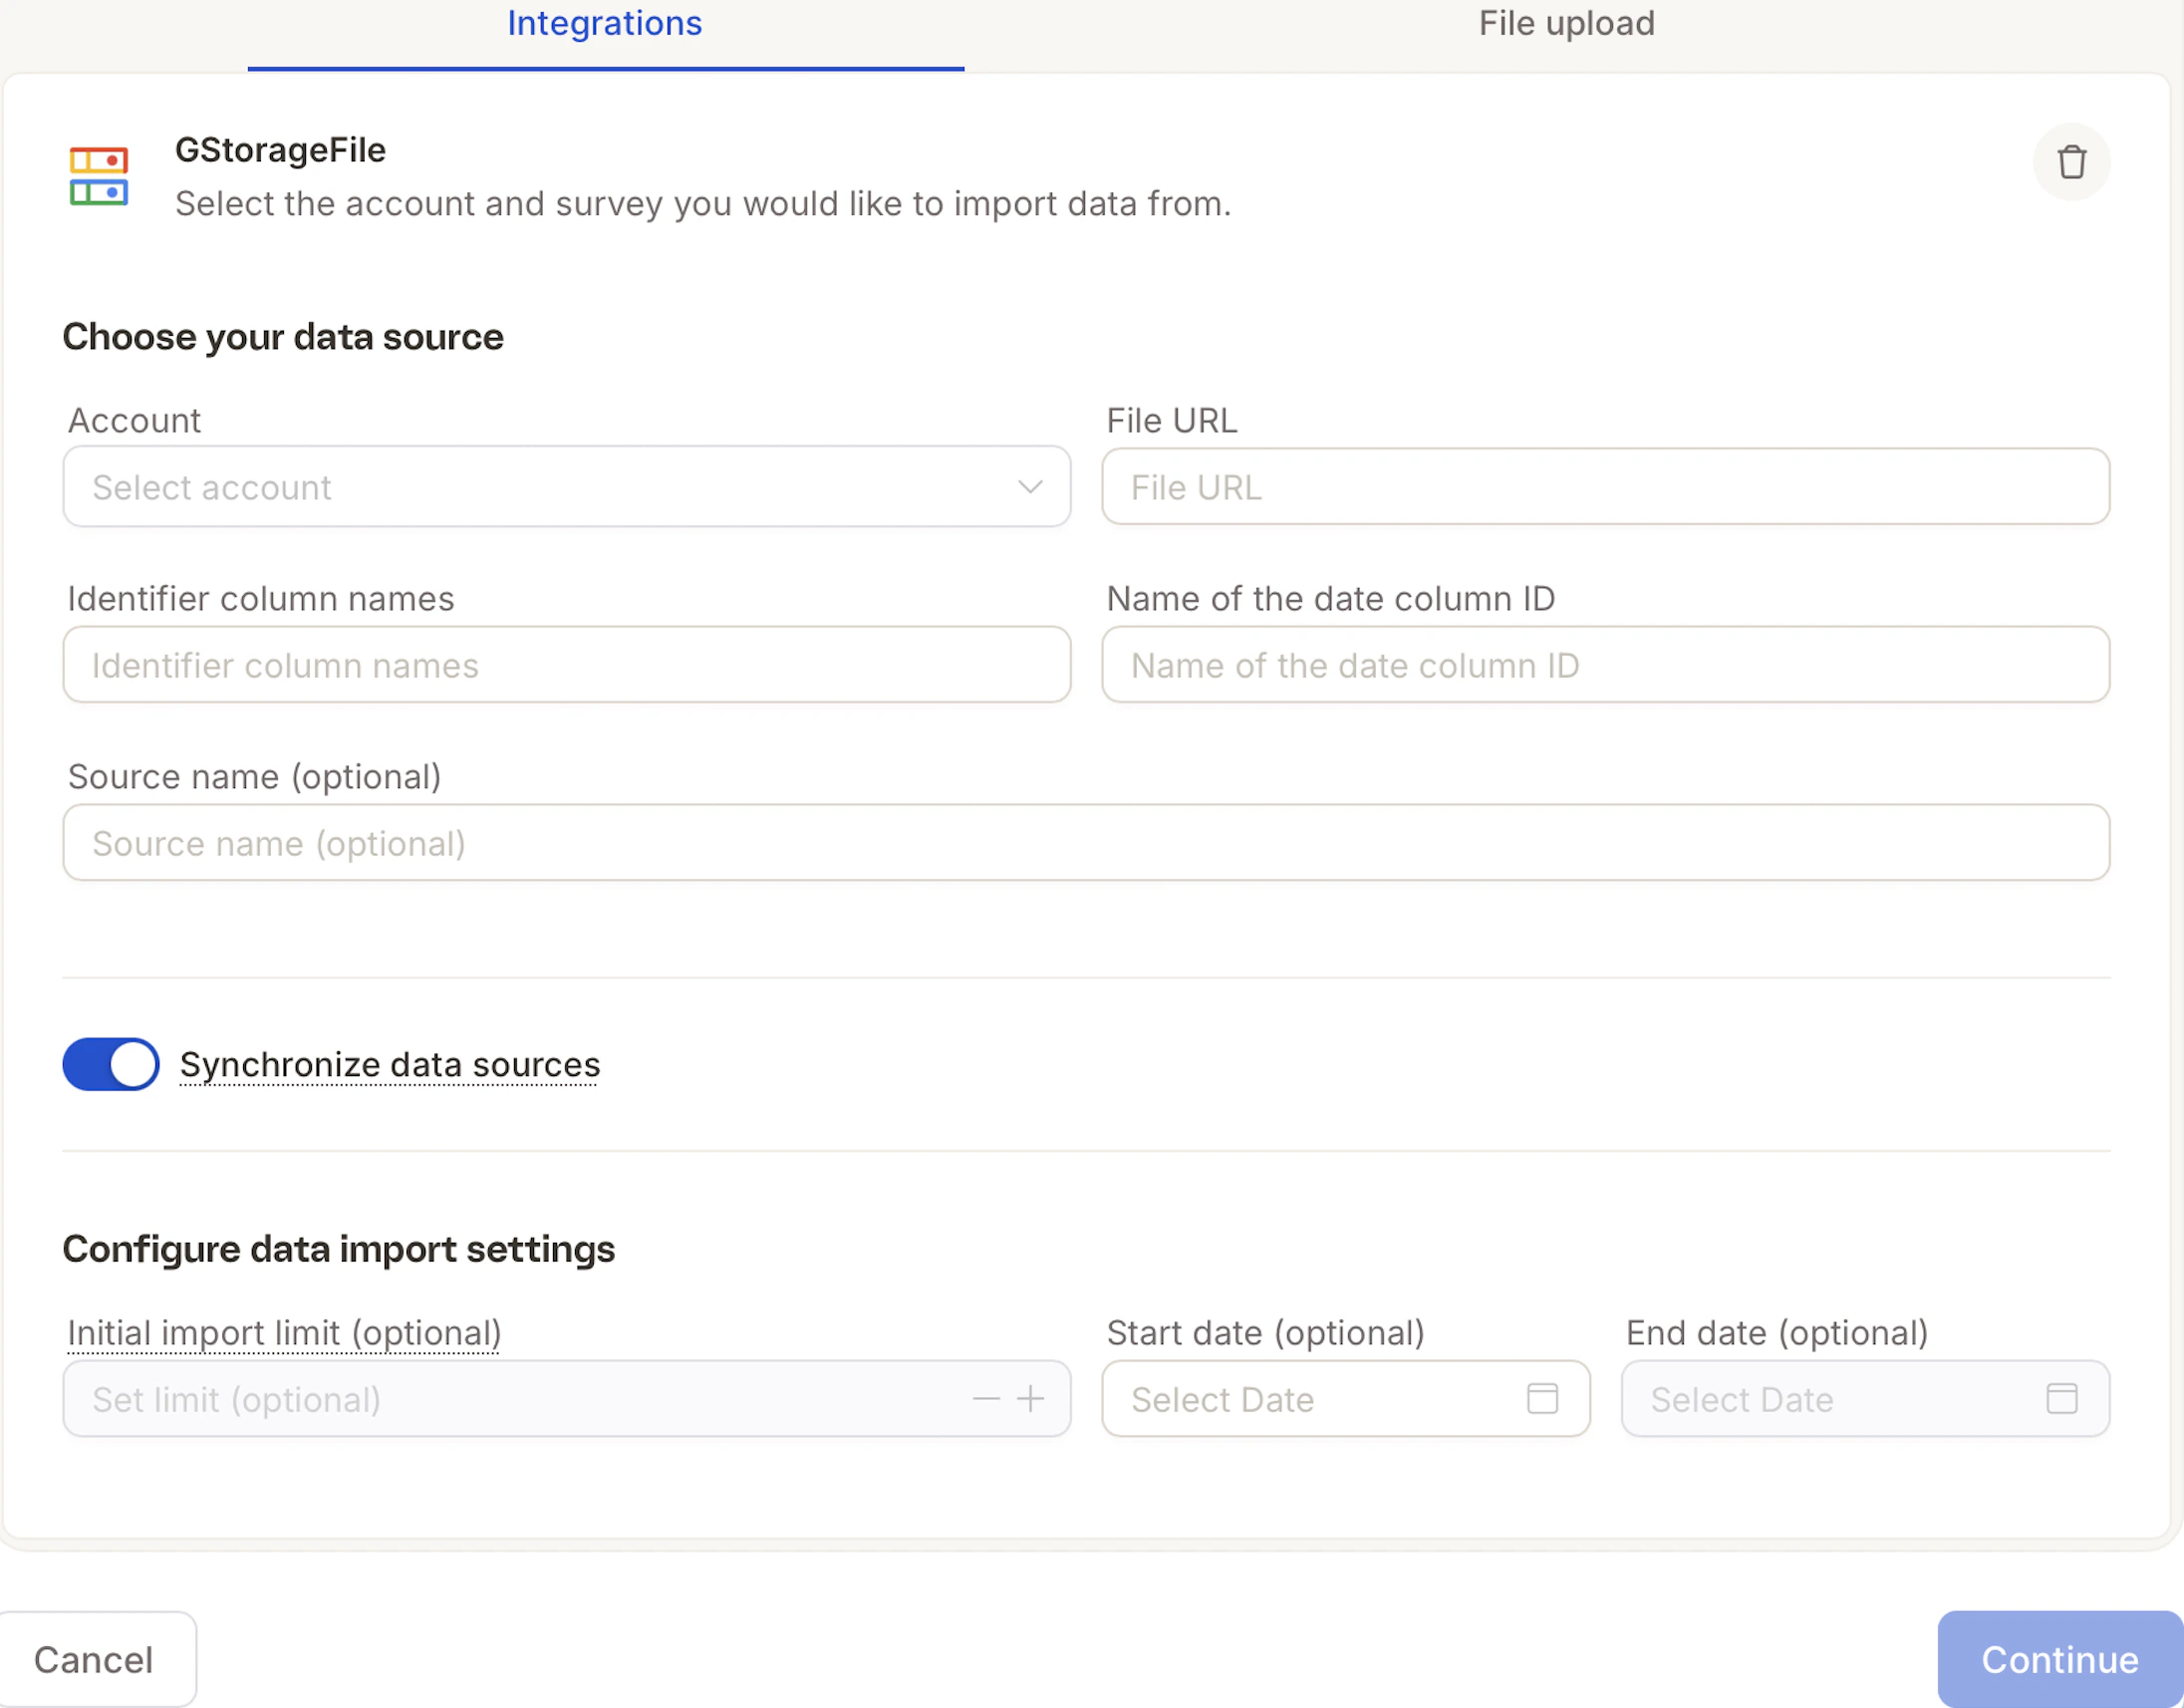
- Account – Select the integration you just created
- File URL – Paste your
gs://file URI - Identifier column name – The column that uniquely identifies each row (e.g.
id,response_id) - Date column name – The date/timestamp column used to detect new data (e.g.
created_at) - Source name (optional) – A label that will appear in your project
Configure Data Import
- Account – Select the integration you just created
- File URL – Paste your
gs://file URI - Identifier column names – One or more columns that together uniquely identify each row (e.g.
id,response_id). Caplena uses these to detect new rows on each sync. To use multiple columns, enter them as a comma-separated list (e.g.respondent_id, submitted_at). - Source name (optional) – A label that will appear in your project
Azure Blob Storage
Connect a file stored in Azure Blob Storage so your project refreshes automatically overnight.Generate a Connection String in Azure
- Permissions – Enable Read
- Allowed protocols – Select HTTPS only
- Expiry – Set an expiration date that fits your sync schedule
- Click Generate SAS token and URL
BlobEndpoint value (without the SAS query string) and the SAS token (without the leading ?) for SharedAccessSignature.Supported formats: .csv and .parquet. Your file must include an identifier column. On each sync, Caplena scans the full file and imports any new rows.Connect in Caplena
- Connection name – Any name to help you recognize this connection
- Connection string – Paste the
BlobEndpoint=...;SharedAccessSignature=...string built in the previous step
Configure Data Import
- Account – Select the integration you just created
- Blob URL – The full URL to your blob (e.g.
https://<your-account>.blob.core.windows.net/<container>/path/to/file.csv) - Identifier column names – One or more columns that together uniquely identify each row (e.g.
id,response_id). Caplena uses these to detect new rows on each sync. To use multiple columns, enter them as a comma-separated list (e.g.respondent_id, submitted_at). - Source name (optional) – A label that will appear in your project
Decipher
Generate Your Decipher API Key
Connect in Caplena
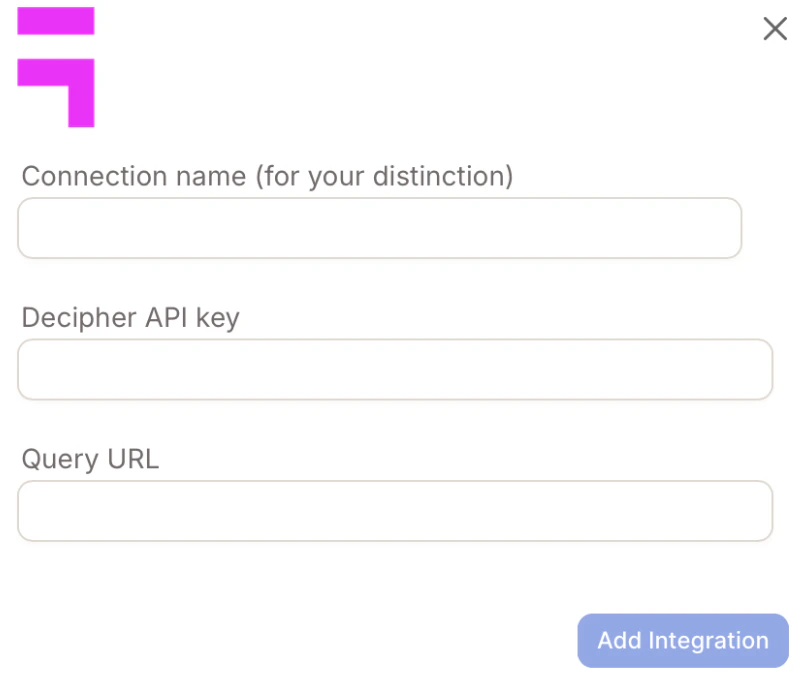
- Connection name – e.g. “Decipher – US Surveys”
- Decipher API key – Paste the key generated above
- Query URL – Your Decipher instance URL
Import Data
Intercom
Add Your Intercom Account
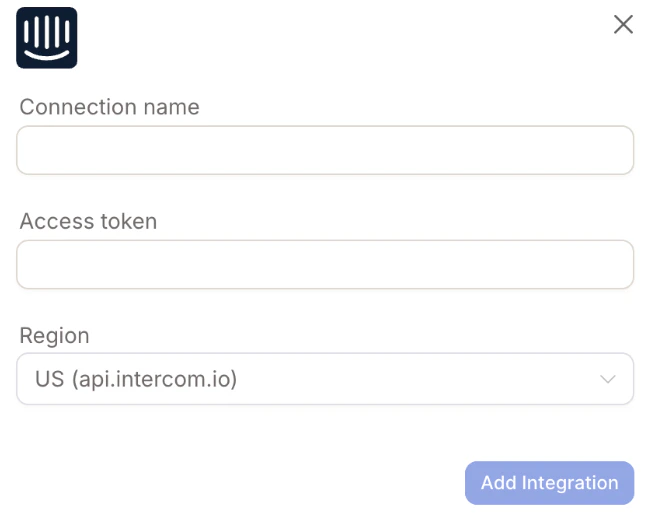
- Connection name – e.g. “Intercom Production”
- Access token – From your Intercom Developer Hub
- Region – US (
api.intercom.io), EU (api.eu.intercom.io), or AU (api.au.intercom.io)
Import Data
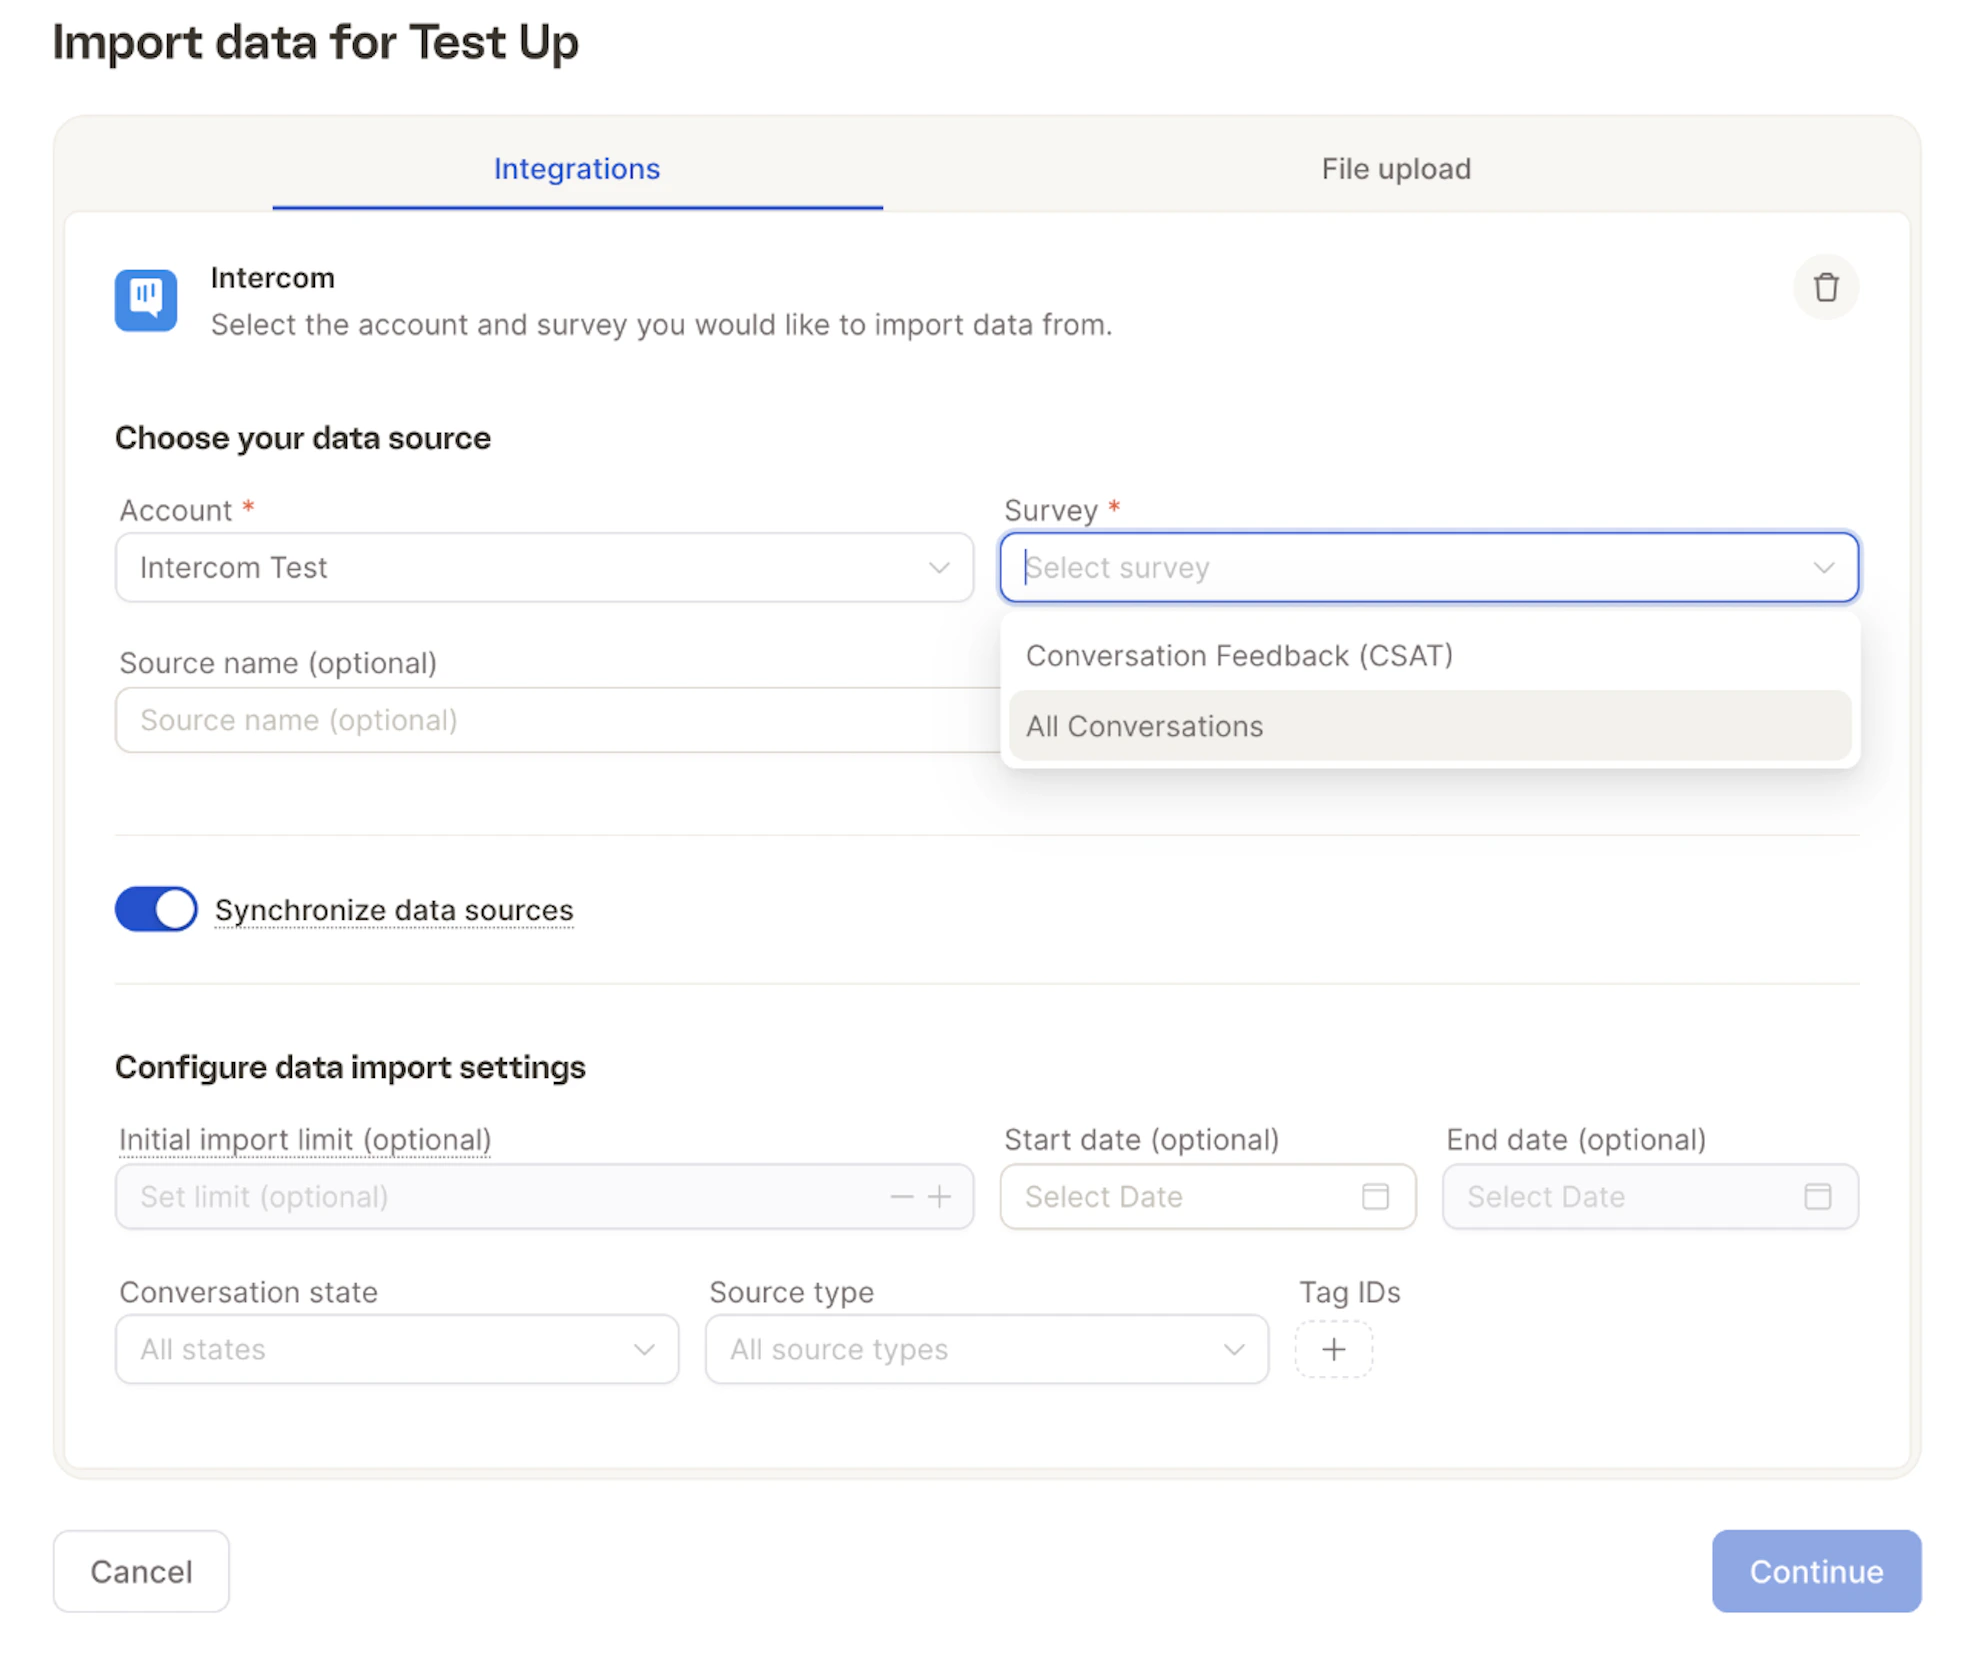
- Initial import limit, start/end date
- Conversation state (open, closed, snoozed)
- Source type (Conversation, Email, WhatsApp, etc.)
- Tag IDs
Salesforce
Connect Salesforce to import survey responses into Caplena for analysis. Caplena authenticates through the OAuth Client Credentials Flow, which runs as a dedicated API-only user. Setting this up requires a few steps inside Salesforce before you add the connection in Caplena.Create a Permission Set
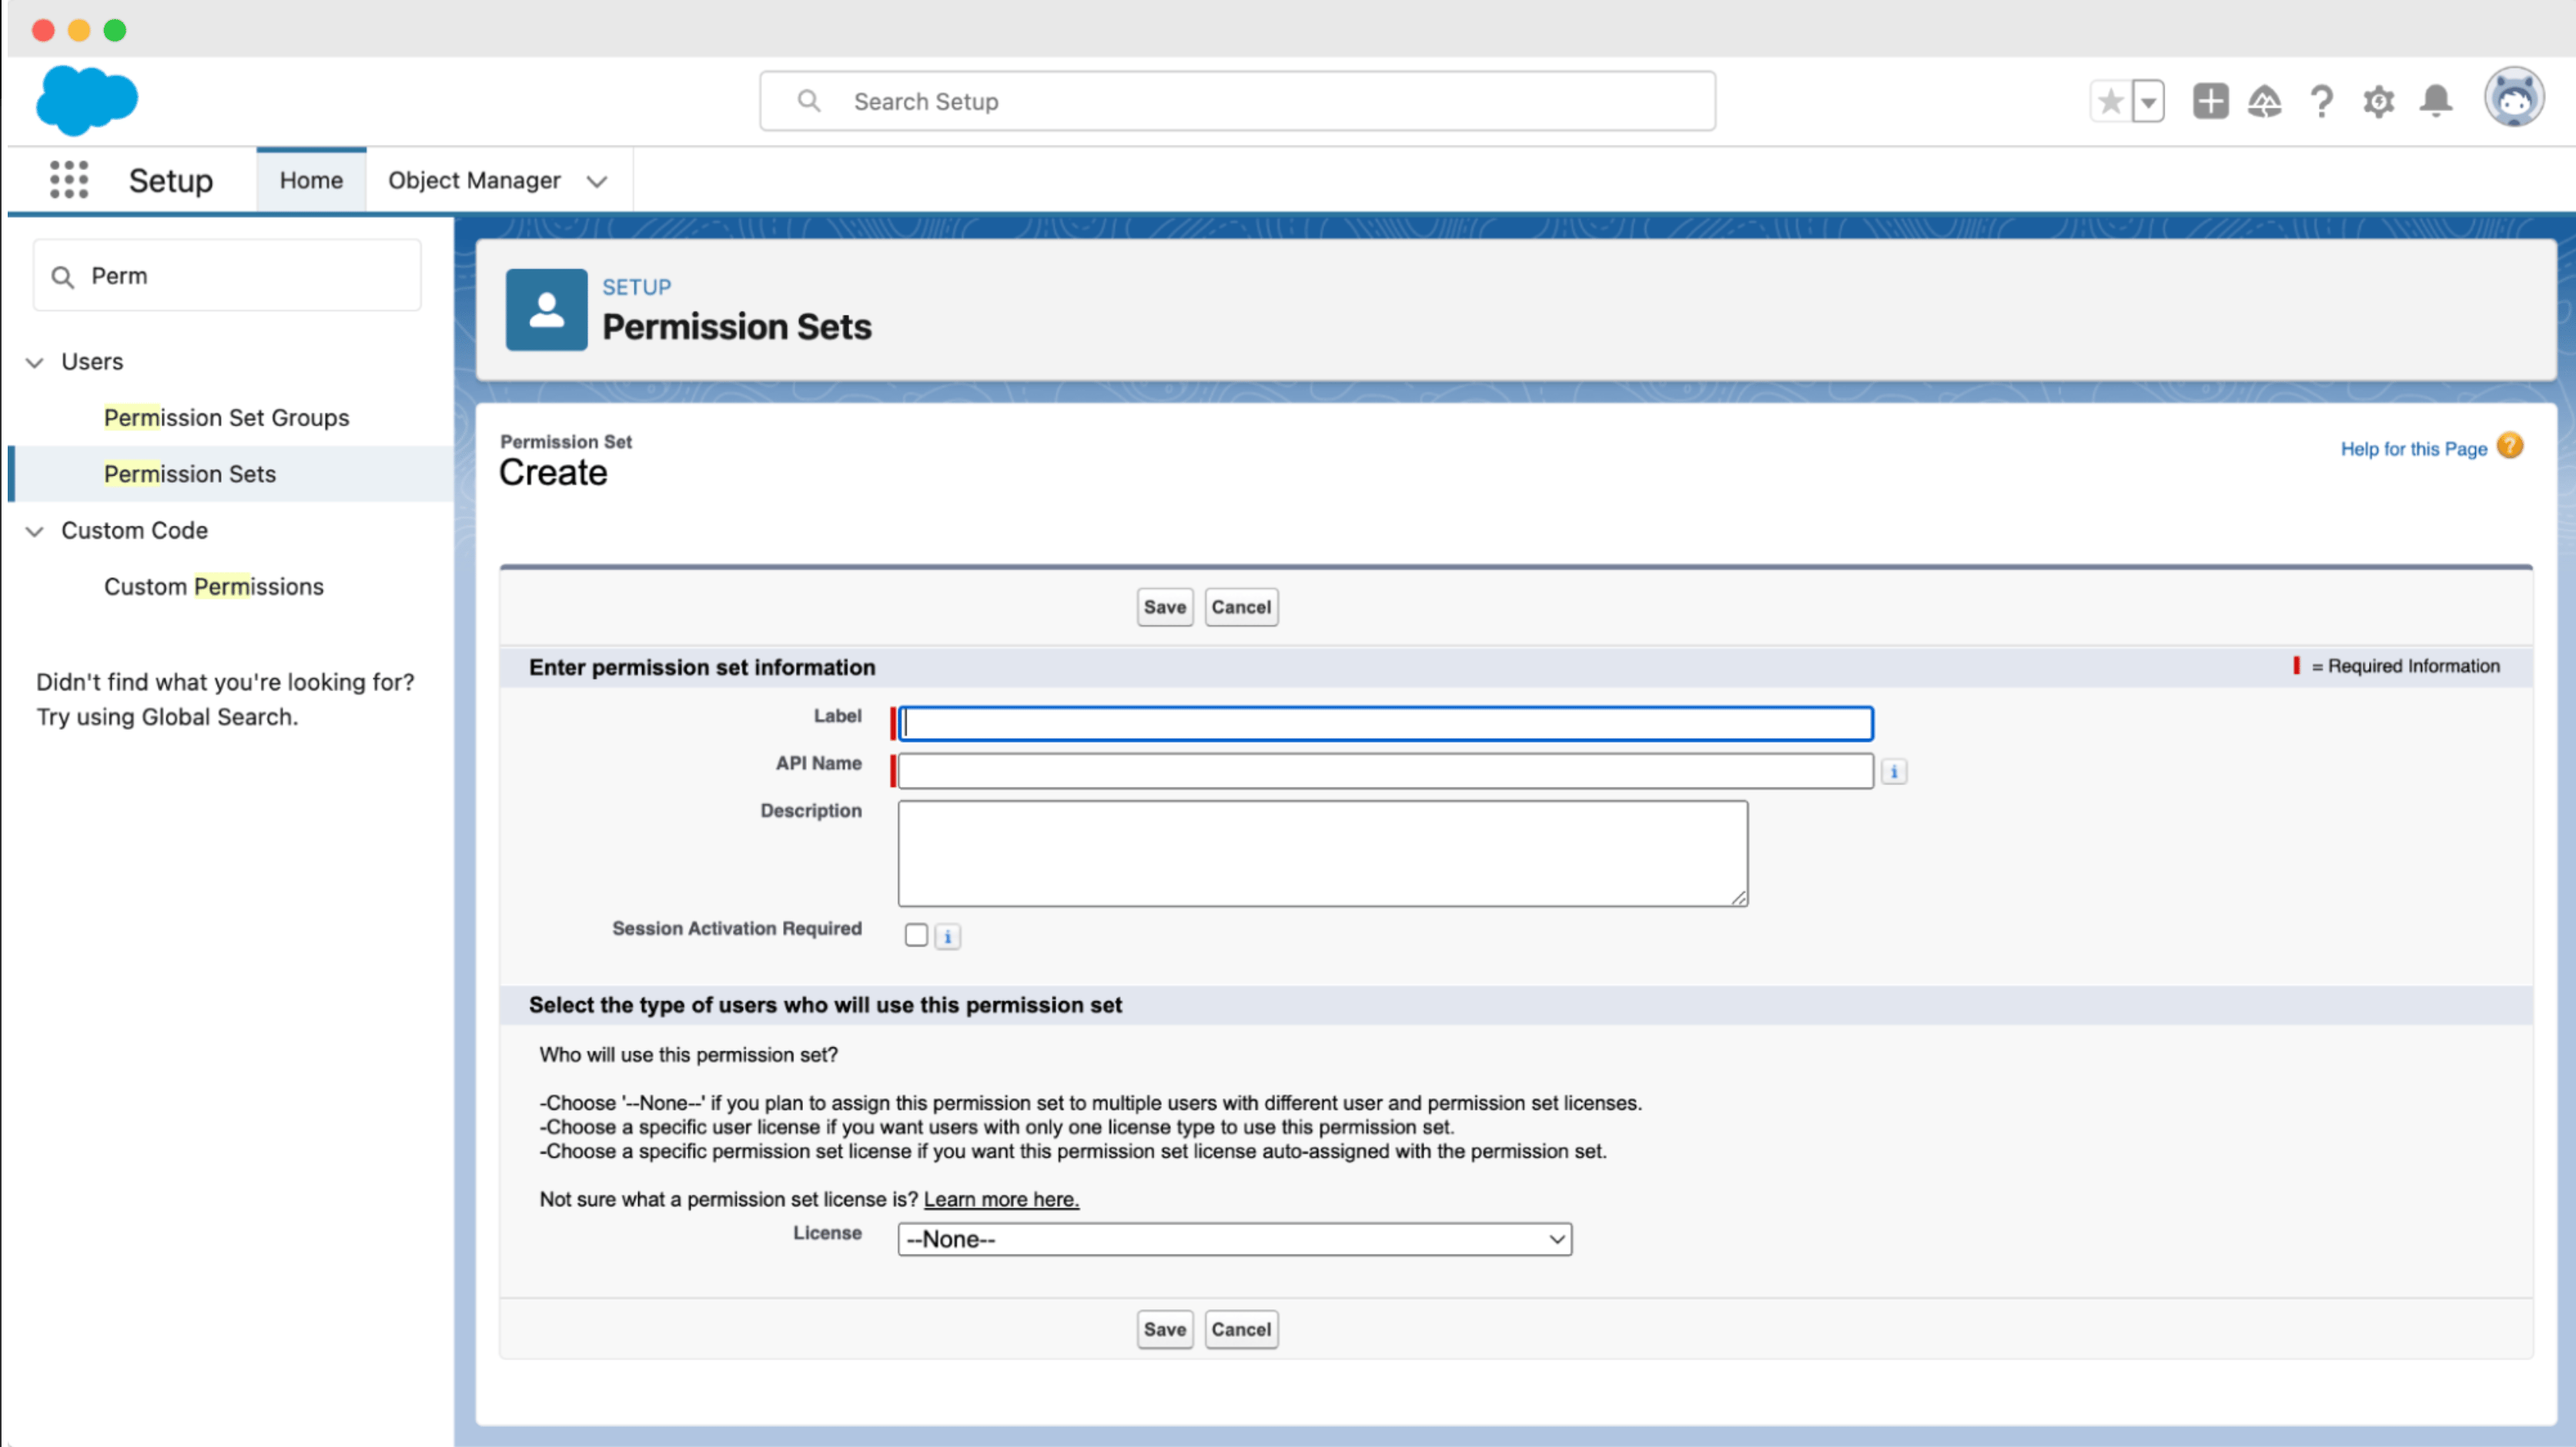
- Under System Permissions, enable API Only User and API Enabled.
- Under Apps → Object Settings, open Surveys and Survey Responses and enable Read, View All Records, and View All Fields for each.
Create an API-only User
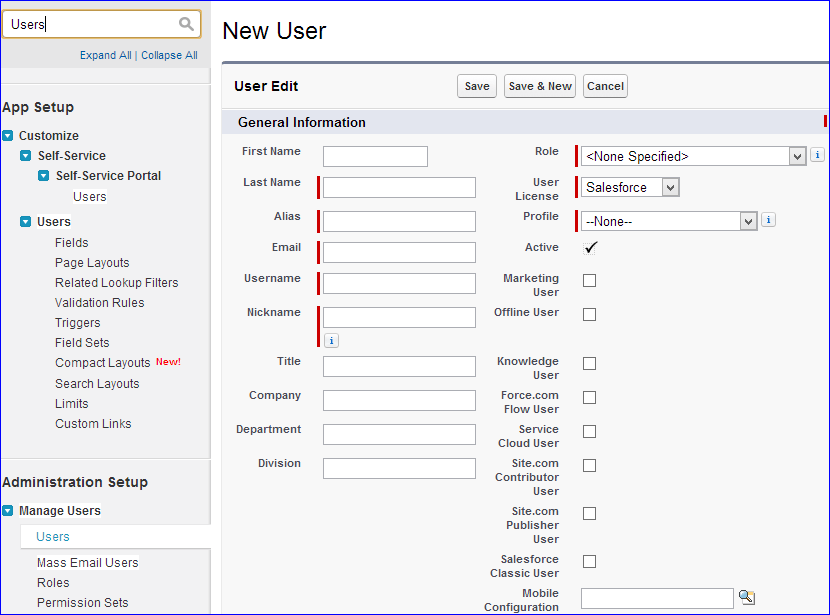
- User License: Salesforce
- Profile: Minimum Access - Salesforce
- Permission Set Assignments: assign the permission set created in the previous step.
Create an External Client App

- Under API (Enable OAuth Settings), check Enable OAuth.
- Callback URL: any value works and is not used by this flow (e.g.
https://localhost). - OAuth Scopes: add Manage user data via APIs (api).
- Under Flow Enablement, check Enable Client Credentials Flow, then click Create.
- Open the app’s Policies → OAuth Flows and External Client App Enhancements, check Enable Client Credentials Flow, and set the Run As user to the API-only user created in the previous step.
- Open Settings → OAuth Settings and copy the Consumer Key and Consumer Secret — you’ll need these in Caplena.
Open Integration Settings in Caplena
Add Your Salesforce Account
\

- Connection name – e.g. “Salesforce Production”
- Client ID – The Consumer Key from your External Client App
- Client Secret – The Consumer Secret from your External Client App
- Instance URL – Your Salesforce instance URL (e.g.
https://yourorg.salesforce.com)
Import Salesforce Data
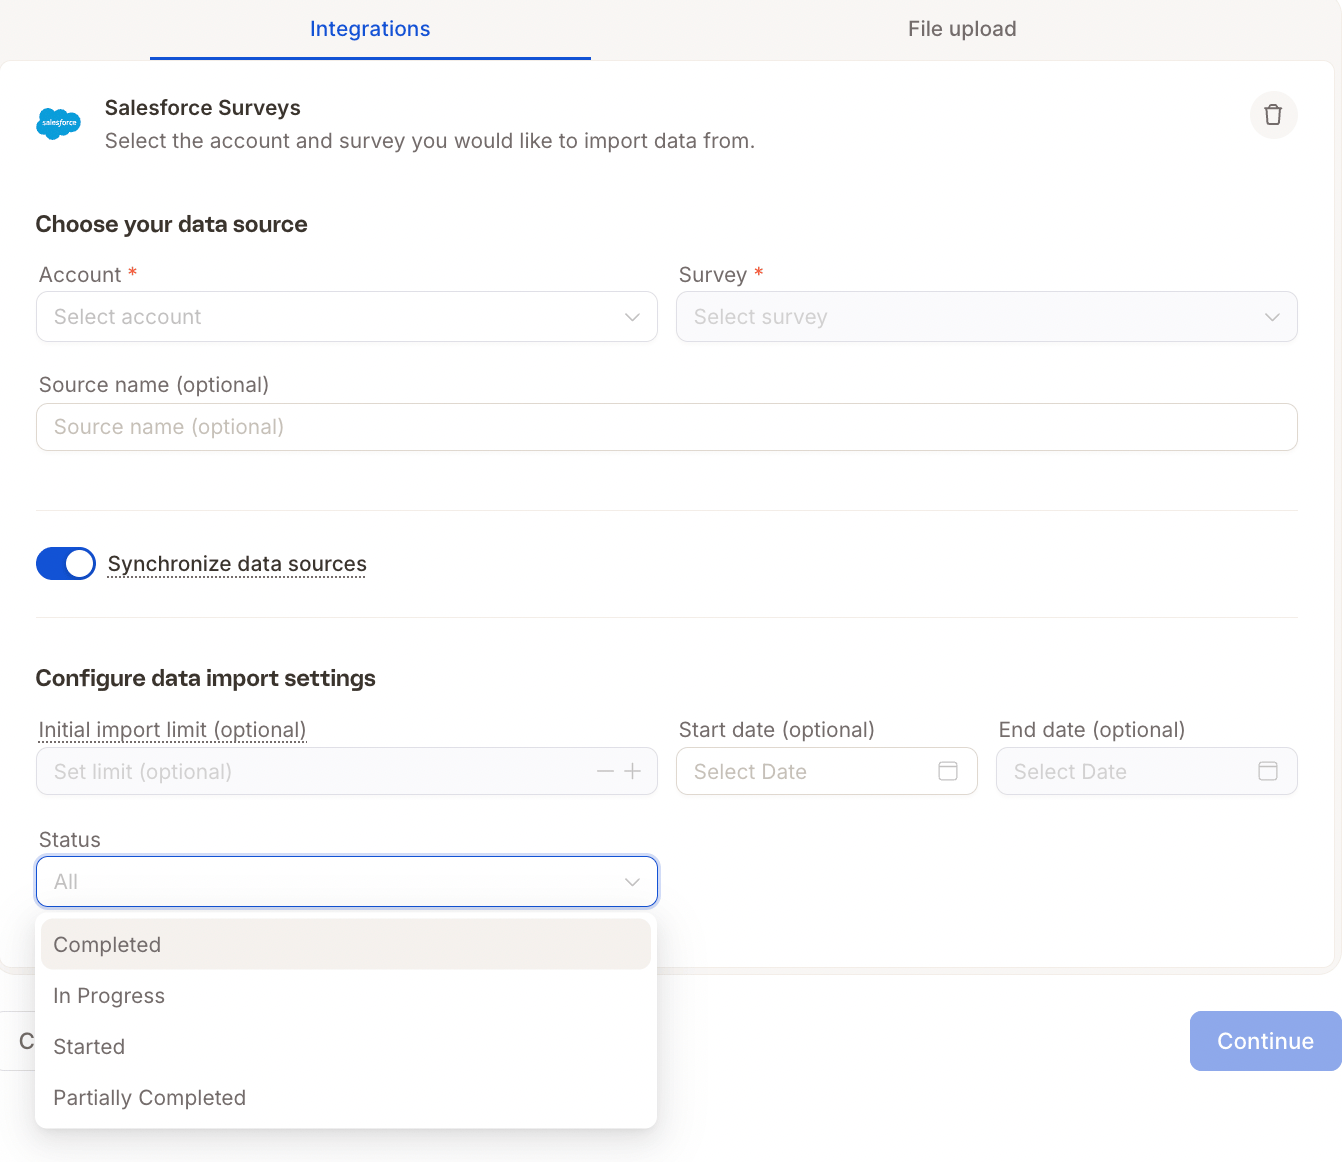
- Completed
- In Progress
- Started
- Partially Completed
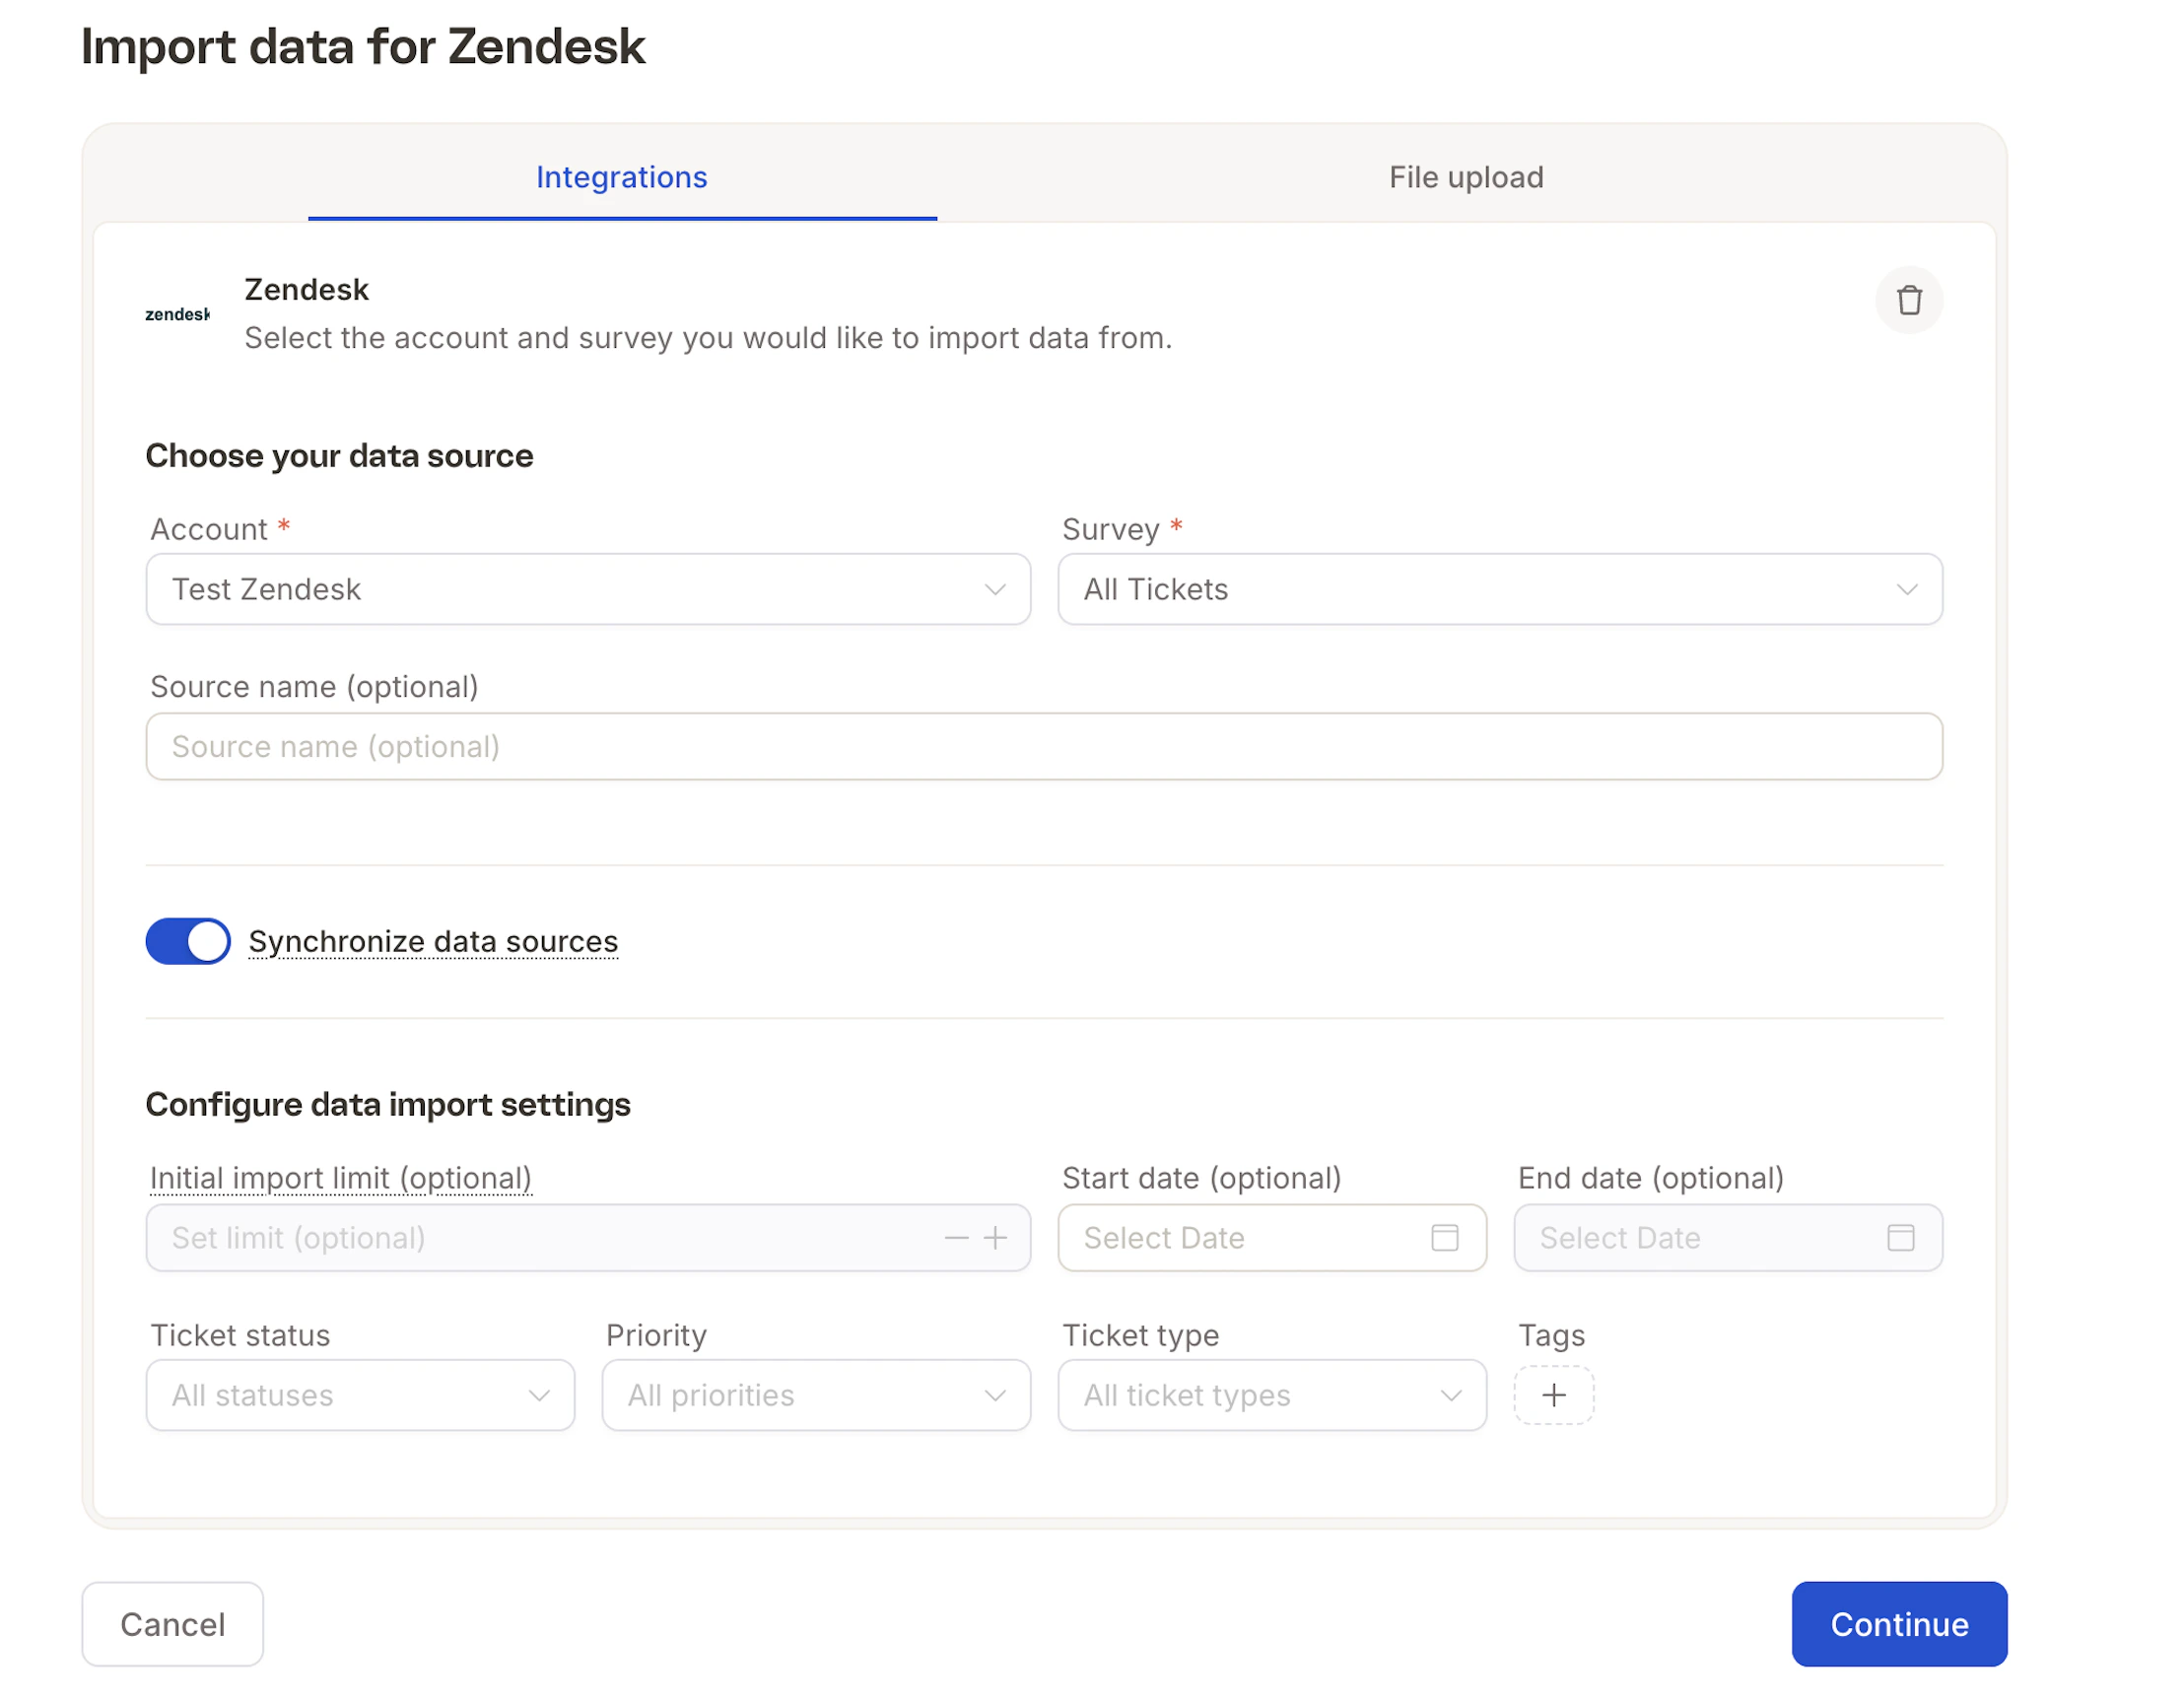
Zendesk
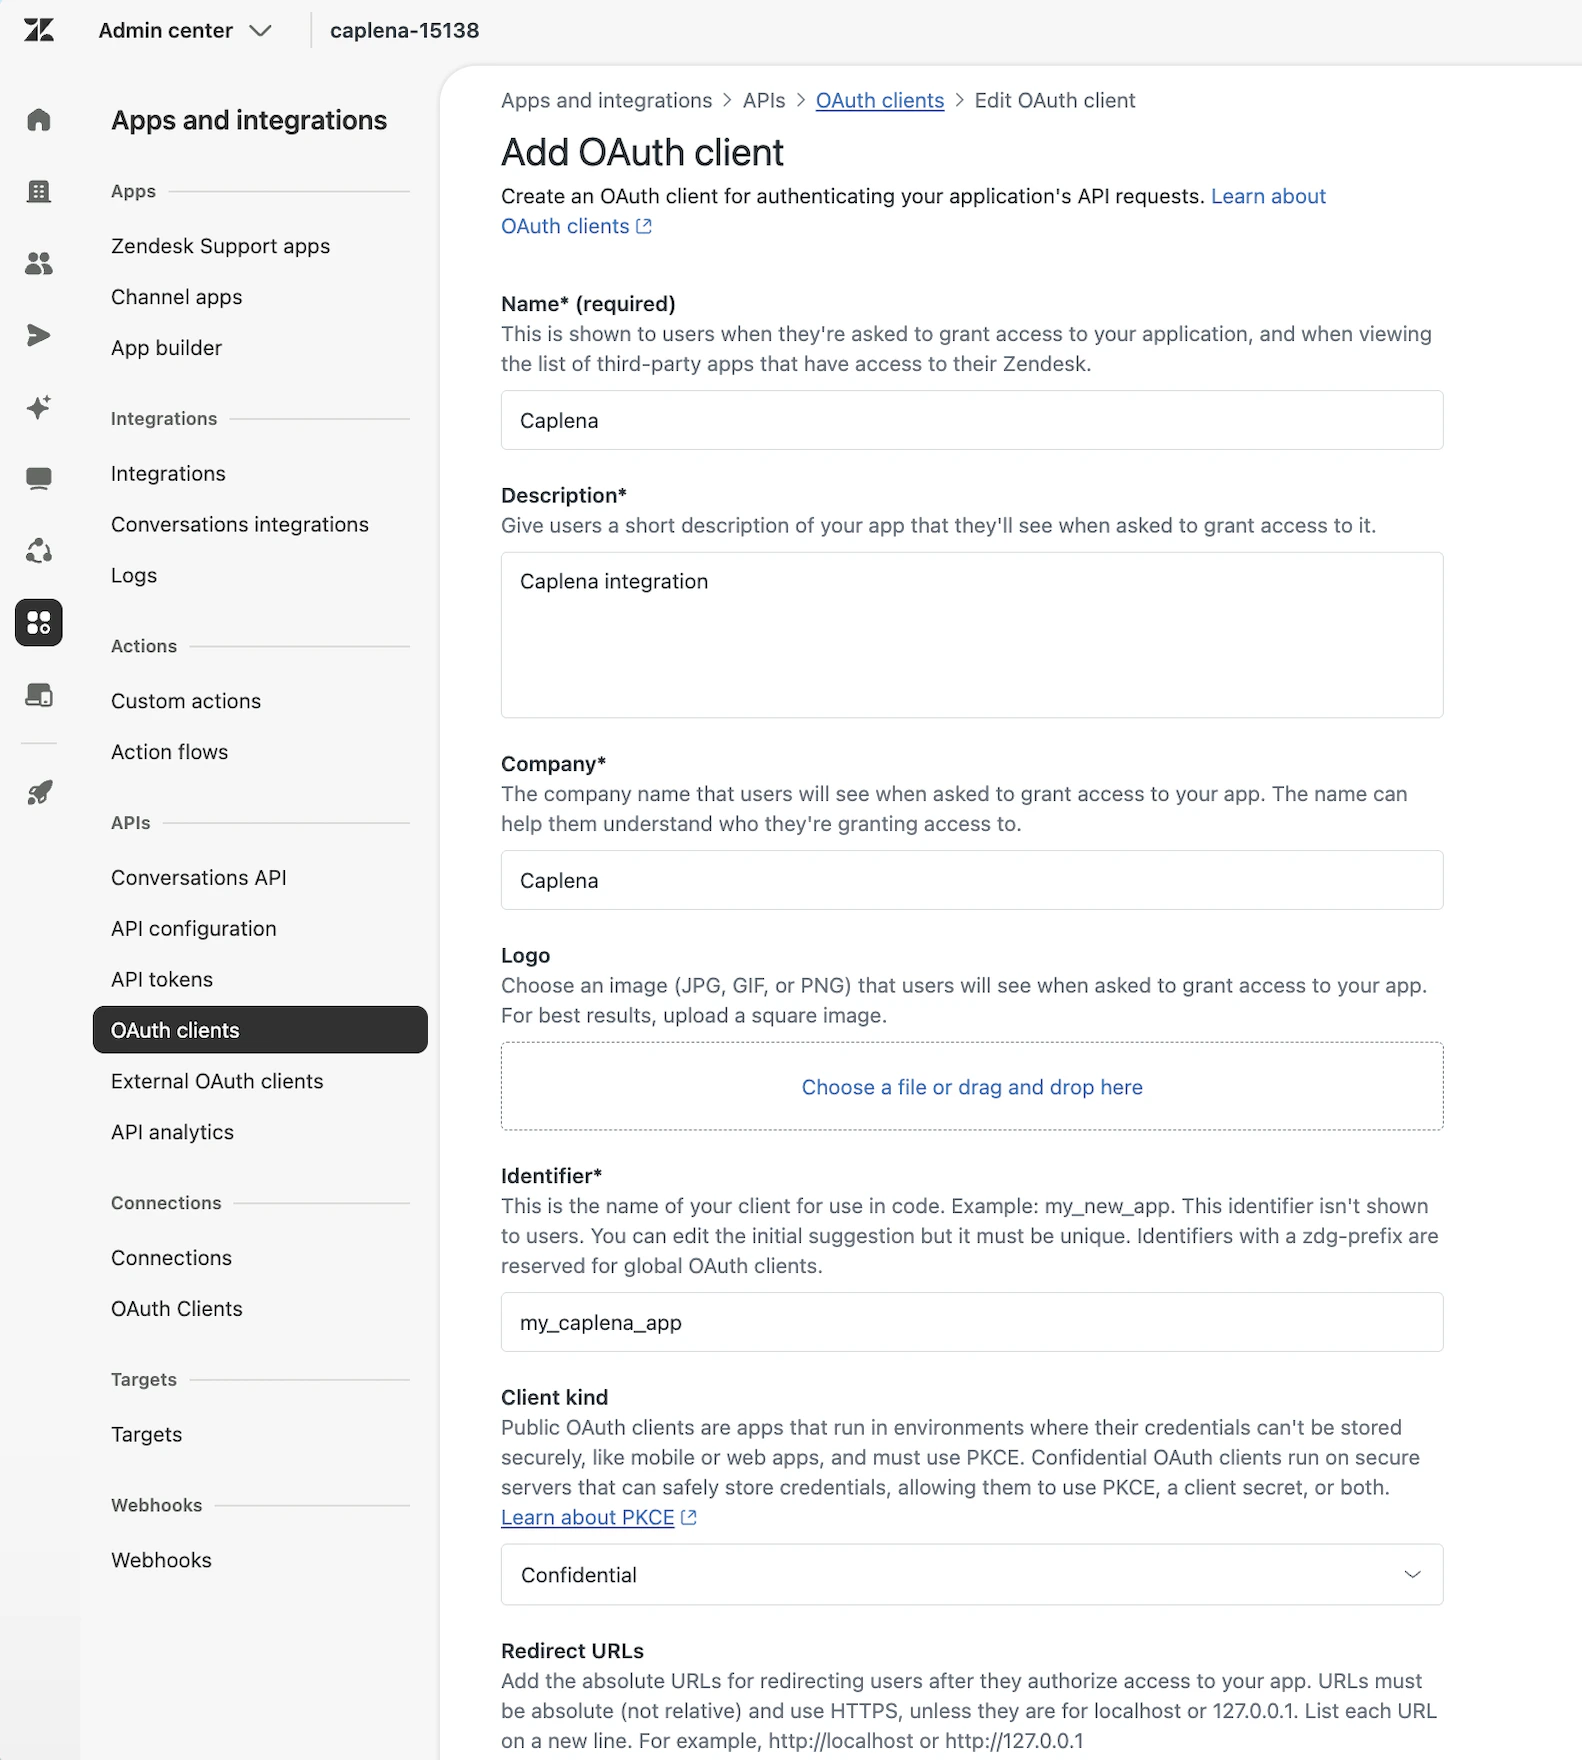
Import and analyze Zendesk ticket data and CSAT responses directly in Caplena.Set up OAuth in Zendesk
- Redirect URL –
https://api.caplena.com/api/ui/integrations/zendesk/oauth/callback - Client kind – Confidential
Open Integration Settings in Caplena
Add Your Zendesk Account

- Connection name – e.g. “Zendesk Production”
- Client ID – The “Identifier” from your OAuth setup in Zendesk
- Client secret – The secret copied during OAuth setup
- Company subdomain – e.g.
yourcompanyforyourcompany.zendesk.com
Connect the Account
Import Zendesk Data