As long as your existing data has already been analyzed (i.e., topics are in place), any newly added data will automatically be assigned to topics using the current setup.
Step 1: Go to the Data Tab
- In your project, click the Data icon in the left-hand navigation bar.
- Then click Add new rows in the top-right corner.
Step 2: Upload Your File
In the import screen:- Drag and drop your file, or click to browse
- File types supported:
.xls,.xlsx,.csv,.sav,.spss - (Optional) Add a name for the data source
- Make sure your file includes column headers in the first row
- Click Continue to proceed
Your file does not need to match the previous column order or column count
Step 3: Match Your Columns
Caplena will guide you through matching the new file’s columns with those already in your project. What happens automatically:- Columns with the same name are matched
- Order doesn’t matter, Caplena accepts columns in any order
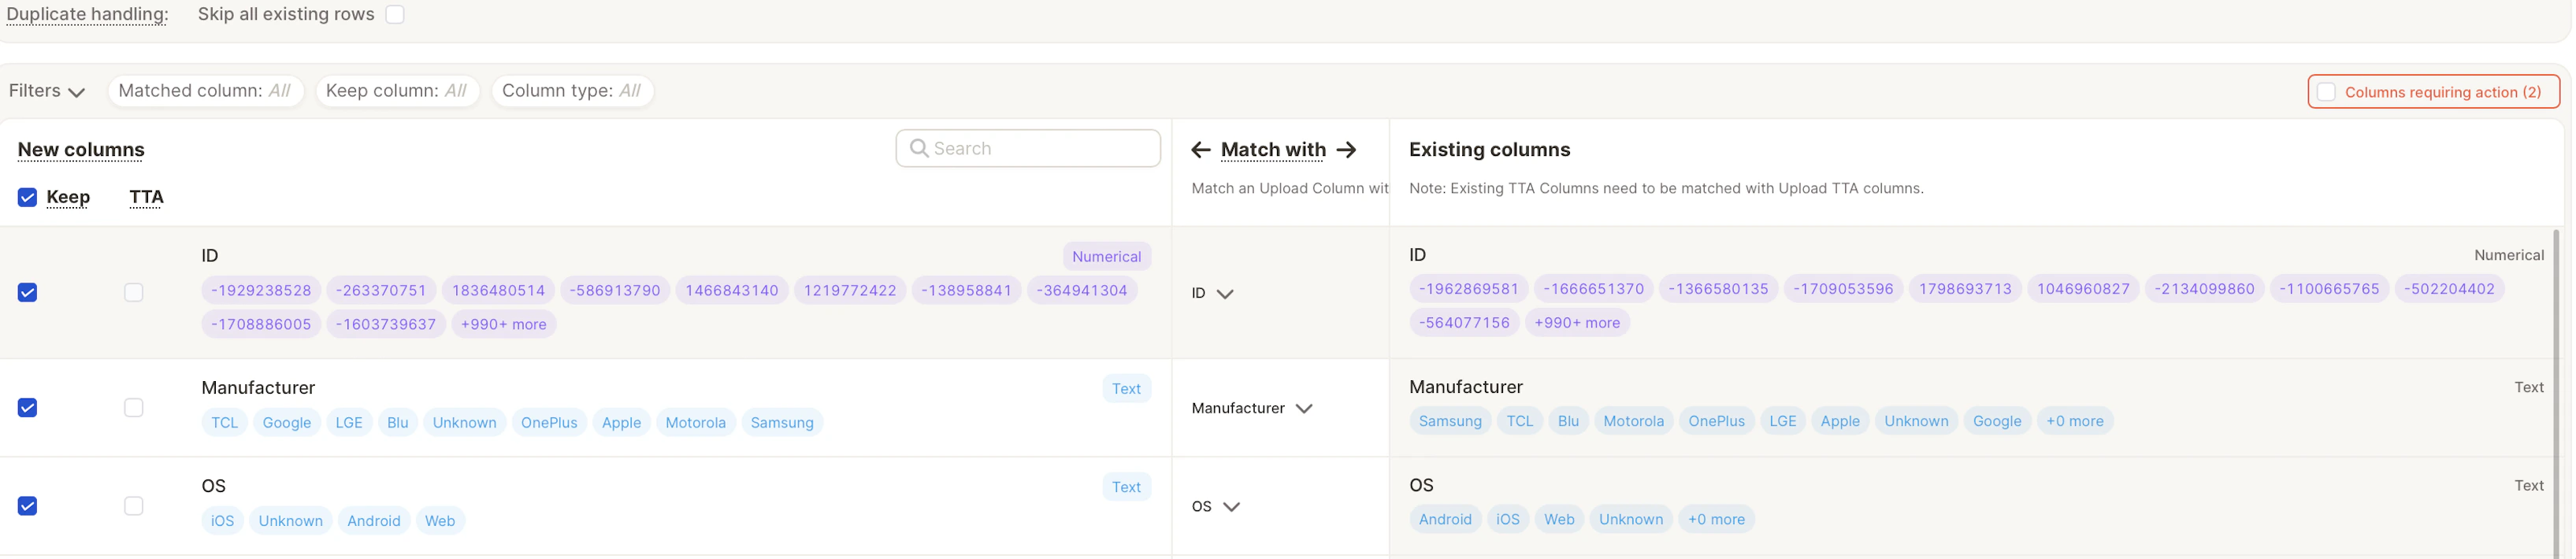
- Skip columns you don’t want to import
- Create new columns for unmatched fields
- Manually match columns if needed
Step 4: Validate and Finalize
- Click Validate to confirm your column mappings
- Click Finalize to upload the new rows
Your new data will now be added to the project and analyzed automatically.
Auto-Translation
If you plan to use auto-translation, please enable it when creating the project.It cannot be activated retroactively for existing projects.
Learn more about auto-translation →
Duplicate Row Handling
To avoid importing duplicates:- Enable the “Skip existing rows based on matched column” toggle
- Select the column used for deduplication, usually an **ID field
