

What you can do with reports
- Visualize your data using charts, graphs, and summaries.
- Share compelling insights with your team or stakeholders.
- Track performance and feedback over time.
Step 1: Access the Reports section
1
Open your Caplena project.
2
Click on the Reports tab in the top navigation bar.
3
Select the New Report button in the top-right corner.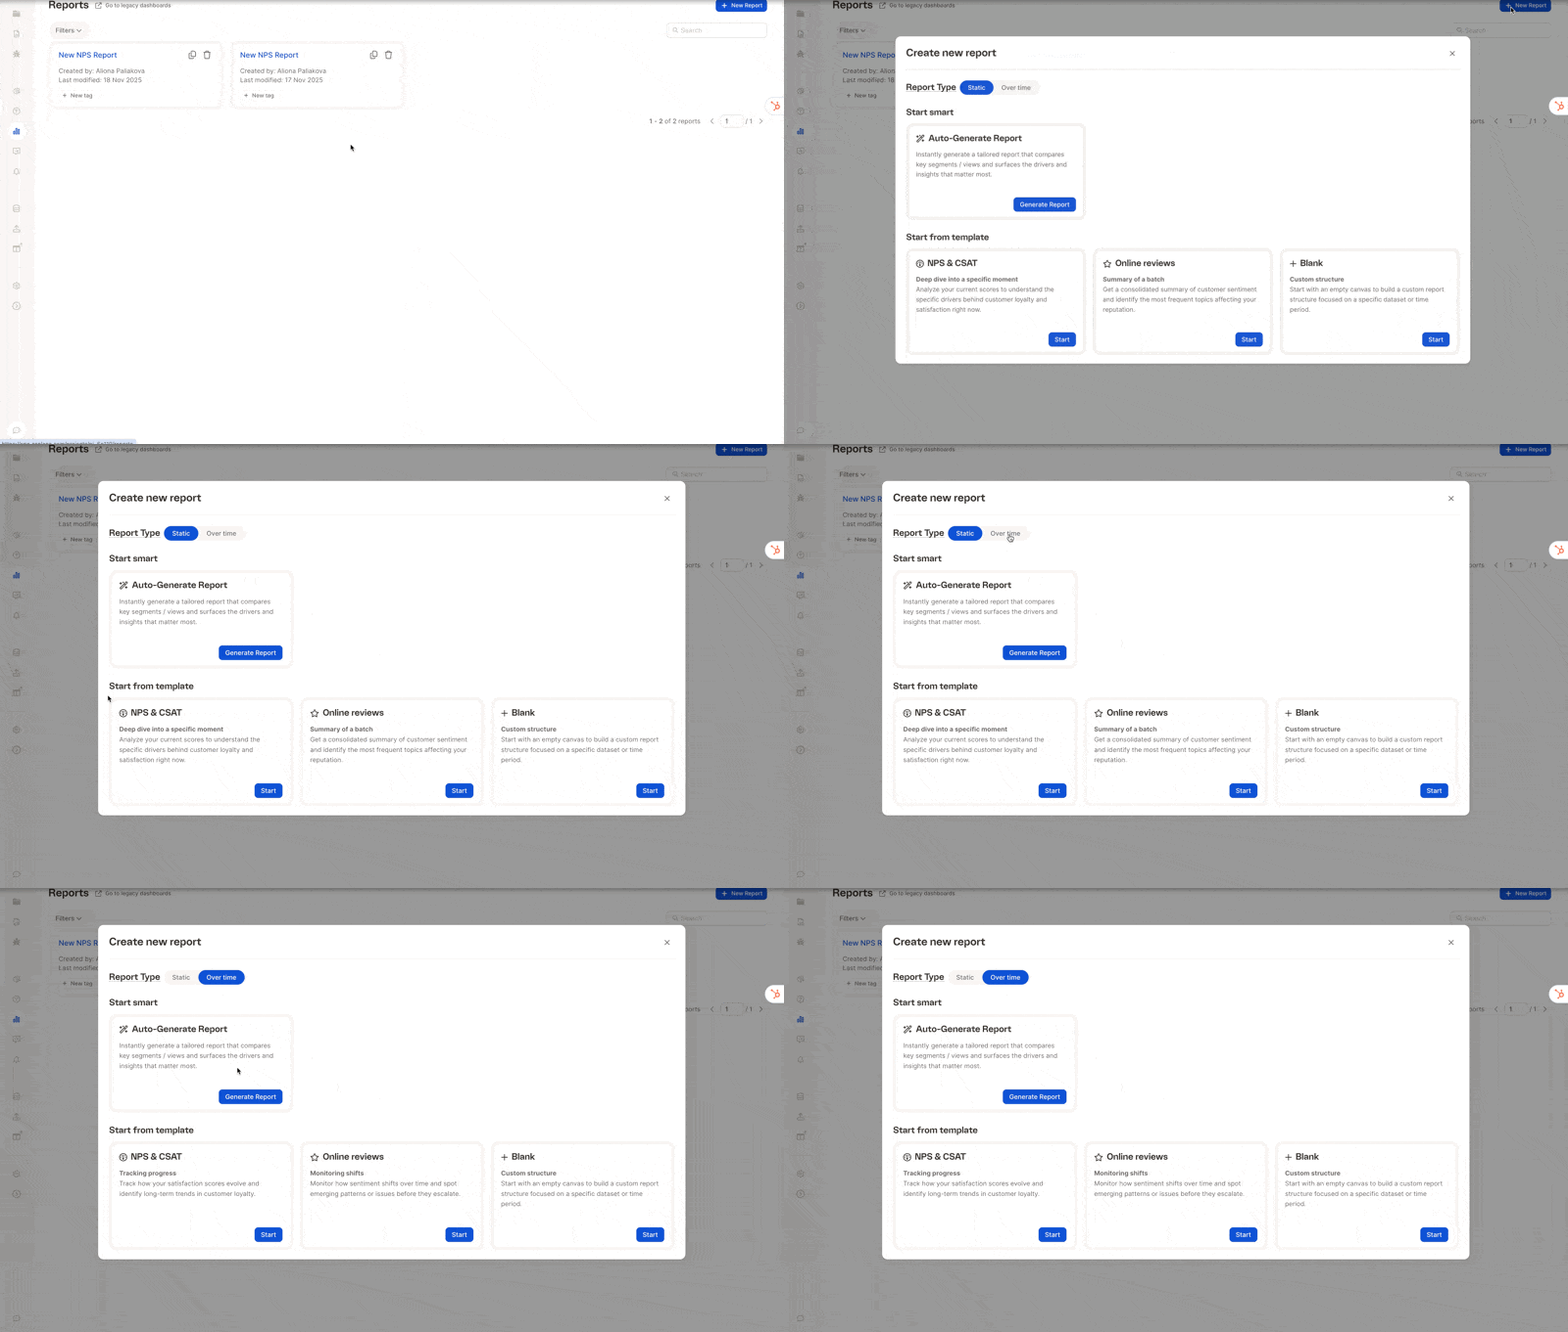
Step 2: Choose a report template
Caplena lets you choose between two report types at the top of the “Create new report” screen:- Static – A point-in-time report
- Over time – A report comparing results across periods (e.g., months, weeks)
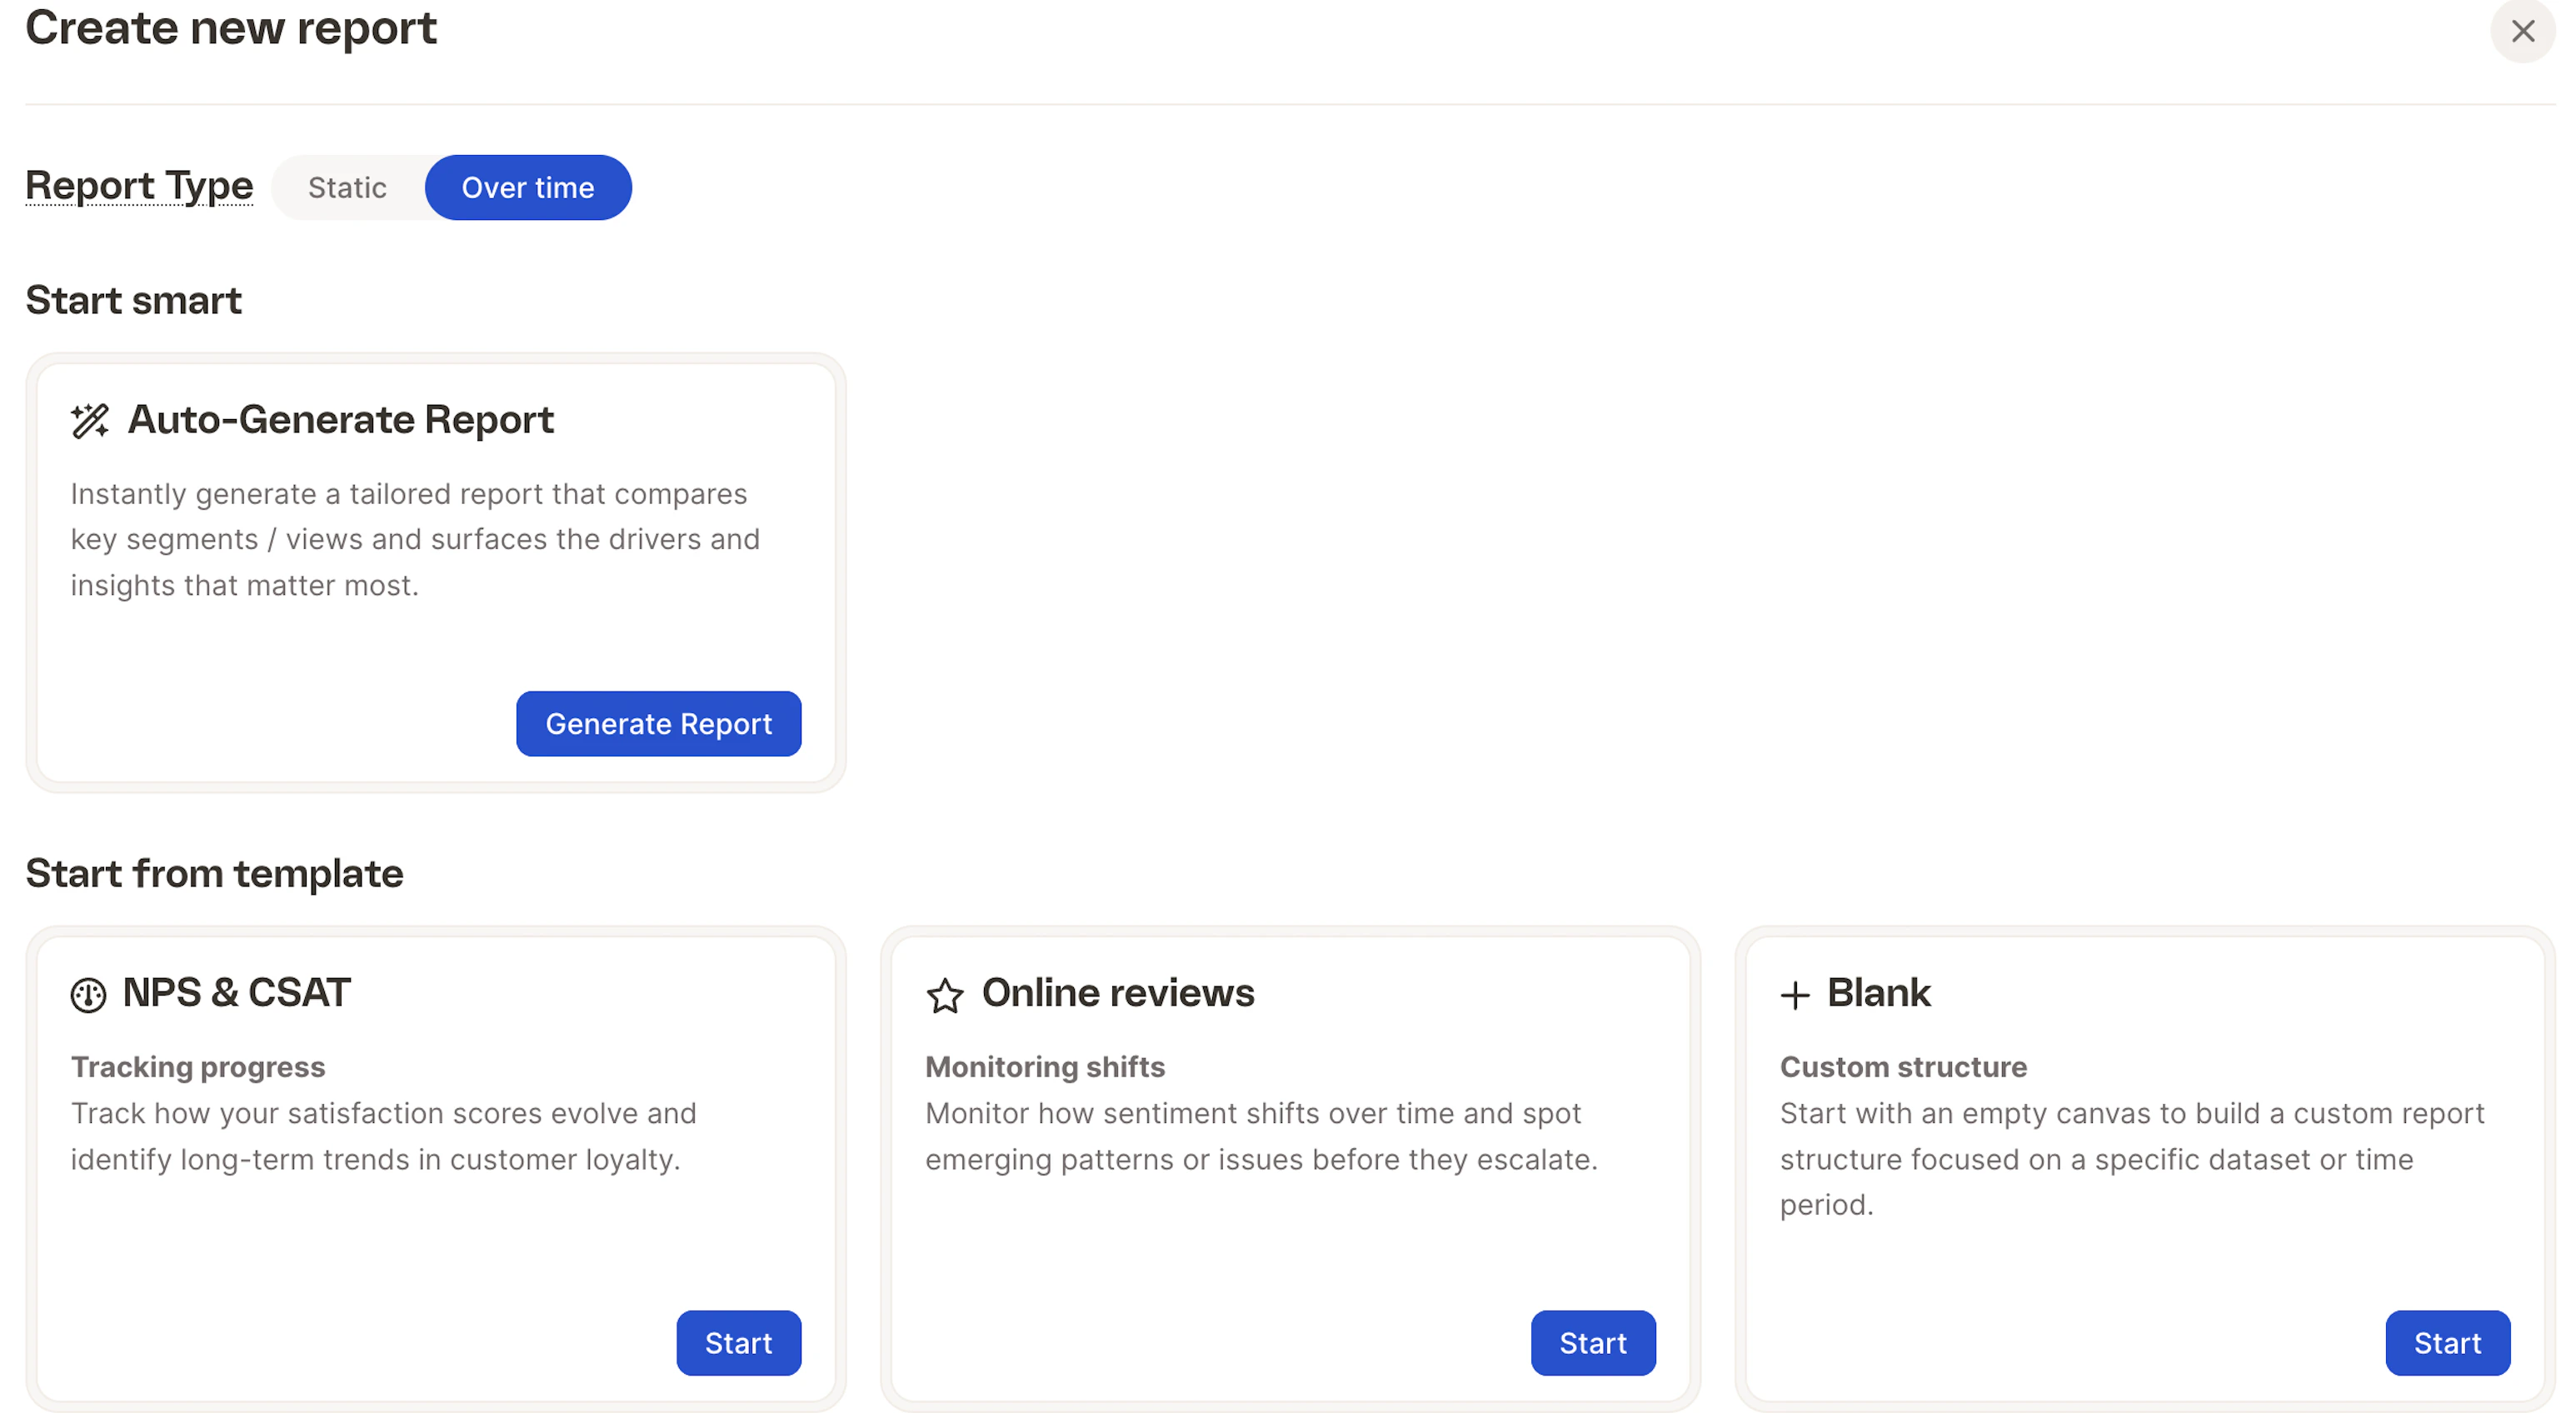
✨ Auto-Generate ReportGenerates a tailored report instantly based on your dataset. Caplena highlights key segments, meaningful differences, and the main drivers behind sentiment and experience. Click Generate Report to create it automatically.
Click Start under your preferred template to continue.
Step 3: Configure your report
Let’s walk through the configuration using the NPS Over Time template as an example.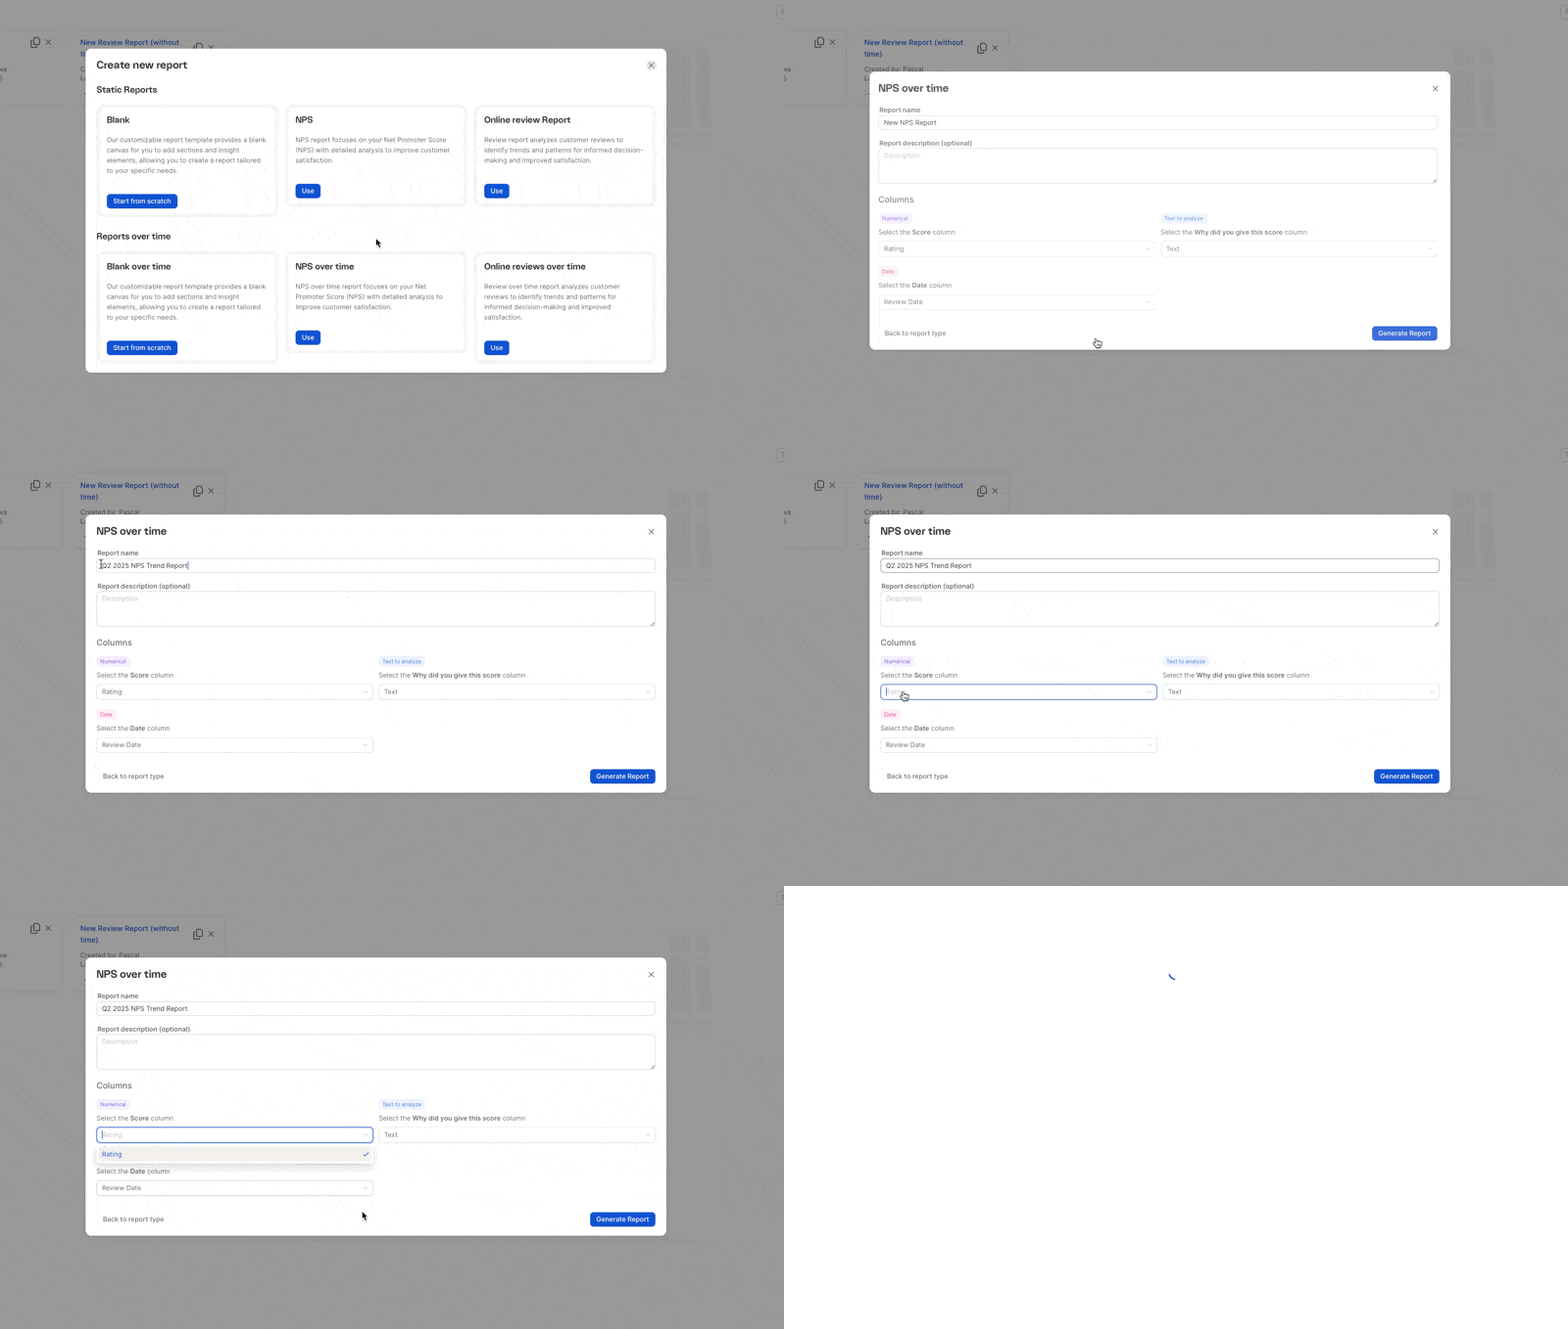
Basic info
- Report Name — e.g., Q2 2025 NPS Trend Report
- Description (optional) — brief goal or context, e.g., “Tracking NPS after April onboarding update”
Data columns
- Score — numeric field (e.g., NPS Score, Satisfaction Rating)
- Open-Text — explanation field (e.g., Why did you give this score?)
- Date (optional) — for time-based charts (e.g., Survey Completion Date)
Step 4: Generate and customize your report
Click Generate Report to instantly create your first draft. From there, you can:- Drag & drop visual elements.
- Apply filters by segments like country, product, or sentiment.
- Add titles and annotations to tell a clear story.