

What are Proactive Insights?
Proactive Insights are findings that Caplena generates automatically from your report views and surfaces in a side rail next to your report. Use them to spot shifts, drivers, and noteworthy patterns without having to ask the Insight Agent each time you open a report. You can also add your own insights manually to capture observations alongside the AI-generated ones.Where you see Proactive Insights
- Report side rail — a collapsible panel on the right of any report view, shown as collapsed badges or expanded card stacks. The rail header shows the total insight count and the date of the most recent activity.
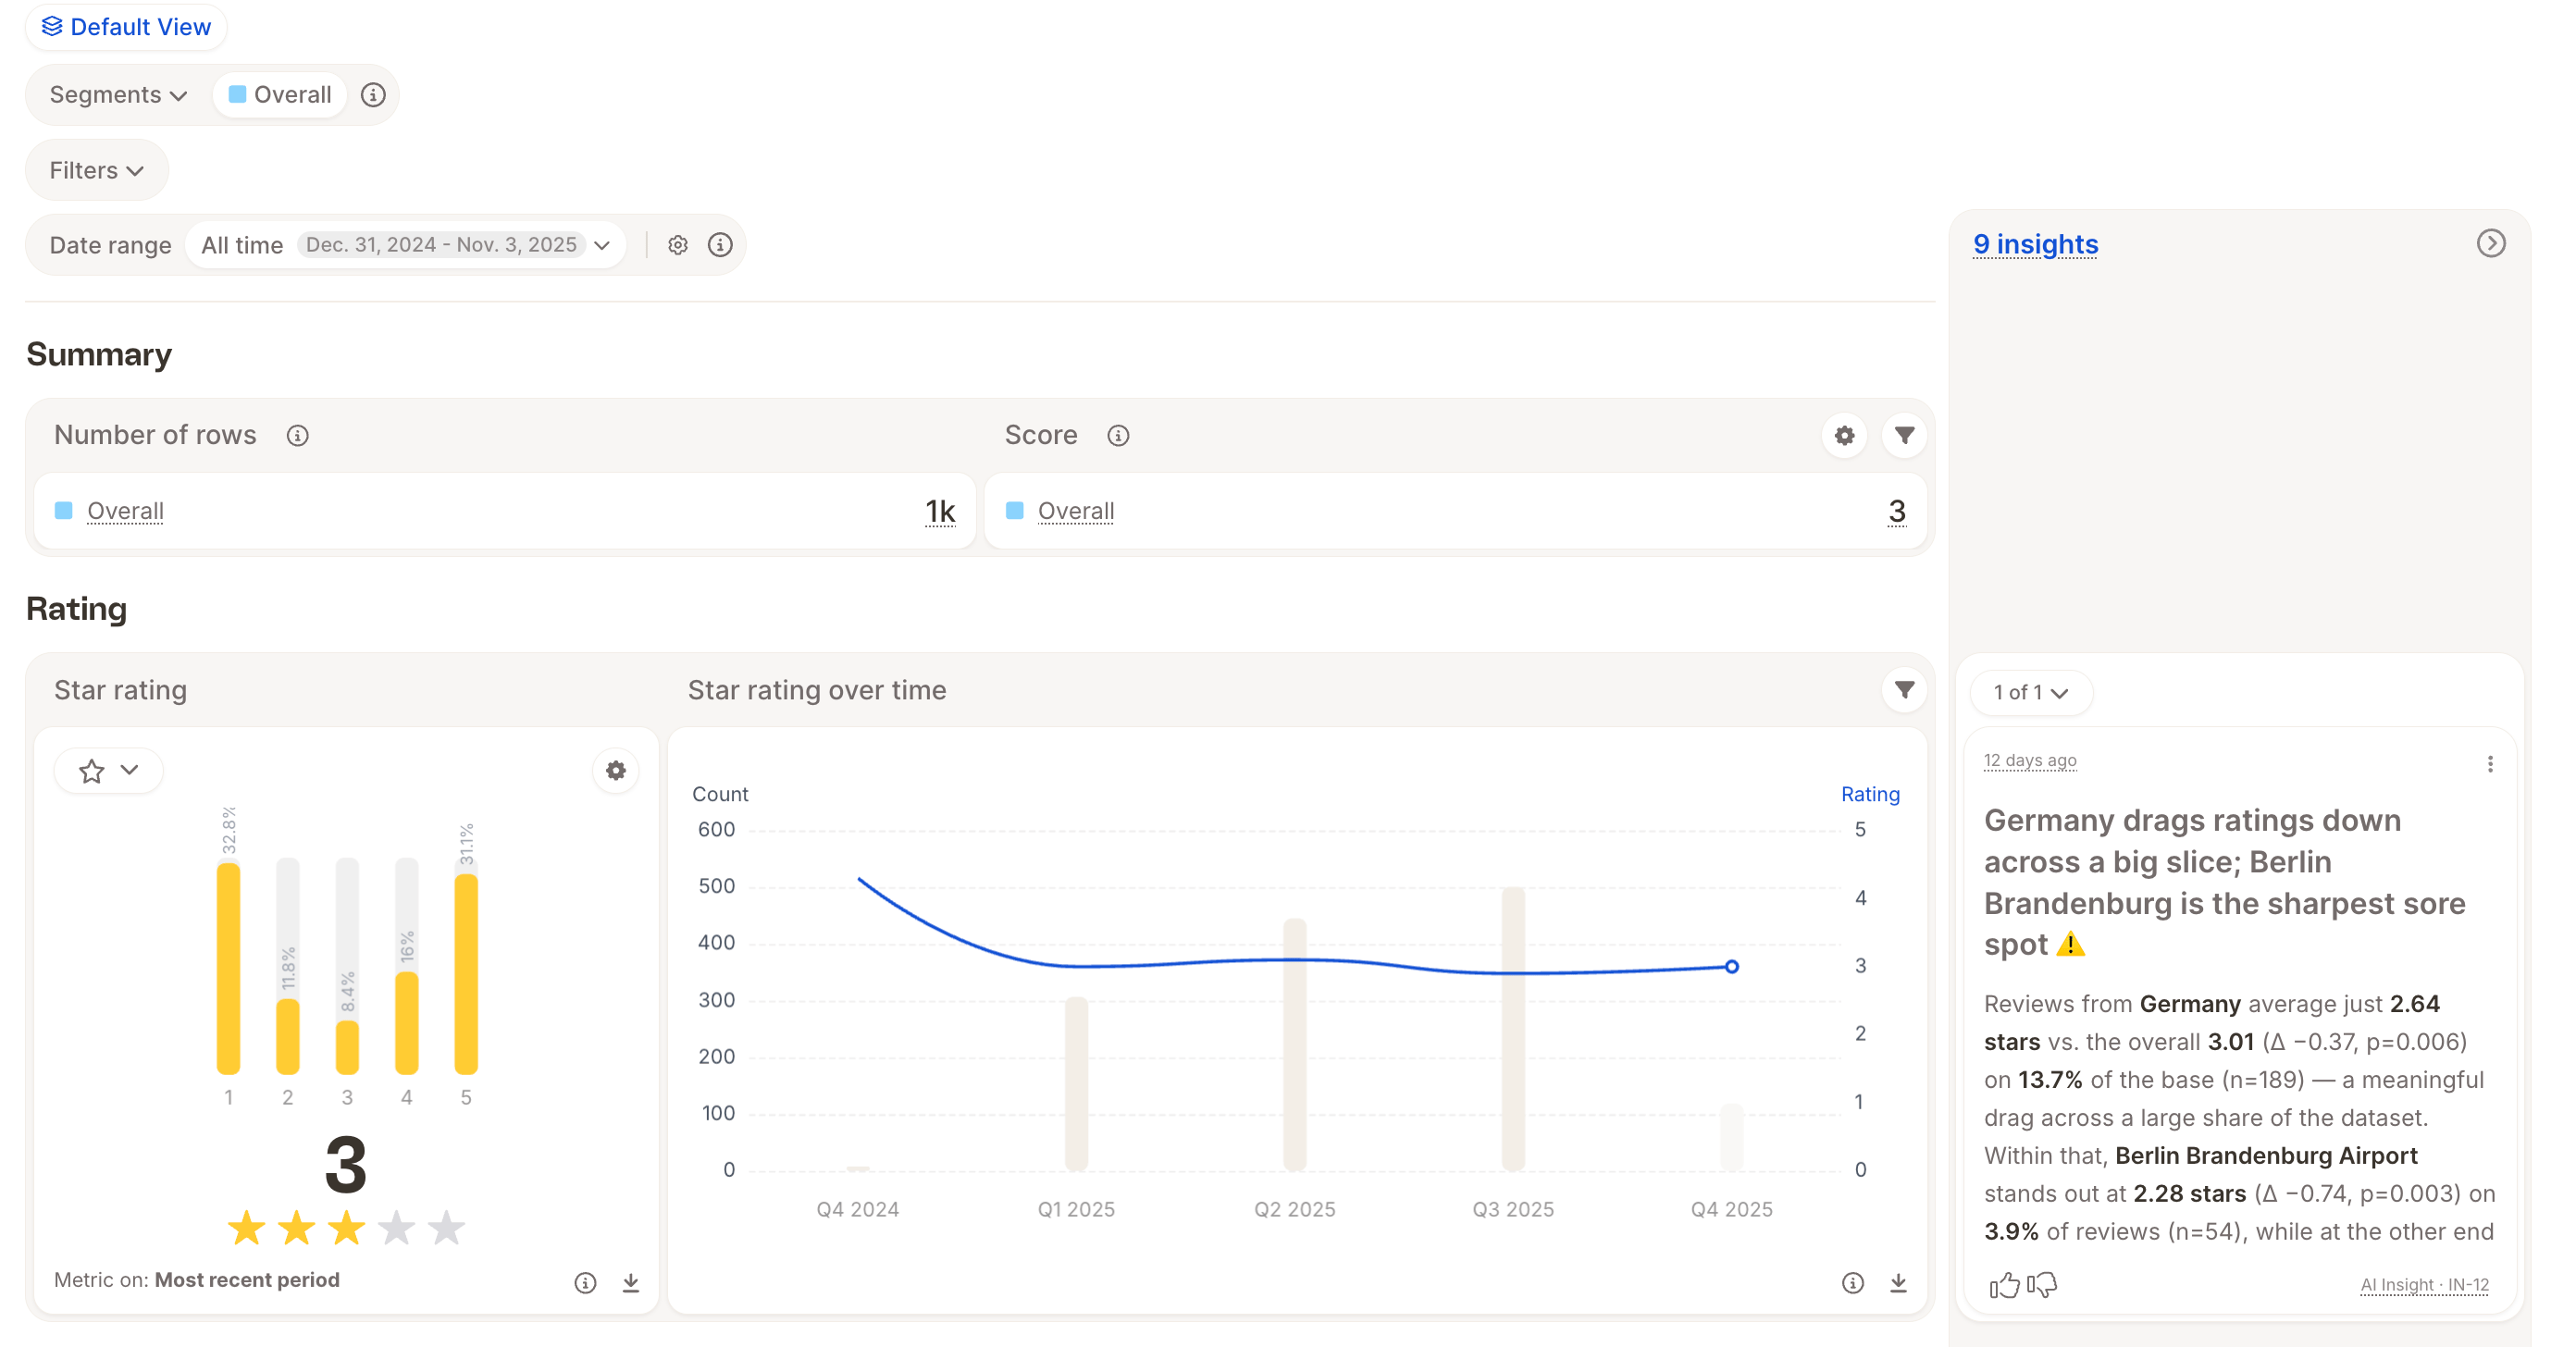
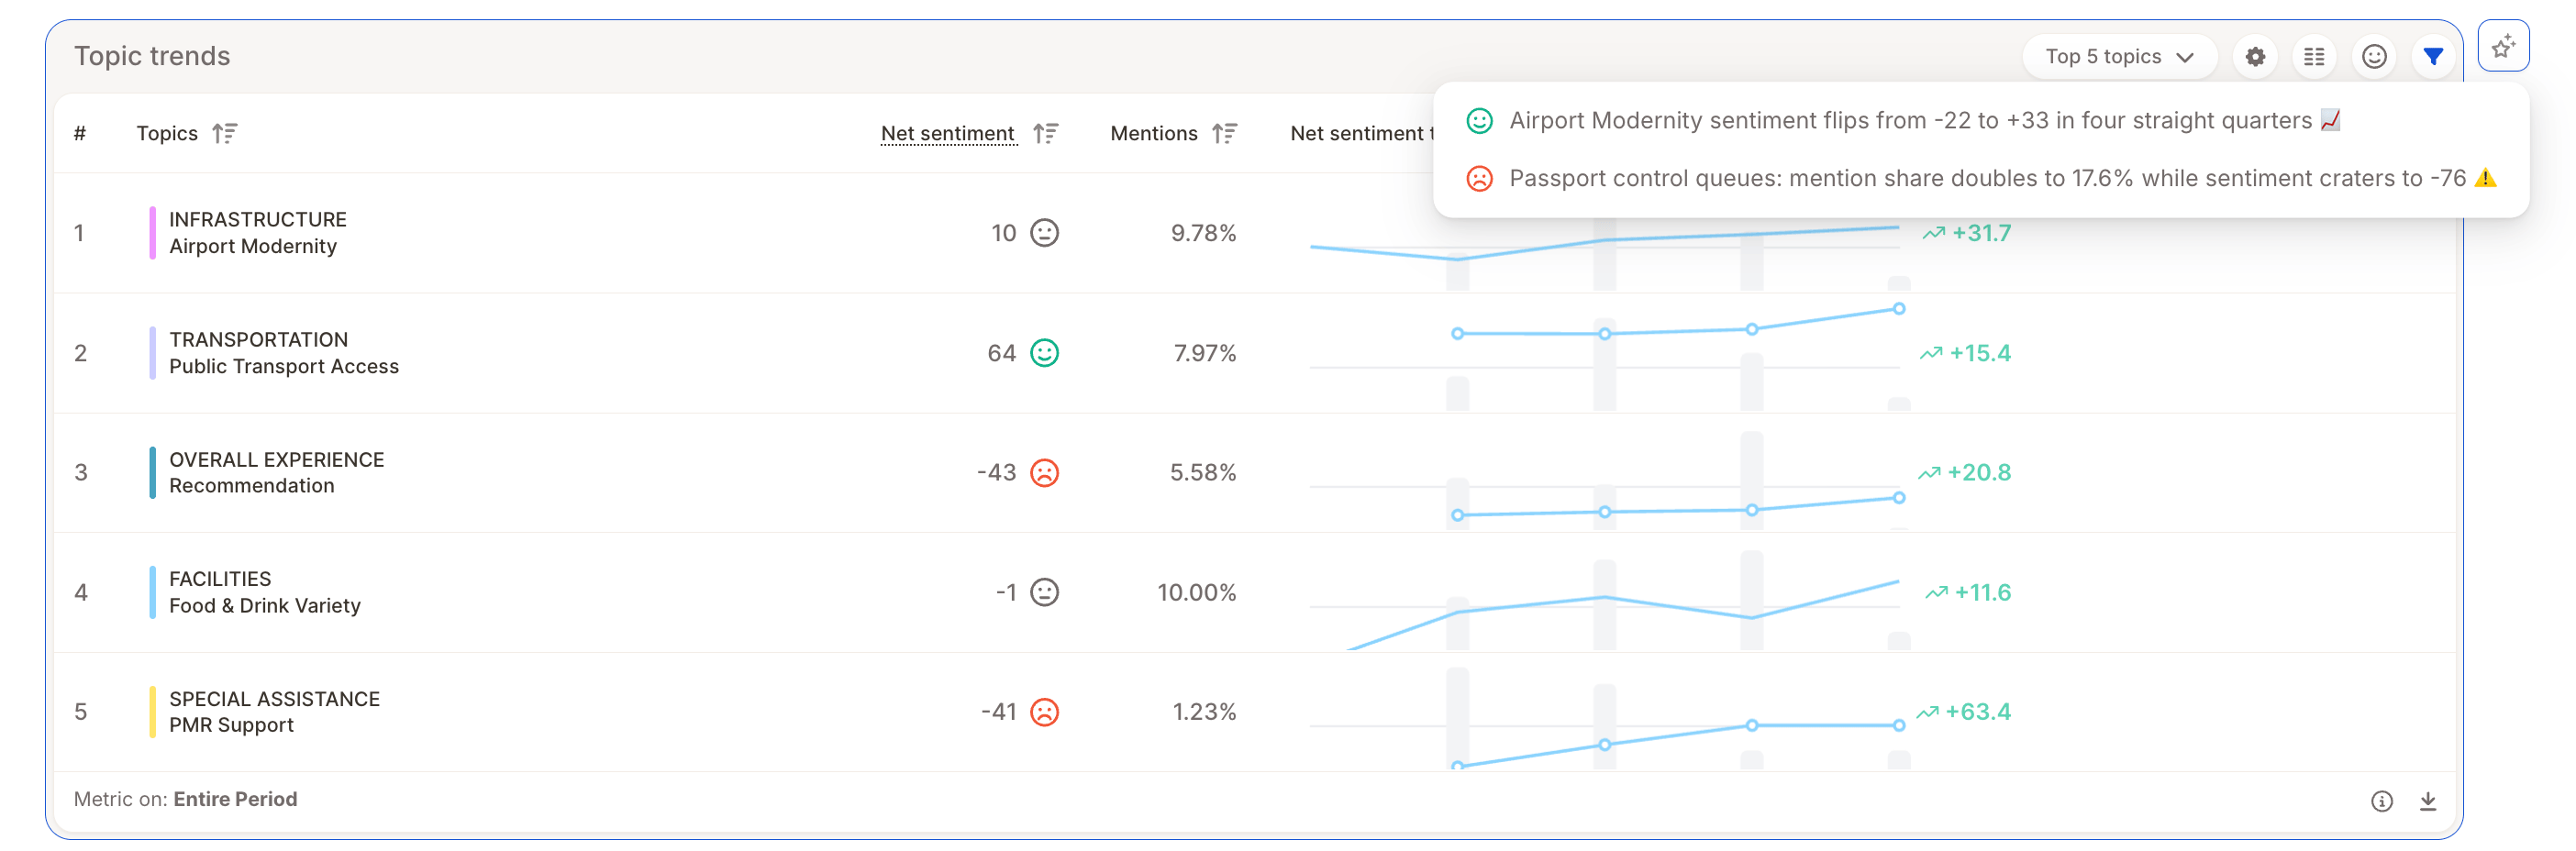
- Per insight element — each insight element can have multiple insights, accessible via the chip on its upper-right side. When an element has related proactive insights, a small sparkles button appears; hover or click it to see those insights in a popover, then open one to expand the rail directly to that card.
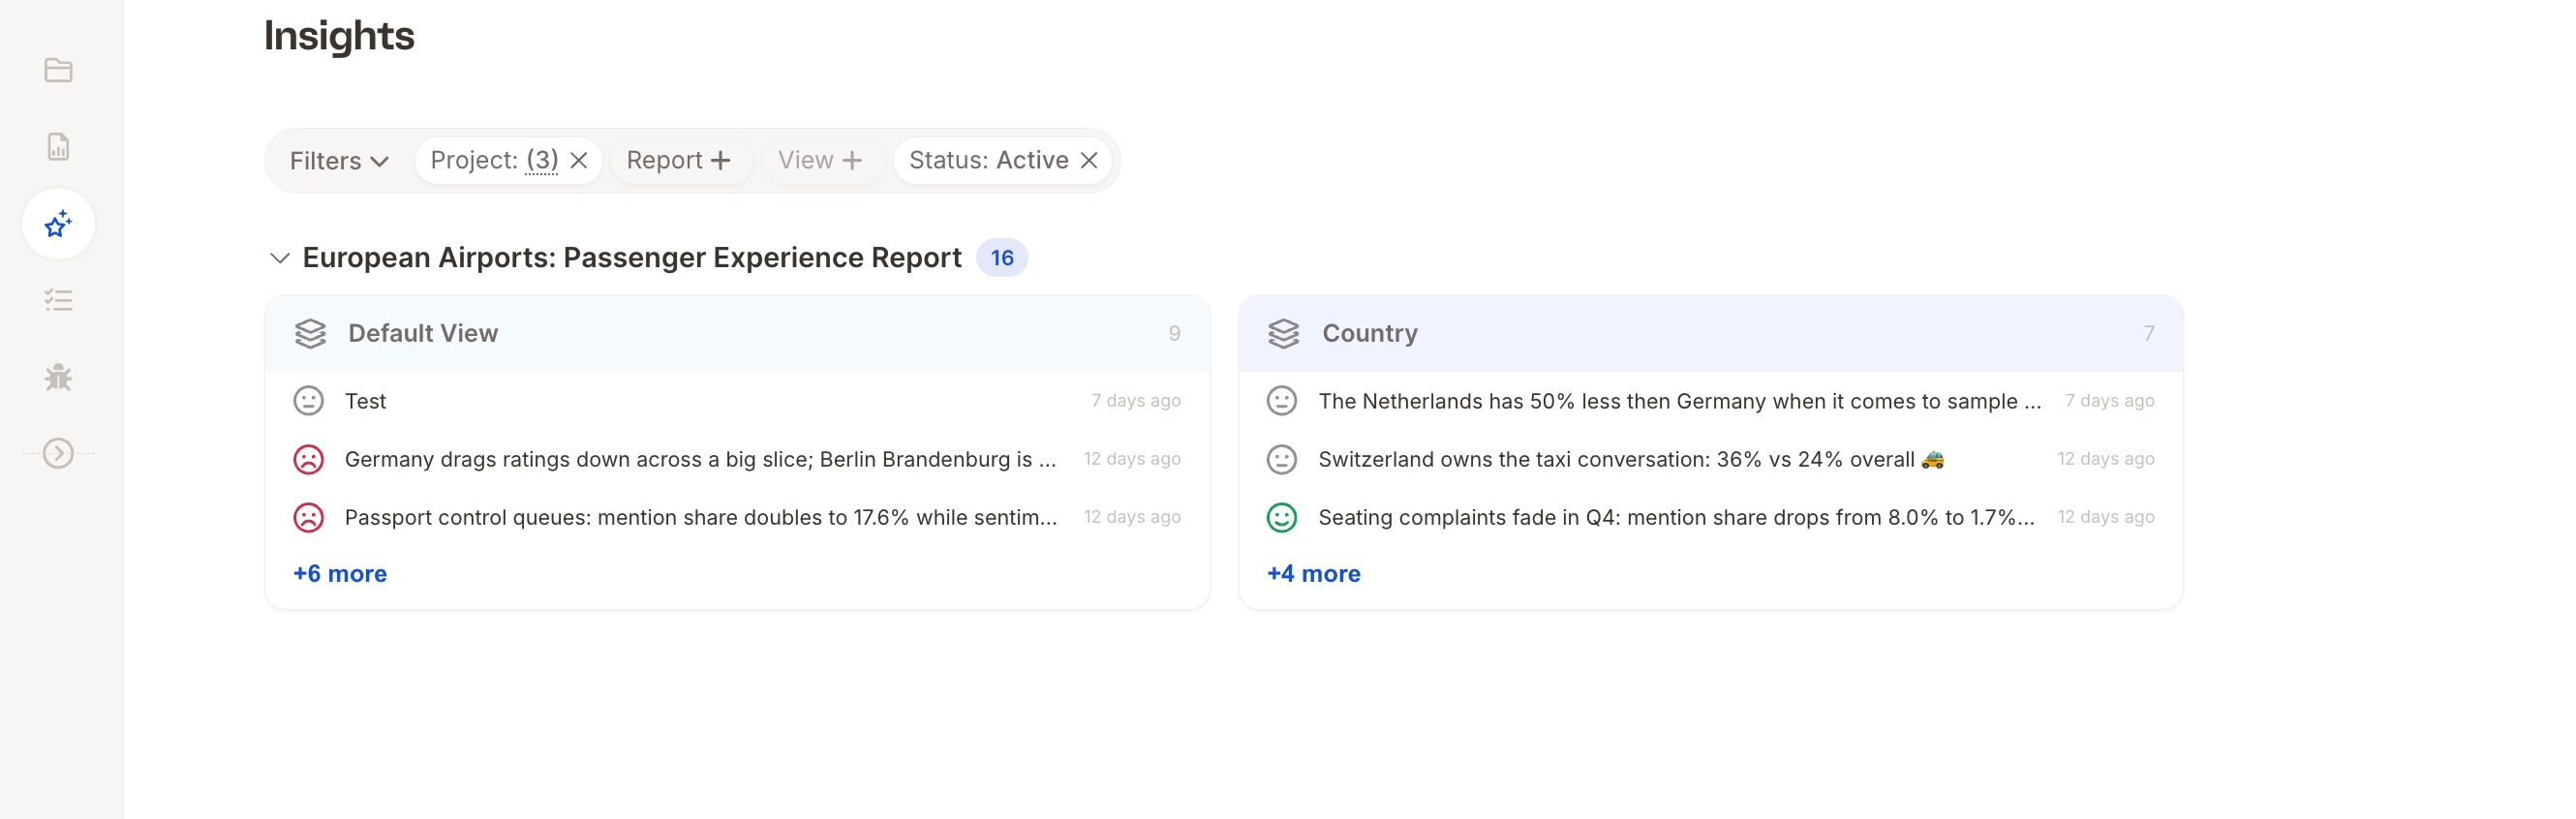
- Insights board — a dedicated project-level page where you can browse every insight across all report views, grouped by view or by project.
Proactive Insights are scoped to a saved report view. If you change filters or segments away from the view’s saved configuration, the rail is disabled until you reset back to the saved view.
The Insight lifecycle
Every insight goes through three stages:- Discovery — on a regular interval (for example, weekly), the Insight Agent looks for interesting findings across your reports. If it finds something worth showing, an insight is created and shown in the report. If it doesn’t find anything noteworthy, nothing is shown.
- Updates — on the same regular interval, live insights are rechecked and refreshed with the latest data, so the numbers stay current for as long as they remain relevant.
- Retirement — once an insight is no longer relevant, it’s retired and removed from the view. A new insight can spawn later if the underlying data starts shifting again.
Reading an insight card
Each Proactive Insight card includes: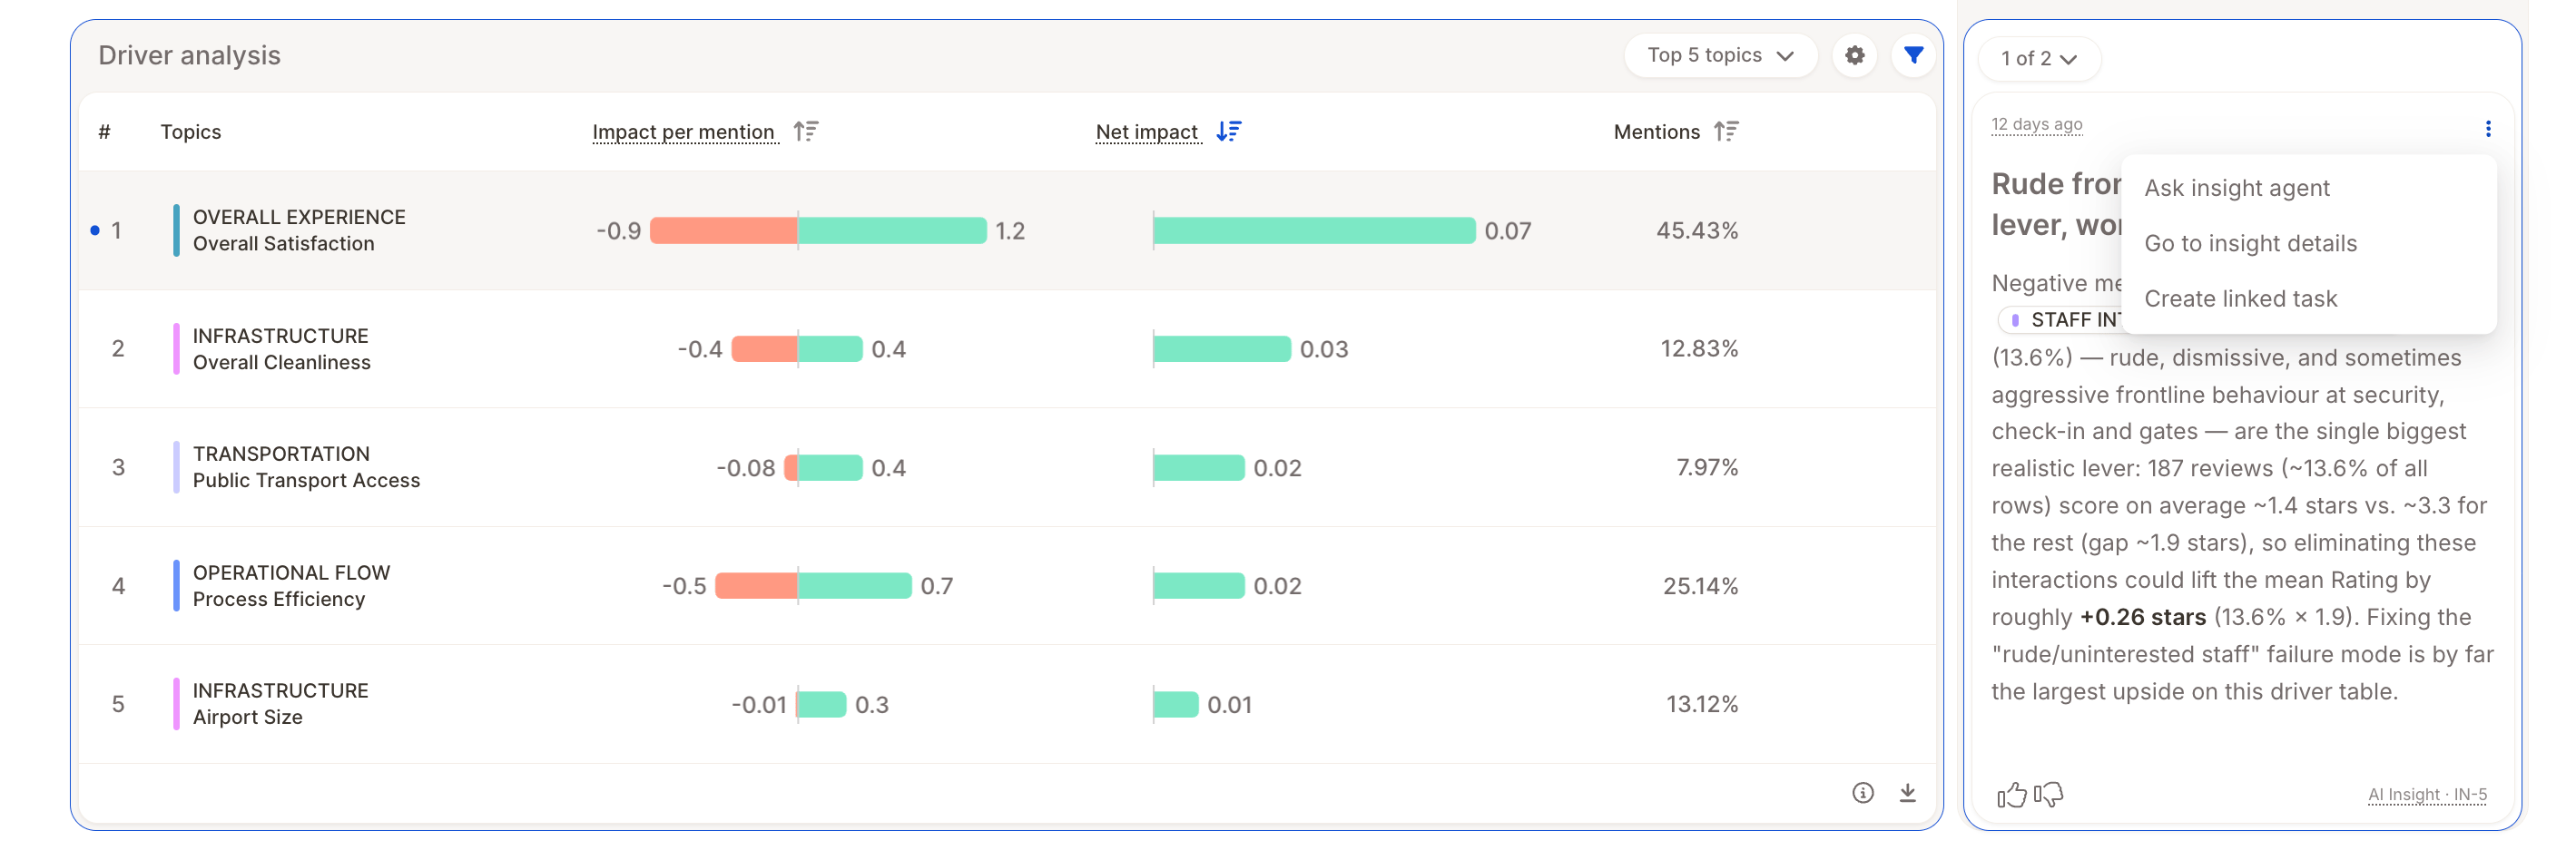
- Title — short summary of what was found.
- Body — markdown-formatted explanation, often with supporting numbers or topic references.
- Chips — metadata tags such as the source insight element, the public ID, whether the insight is outdated, and whether it was created by a user or by Caplena.
- Actions menu (burger icon, top-right of the card) — ask the Insight Agent a follow-up question about this insight, open the insight’s detail page, create a task from it, archive it, or dismiss it.
Resizing and persisting the rail
Drag the left edge of the expanded rail to resize it. Caplena remembers your preferred width across reloads, so the rail opens at the same size next time you visit the report.Adding a manual insight
Insights aren’t only created automatically — you can add your own: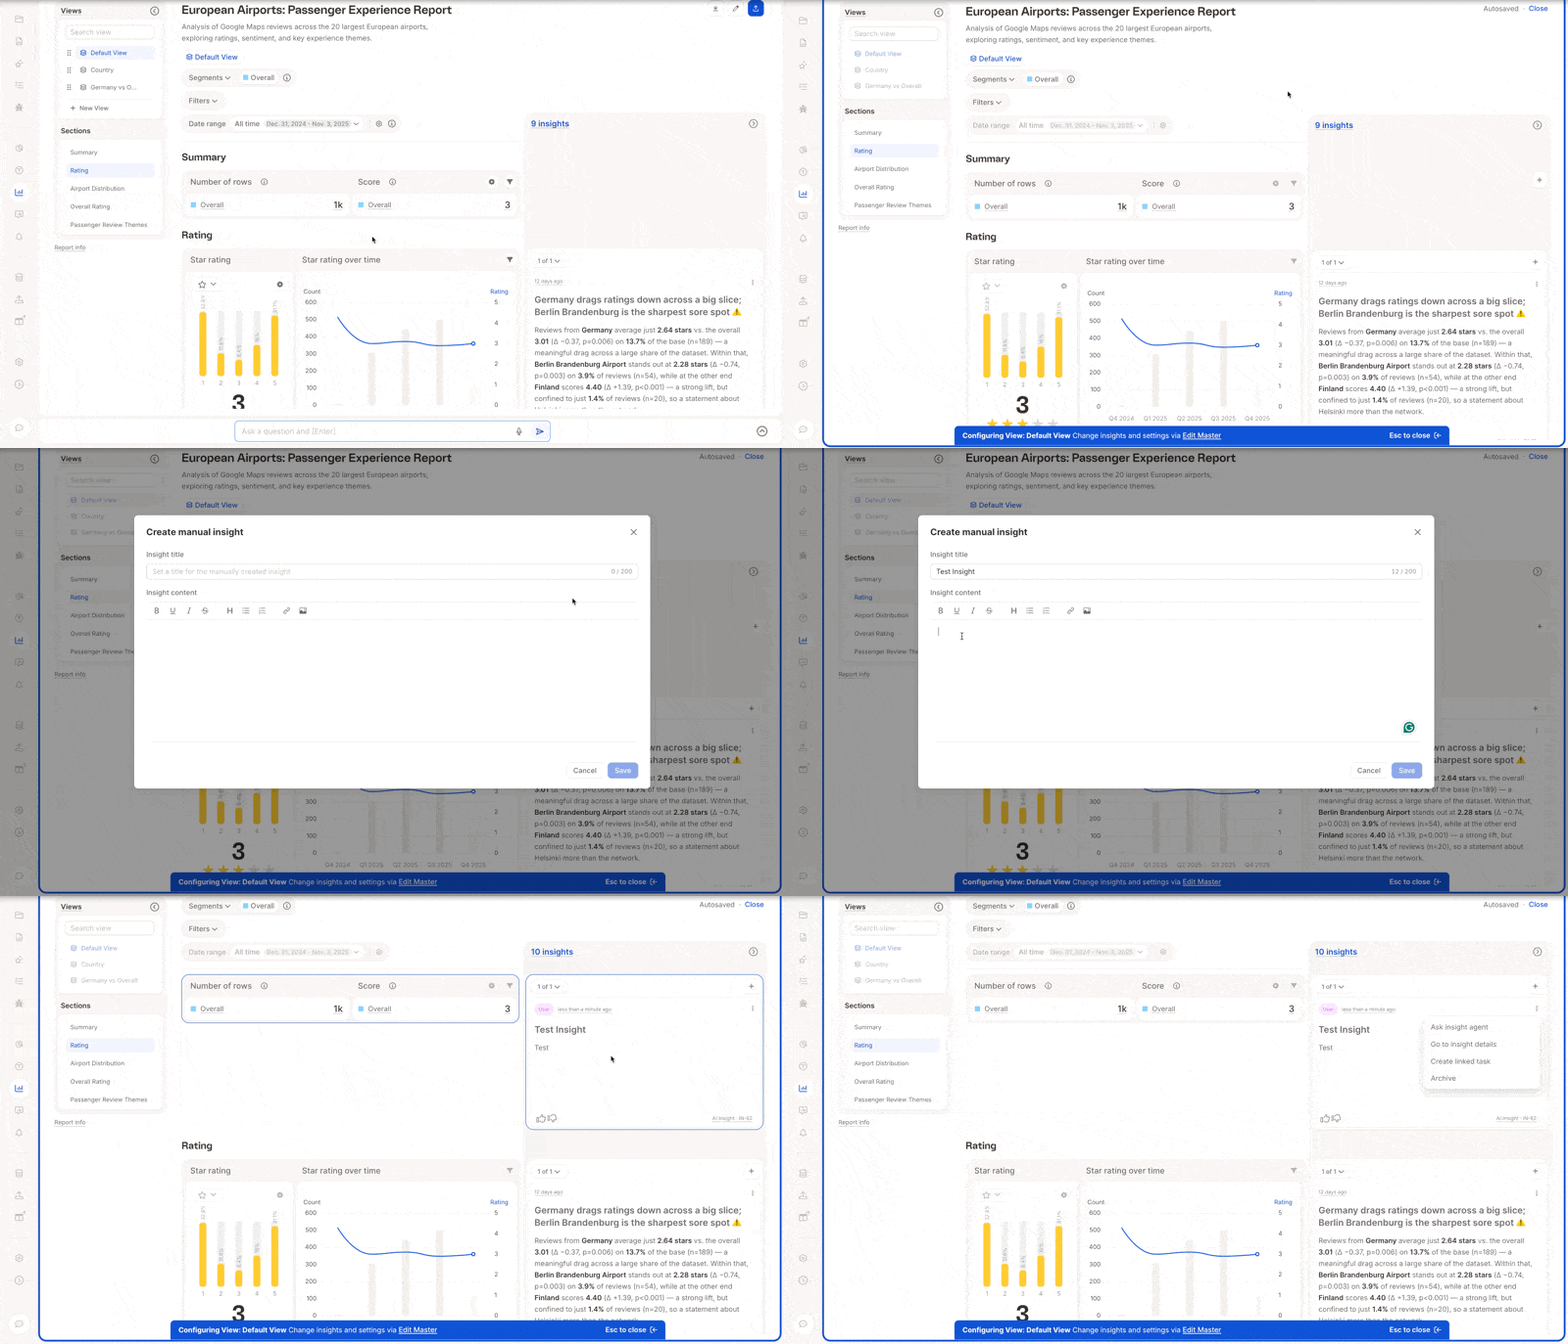
- Open the report and go into Configure View mode.
- Click Add Insight.
- Choose Manual, give it a title and a description.
- Save it.
Archiving an insight
From Configure View mode, open the burger menu on an insight and select Archive. Archived insights are removed from the active rail but aren’t deleted — you can find and unarchive them later from the Insights board by filtering for Archive status.Disabled state: filters or segments diverge from the view
Proactive Insights are tied to the saved configuration of a report view. When you change the report’s filters or segments so that they no longer match the saved view, the rail is disabled and the button shows a popover explaining why. Click Reset in the popover to restore the view’s saved filters and segments and re-enable the rail.What are Tasks?
Tasks let you assign and track follow-up work. A task can be created from an insight (to act on a specific finding) or from scratch (for anything else you want to track against a report view).Creating a task from an insight
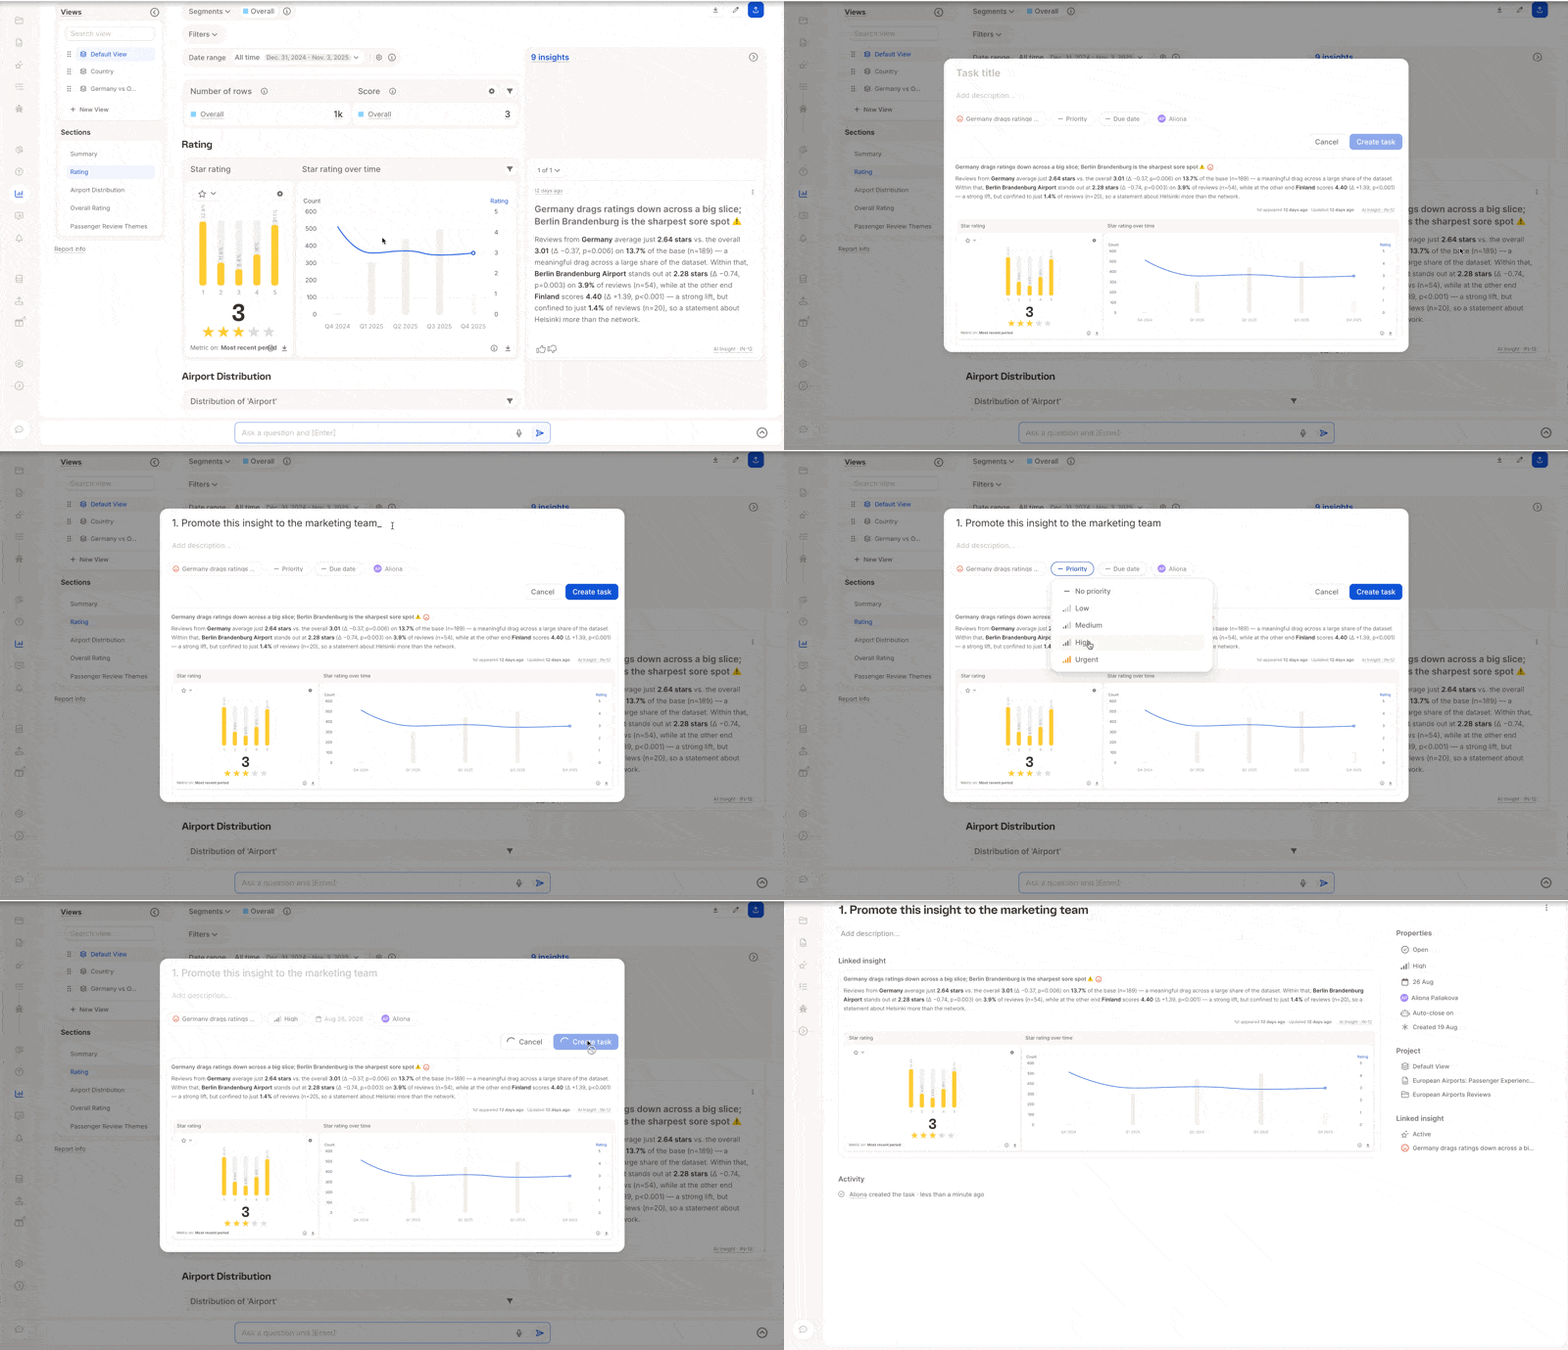
- Open an insight’s burger menu and choose to open its detail page, or create a task directly from the menu.
- On the insight detail page, use the linked tasks sidebar to create a new task — give it a title (for example, “Promote this insight to the marketing team”).
- Set a priority, optionally a due date, and an owner (defaults to you, or reassign to someone else).
- Click Create.
The task detail page
Opening a task shows: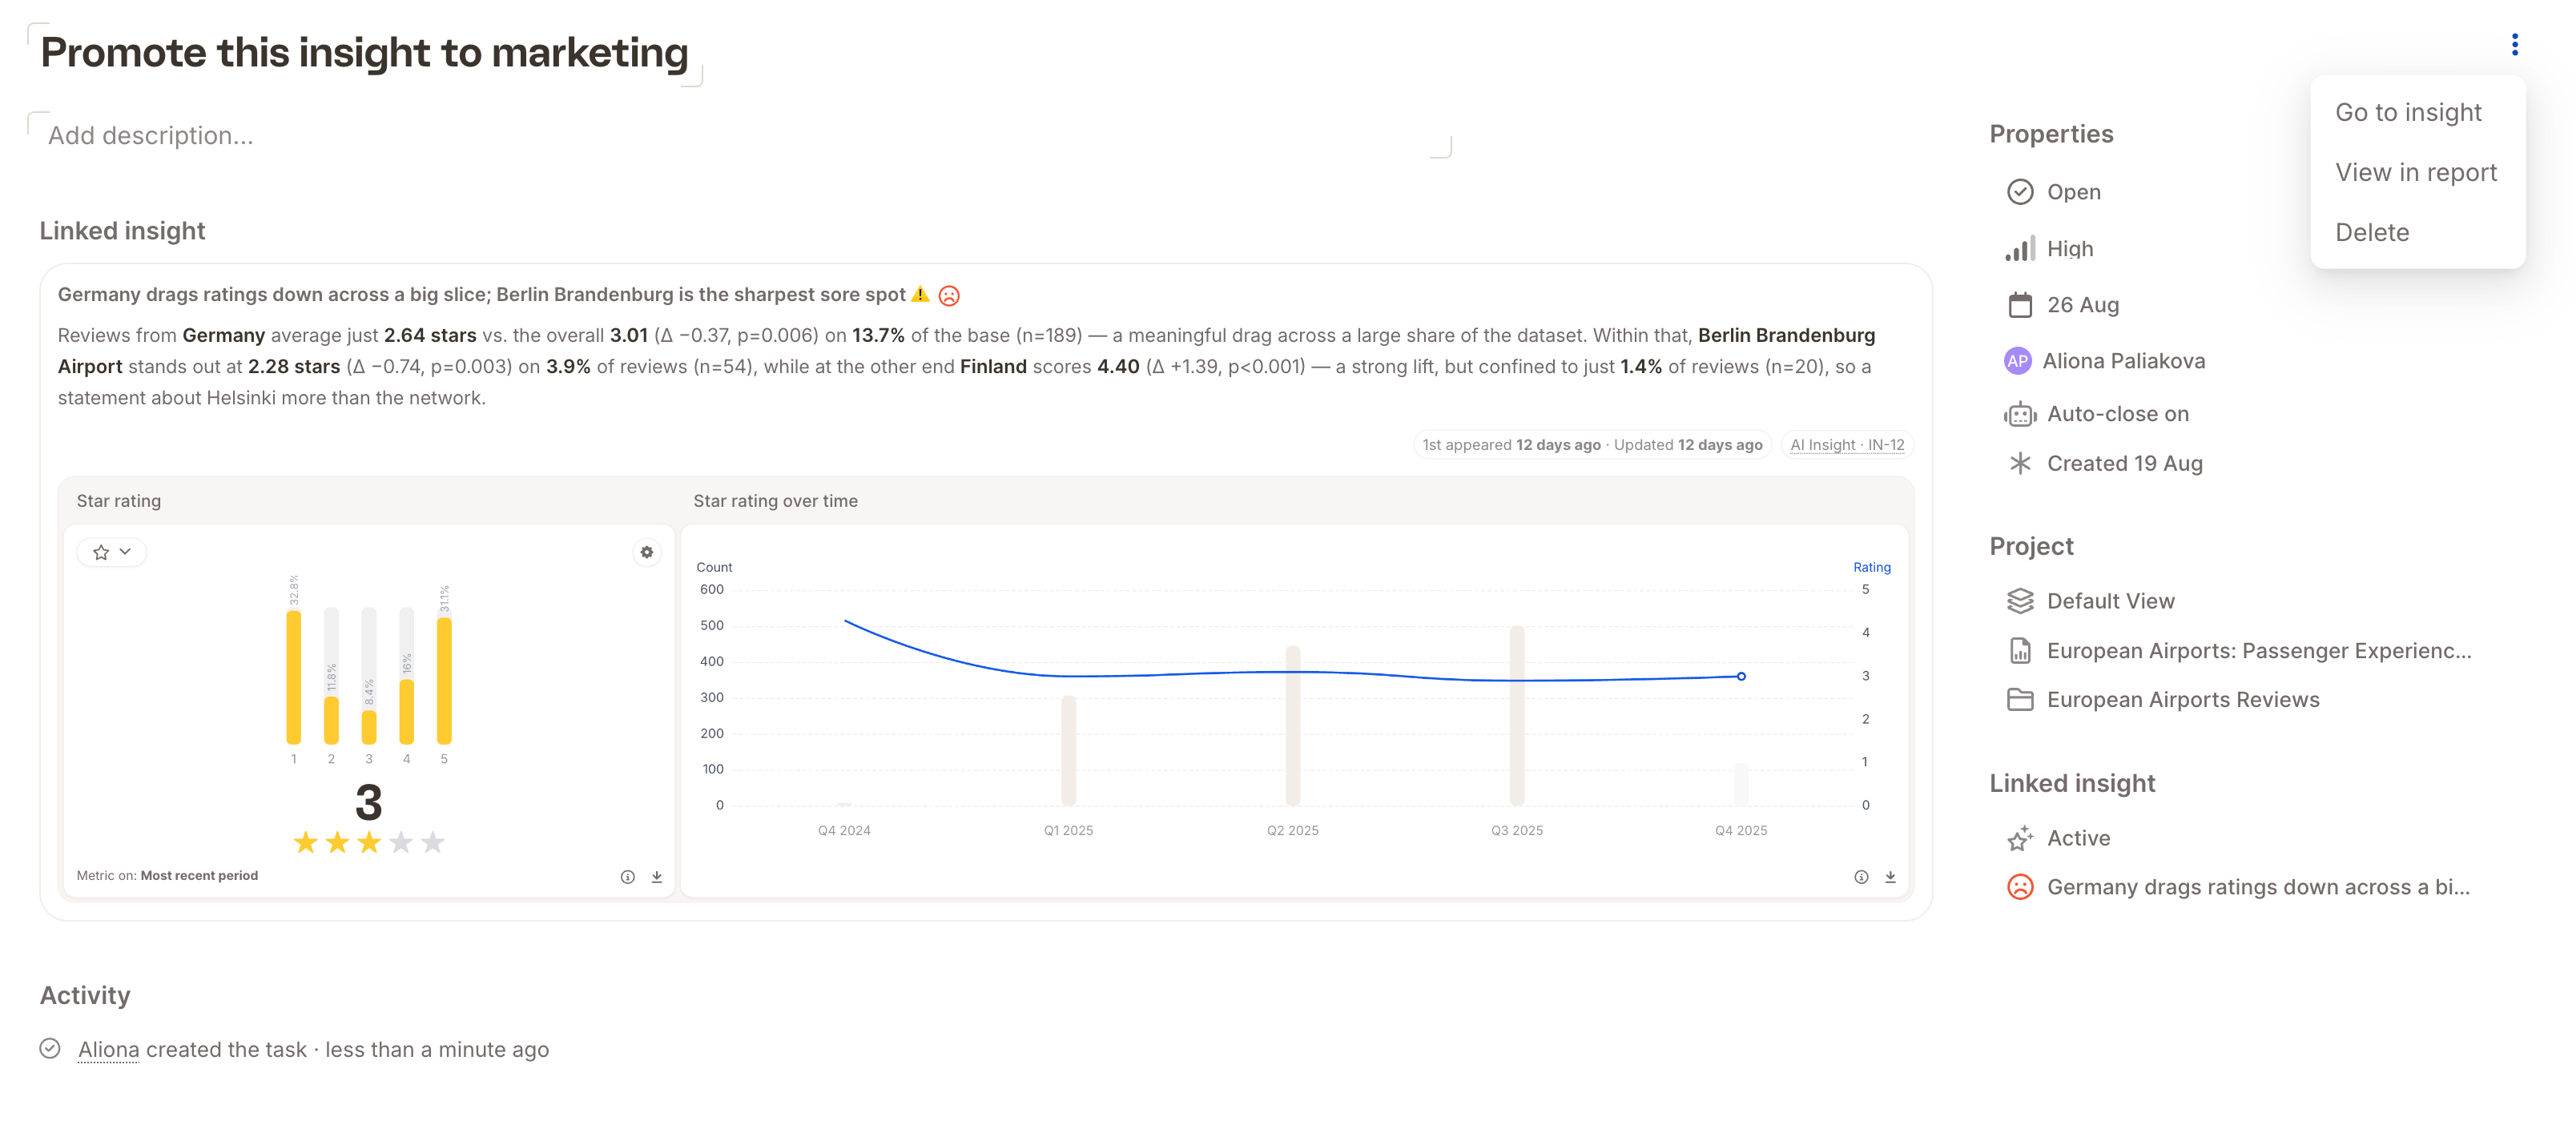
- An inline-editable title and description.
- A linked insight section (if the task was created from one) with a link back to the insight’s detail page. If the task wasn’t created from an insight, this section is empty.
- An activity section — when the task was created, and any changes since.
- Properties, on the right-hand side:
- Status — open or closed; you can close and reopen a task at any point.
- Priority.
- Due date.
- Owner — reassign to any teammate.
- Auto-close toggle — when on, the task closes automatically once its linked insight is retired or dismissed. When off, you have to close the task yourself. Tasks with no linked insight don’t use this setting.
- Project info — which view, report, and project the task belongs to.
Both insights and tasks live at the report view level. If you reassign a task to someone who doesn’t yet have access to that view, you’ll be prompted to grant them access — either to the specific view or to the full report — before the reassignment takes effect.
Creating a task from scratch
You don’t need an insight to create a task: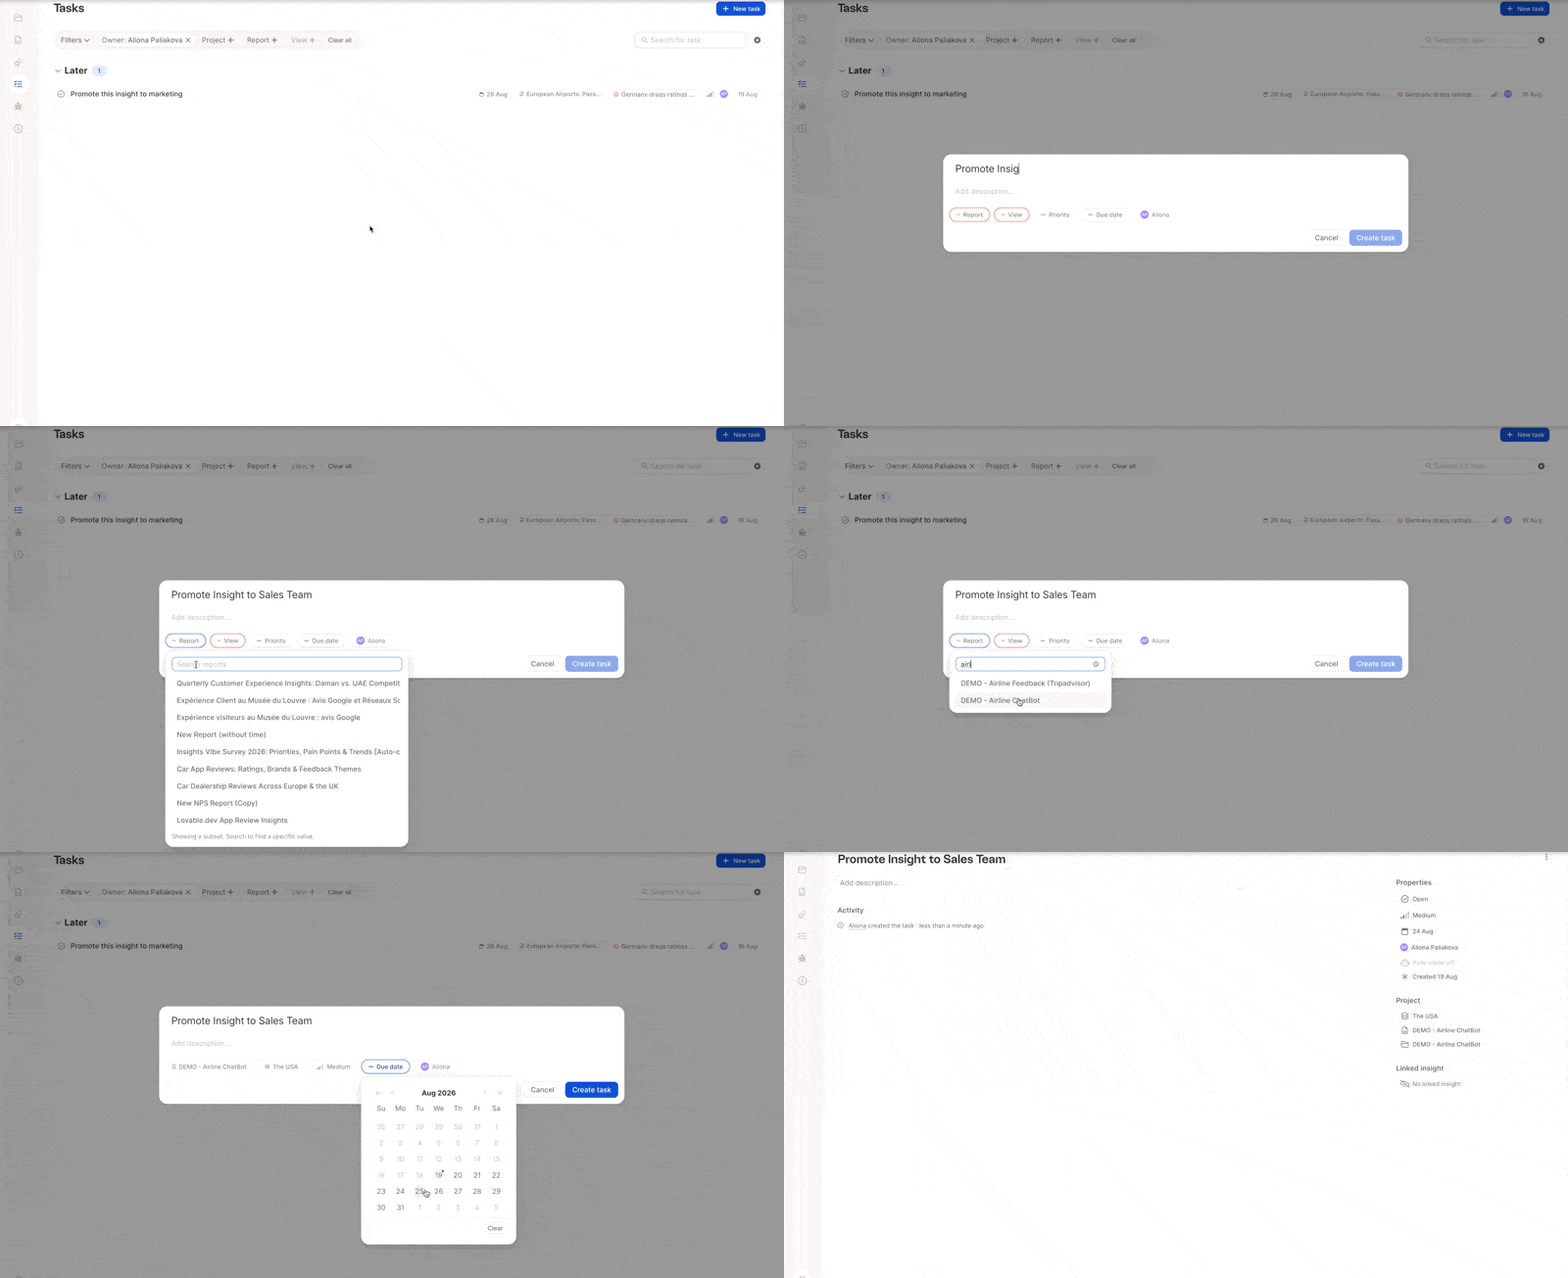
- Open the Tasks list (left-hand top navigation).
- Click the create task button in the top-right.
- Give it a title and description.
- Select the report and then the view you want to tie the task to (required, since tasks live at the view level).
- Click Create.
The Tasks list
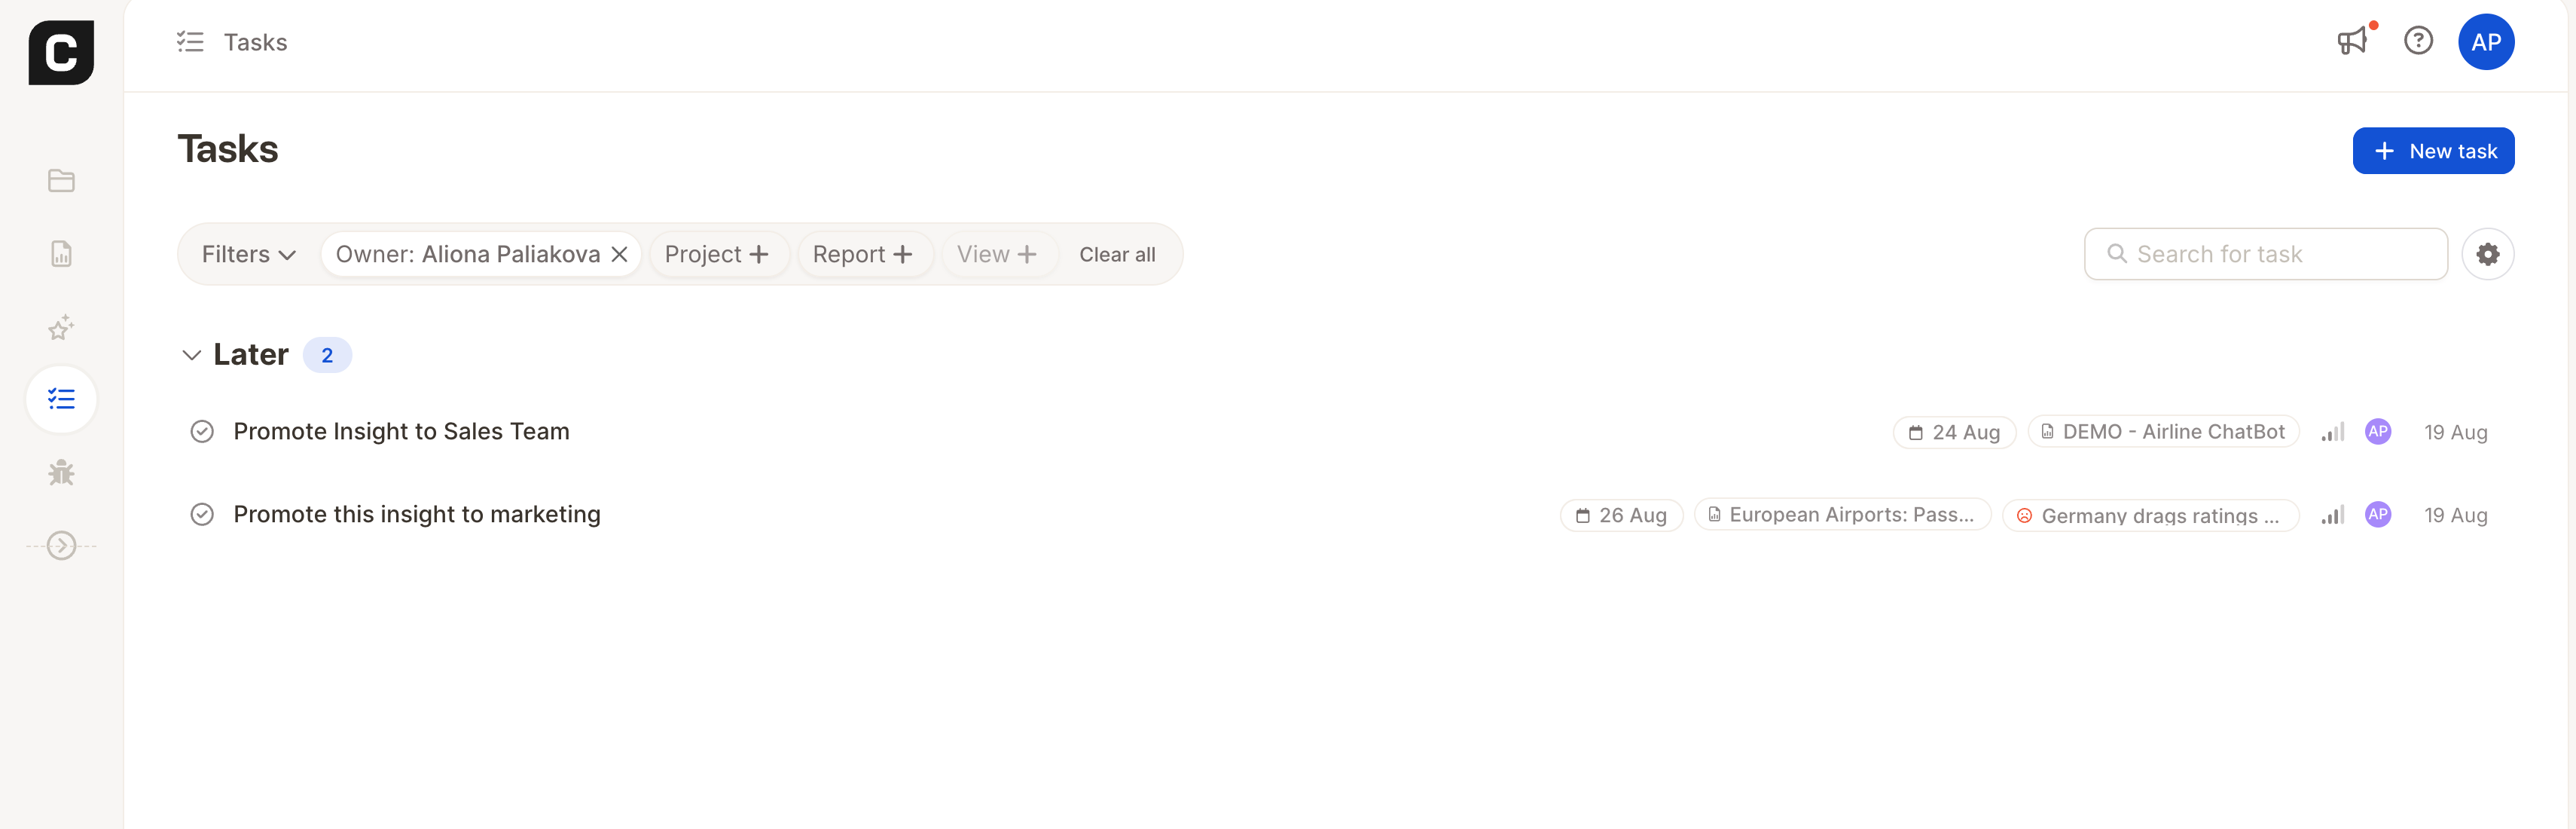
- Filter by owner (for example, to see only tasks assigned to you) — and other filters via the search field.
- Group by priority, due date, or project.
- Sort within groups.
- Show/hide completed tasks based on a time frame, or hide them entirely (they then move to the bottom of the list).
- Tick off a task directly from the list to close it (and undo if needed).