

Turning on Insights Radar
Insights Radar is enabled per report view.During the introductory period (until 31 December 2026), Insights Radar is automatically enabled for frequently used report views. You can change the update frequency or turn it off for any view using the steps below.
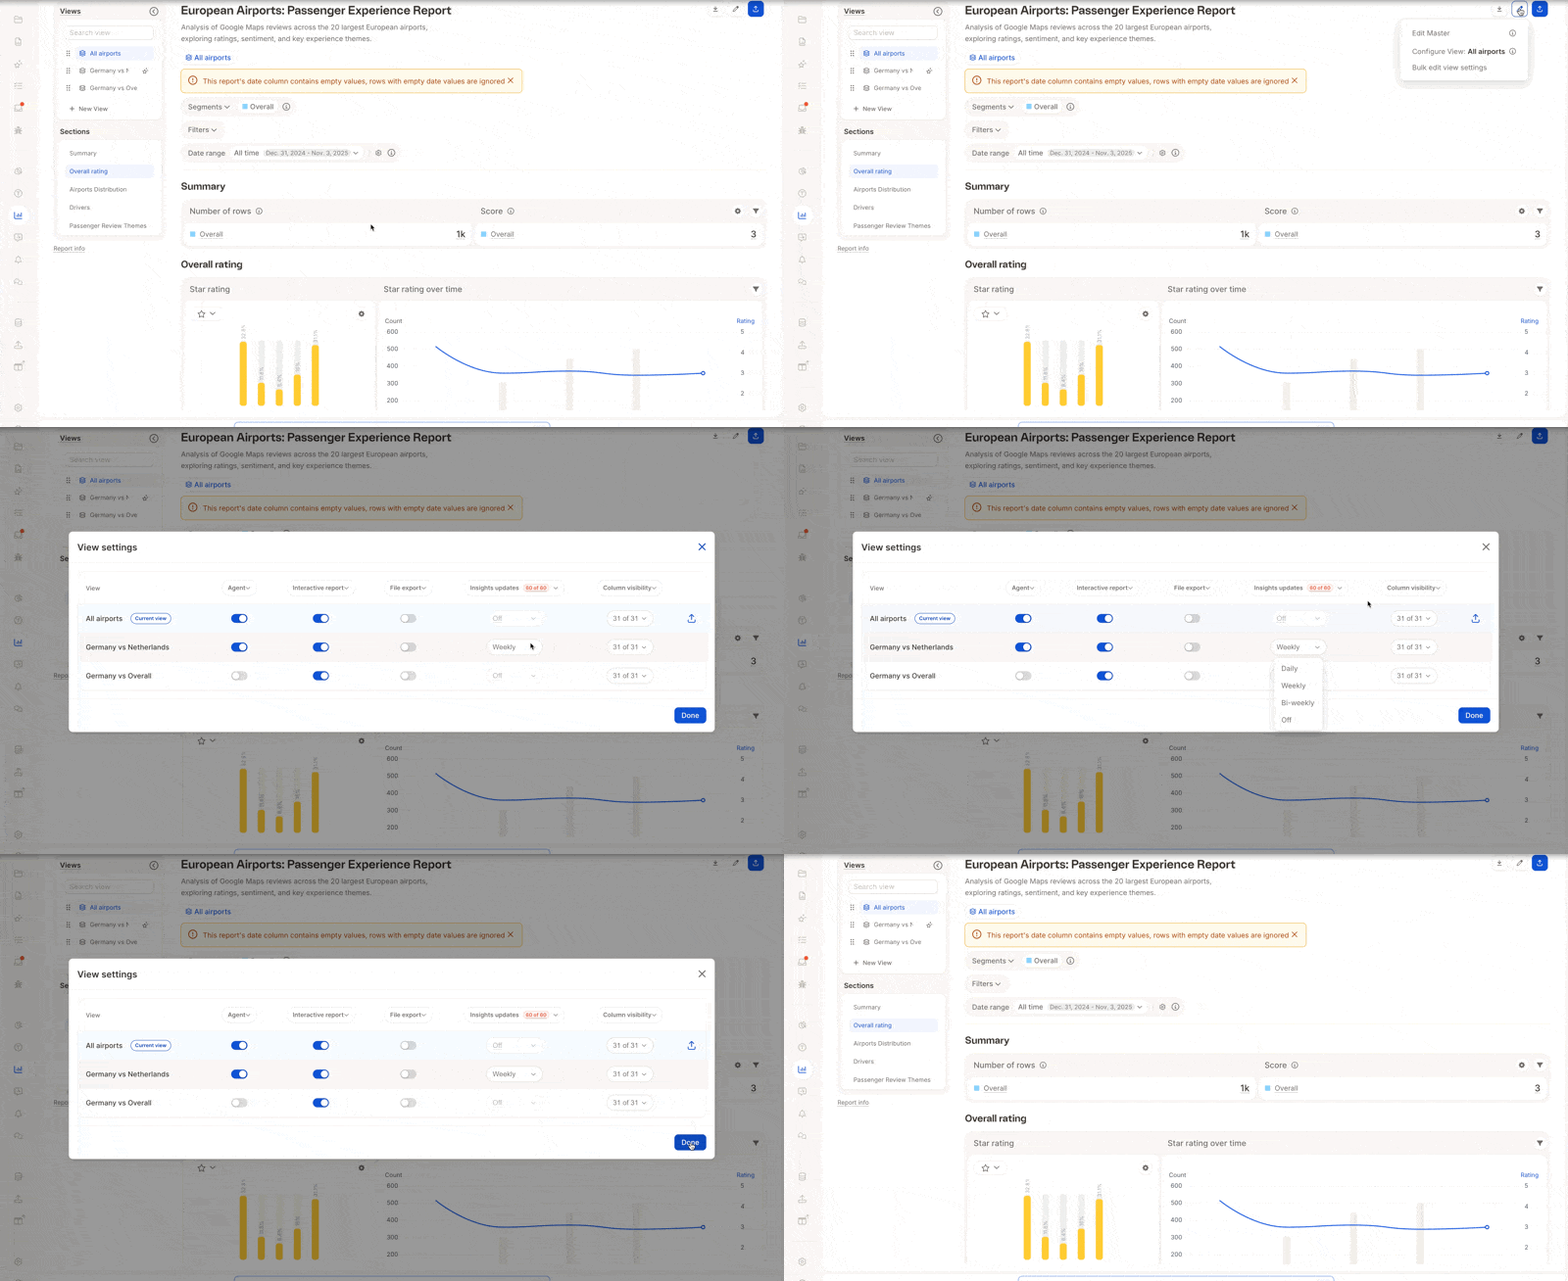
1
Open the view settings
Open your report, click the pencil icon in the top-right corner, and select Bulk edit view settings.
2
Choose an update frequency
In the Insights updates column, open the dropdown next to the view you want and choose Daily, Weekly, or Bi-weekly. Views set to Off don’t generate insights.
3
Save
Click Done. Insights are generated automatically for the view from then on.
Only standard insight elements generate insights. Custom Insight Elements don’t.
Where you see Insights Radar
- Report side rail — a collapsible panel on the right of any report view, shown as collapsed badges or expanded card stacks. The rail header shows the total insight count and the date of the most recent activity.
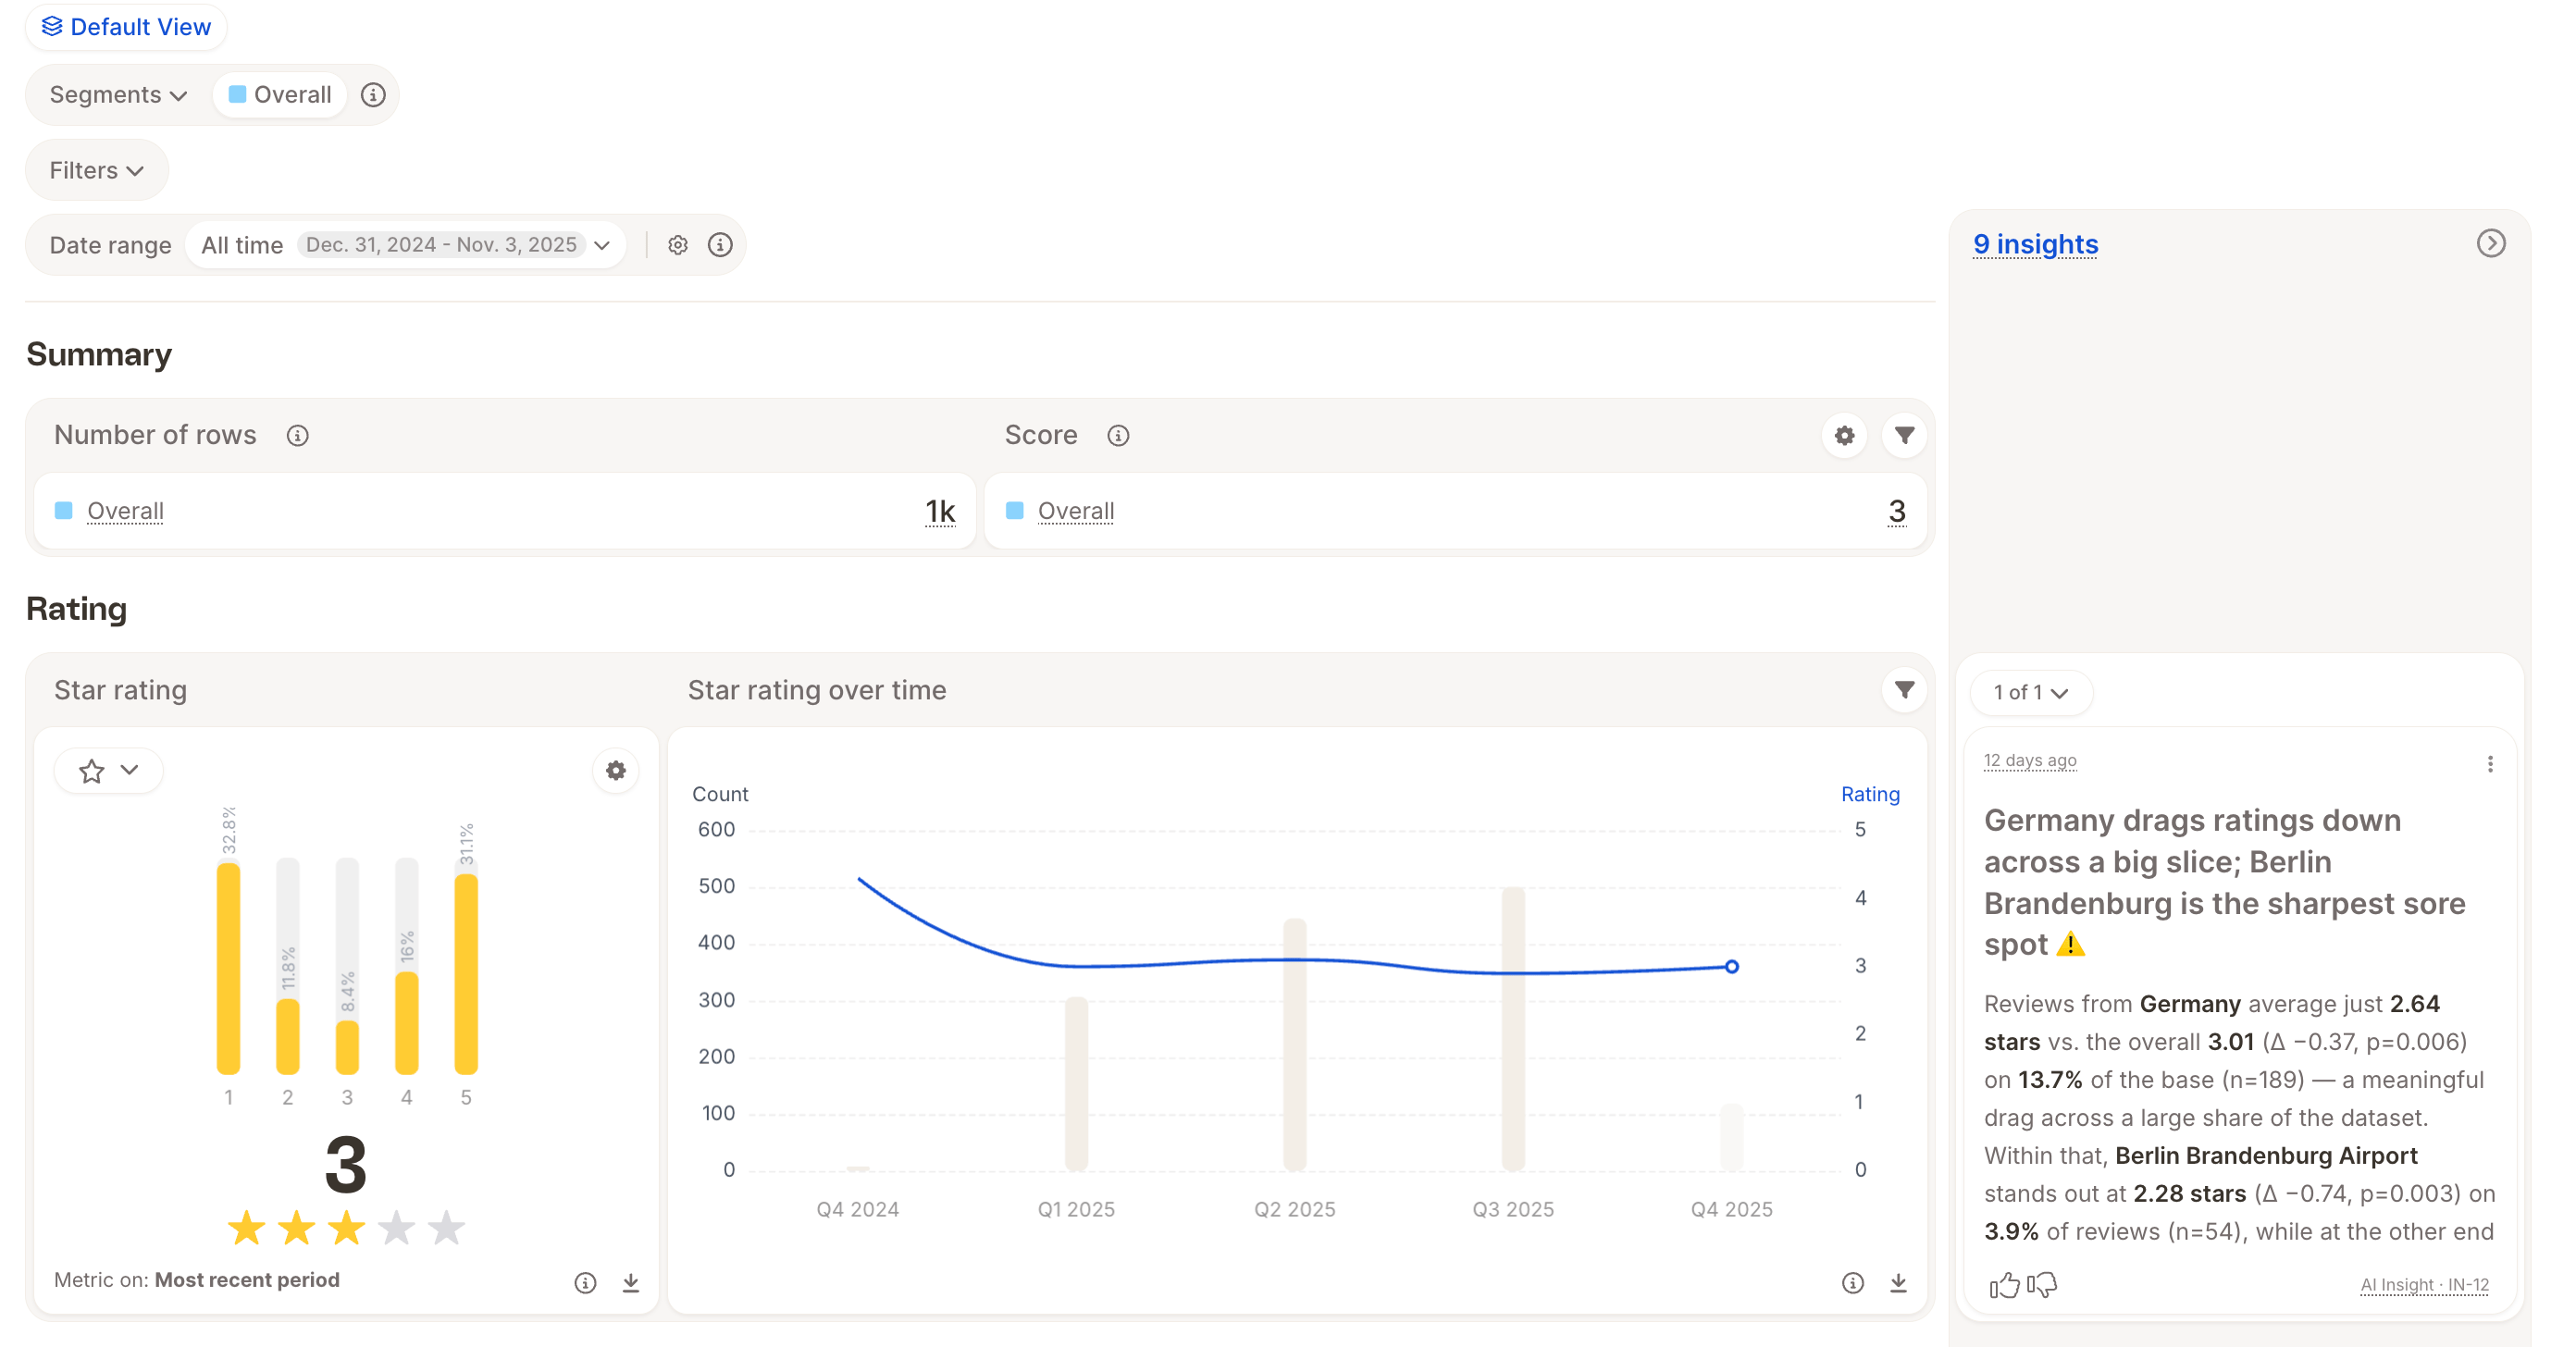
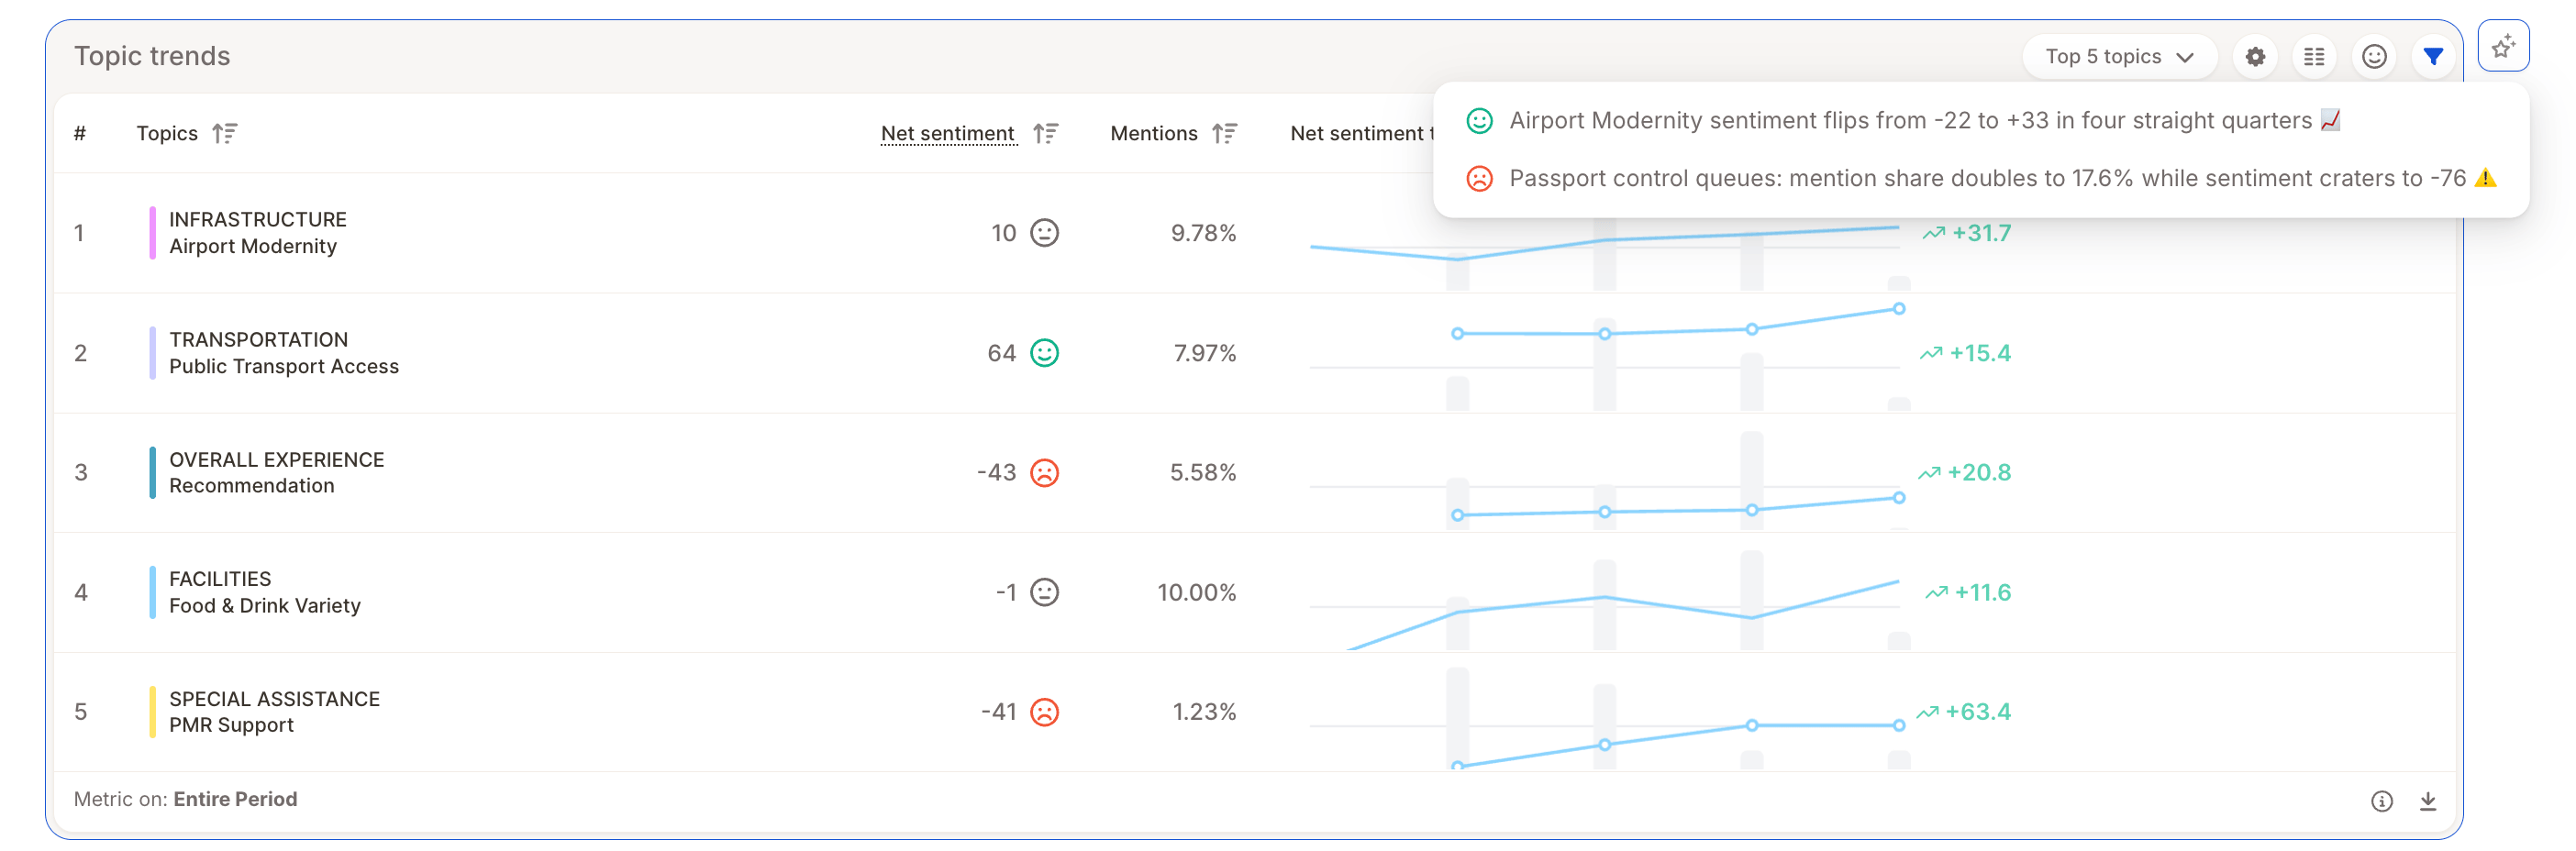
- Per insight element — each insight element can have multiple insights, accessible via the chip on its upper-right side. When an element has related Insights Radar entries, a small sparkles button appears; hover or click it to see those insights in a popover, then open one to expand the rail directly to that card.
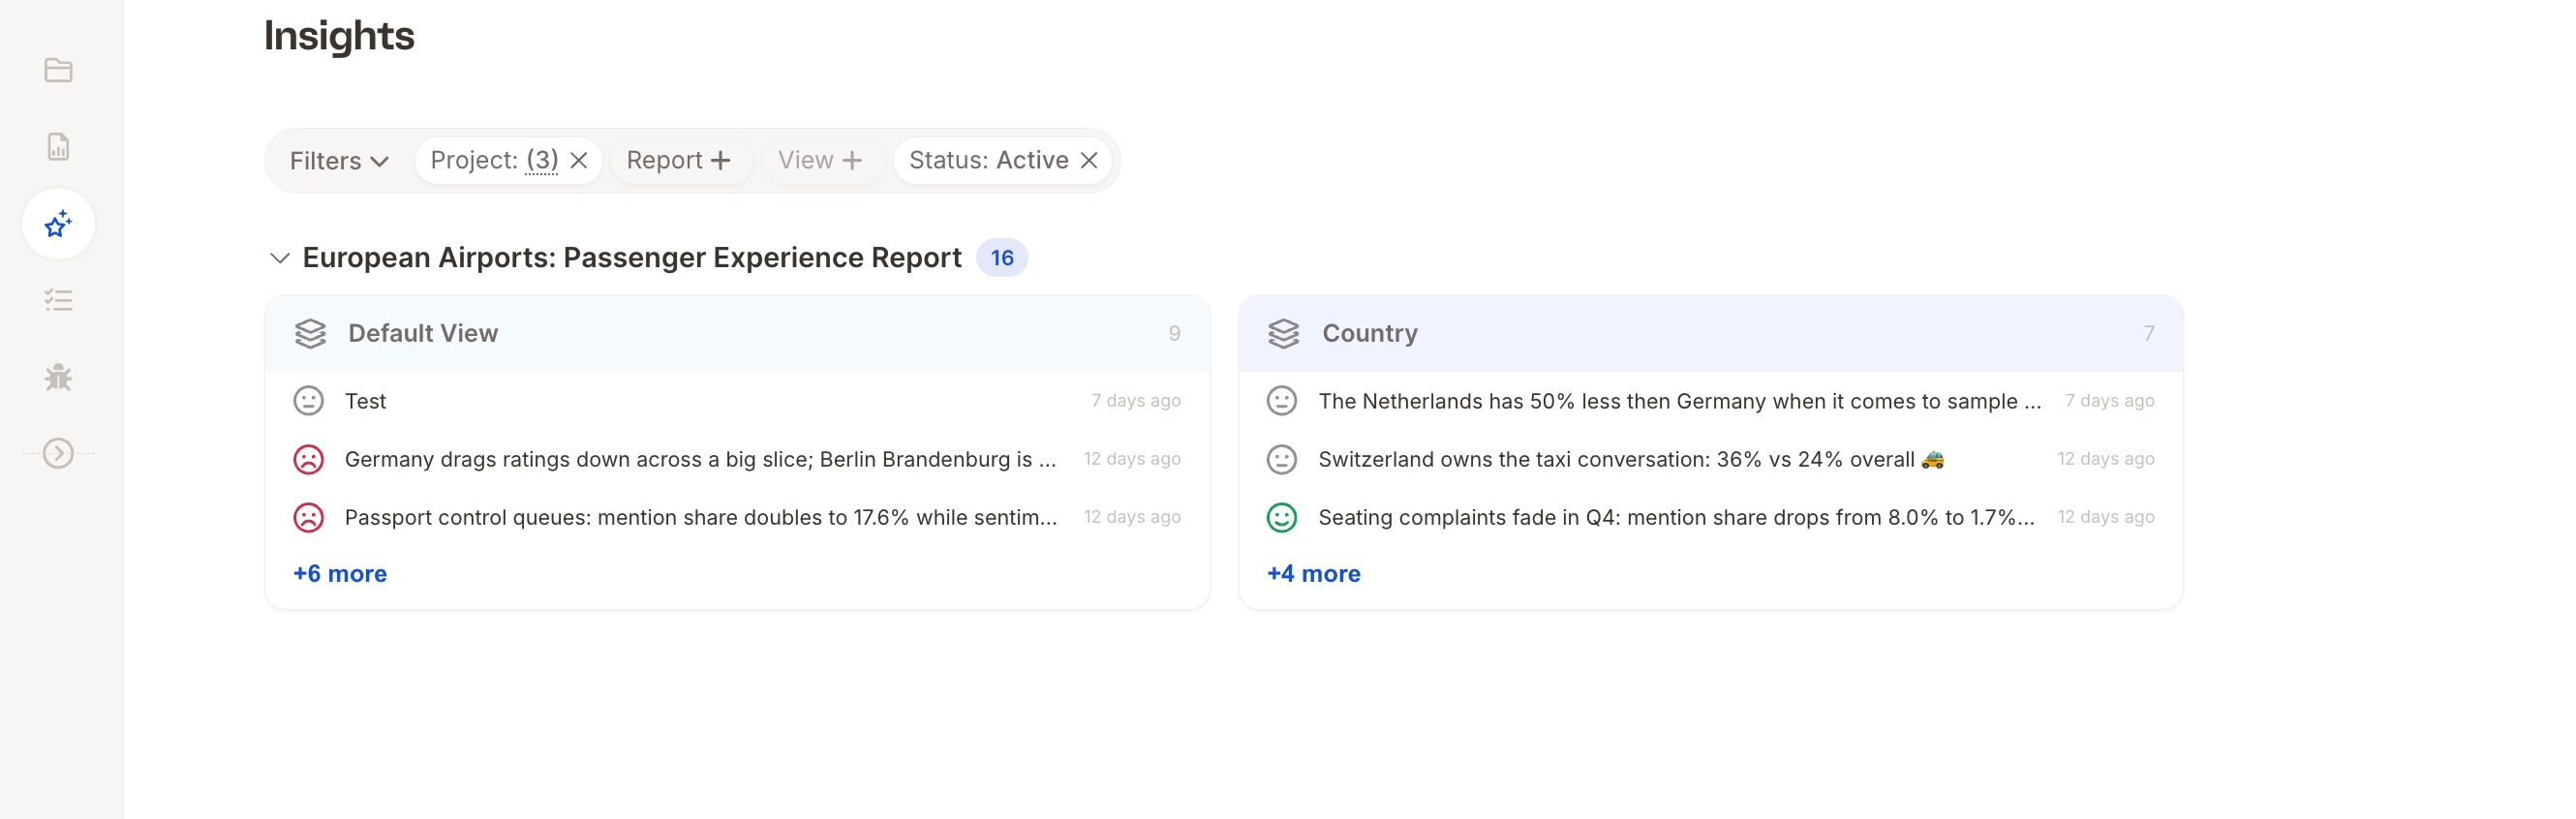
- Insights board — a dedicated project-level page where you can browse every insight across all report views, grouped by view or by project.
Insights Radar is scoped to a saved report view. If you change filters or segments away from the view’s saved configuration, the rail is disabled until you reset back to the saved view.
The Insight lifecycle
Every insight goes through three stages:- Discovery — on a regular interval (for example, weekly), Agent looks for interesting findings across your reports. If it finds something worth showing, an insight is created and shown in the report. If it doesn’t find anything noteworthy, nothing is shown.
- Updates — on the same regular interval, live insights are rechecked and refreshed with the latest data, so the numbers stay current for as long as they remain relevant.
- Retirement — once an insight is no longer relevant, it’s retired and removed from the view. A new insight can spawn later if the underlying data starts shifting again.
Reading an insight card
Each Insights Radar card includes: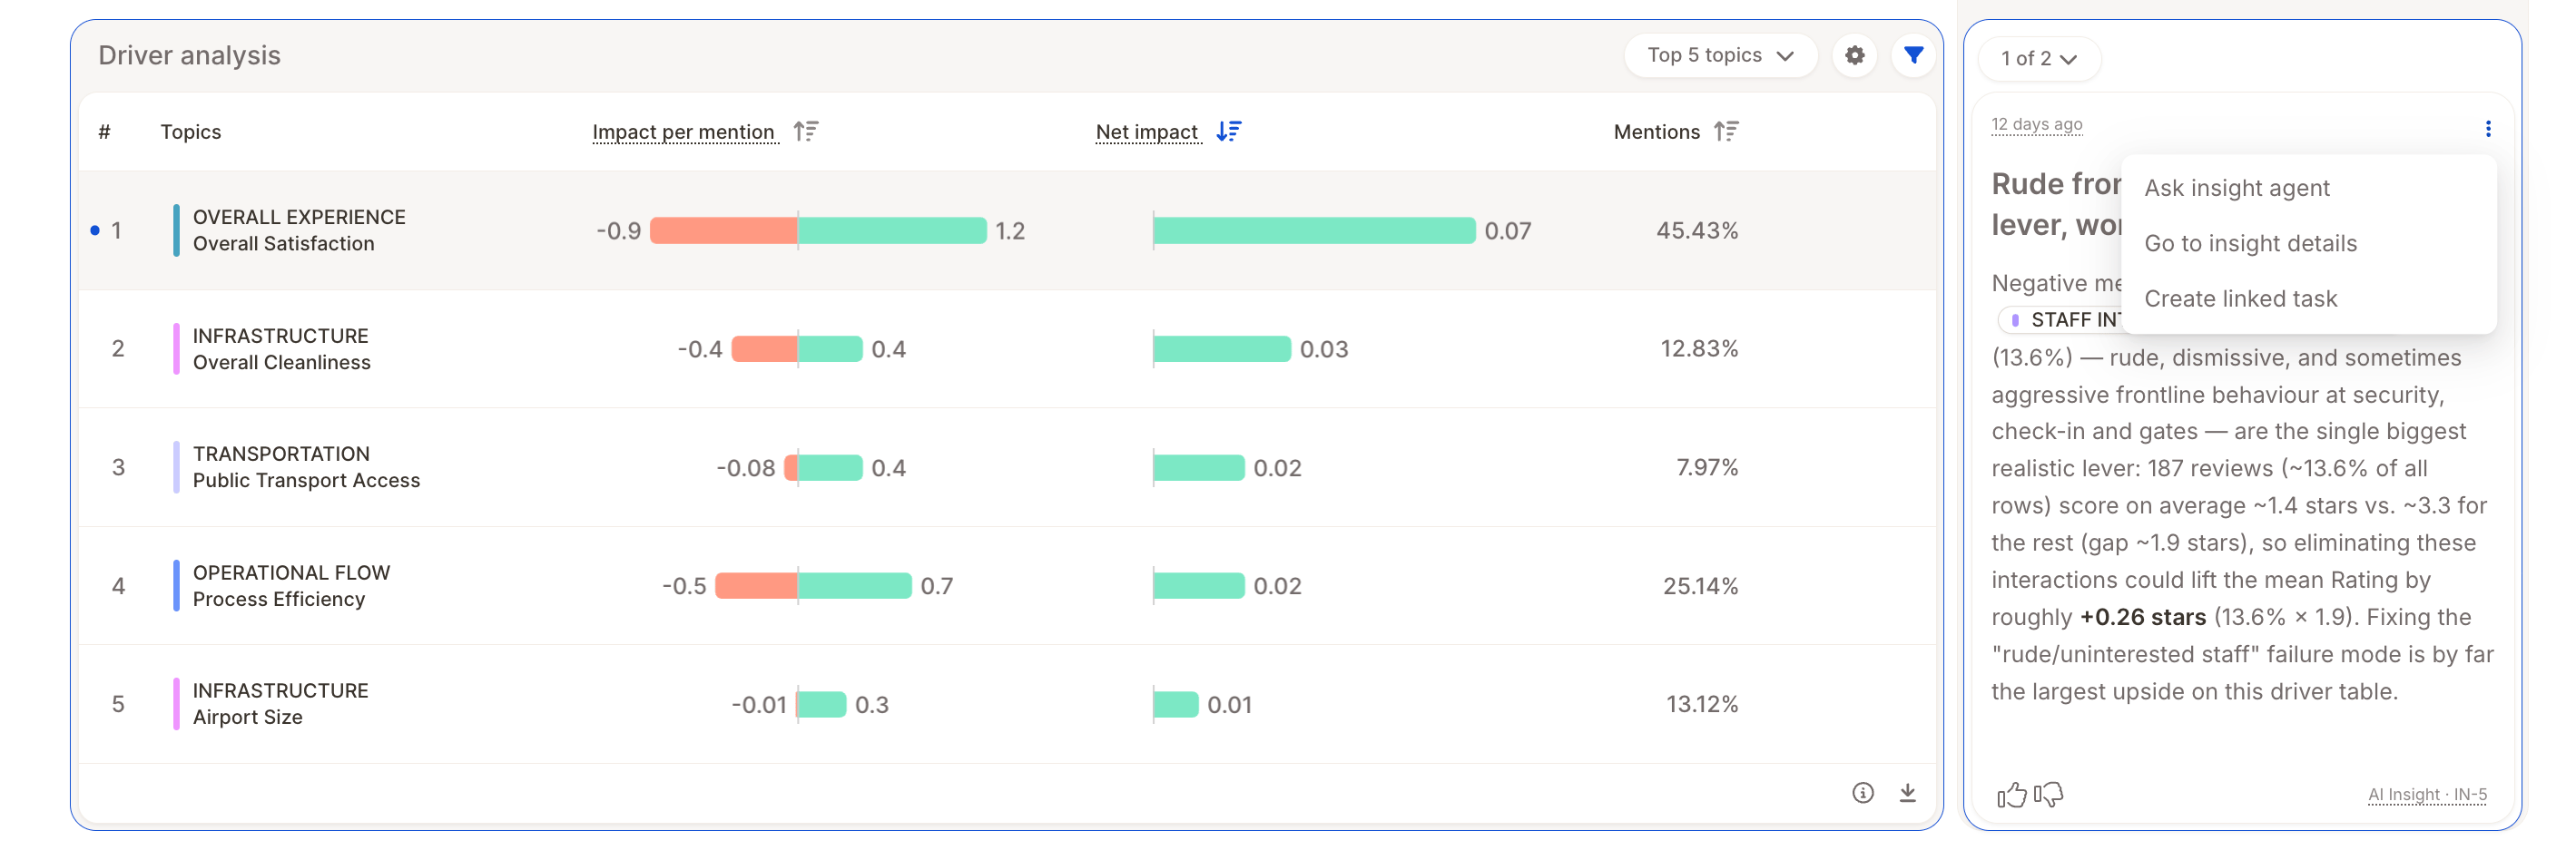
- Title — short summary of what was found.
- Sentiment — a smiley showing whether the finding is positive, neutral, or negative.
- Body — markdown-formatted explanation, often with supporting numbers or topic references.
- Chips — metadata tags such as the source insight element, the public ID, whether the insight is outdated, and whether it was created by a user or by Caplena.
- Actions menu (burger icon, top-right of the card) — ask Agent a follow-up question about this insight, open the insight’s detail page, create a task from it, archive it, or dismiss it.
Notifications
You get a notification in your Caplena inbox when a new insight or task is created, and whenever an existing insight or task changes. You can also have these notifications delivered by email, Slack, or Microsoft Teams.Configuring notification settings
Go to Settings → Notifications to choose which insight and task events reach you outside the Caplena inbox, how often, and on which channels. The settings are shown as a table with two groups, Insights and Tasks. Click a group to expand it and see its notification types:
For each notification type, you set:
- Channels: Select the Email, Slack, and Teams checkboxes to choose where the notification is delivered.
- Frequency: Choose Instant, Daily, or Weekly. Choose Inbox only (off) to keep the notification in your Caplena inbox without sending it to any other channel.
Slack and Teams must be connected before you can select them. If a channel isn’t connected, click Connect next to its column header to open the integration setup.
Presets
Use the presets above the table to fill in the whole table at once:
Start with a preset, then adjust individual rows. Caplena saves each change immediately.
Resizing and persisting the rail
Drag the left edge of the expanded rail to resize it. Caplena remembers your preferred width across reloads, so the rail opens at the same size next time you visit the report.Adding a manual insight
Insights aren’t only created automatically — you can add your own: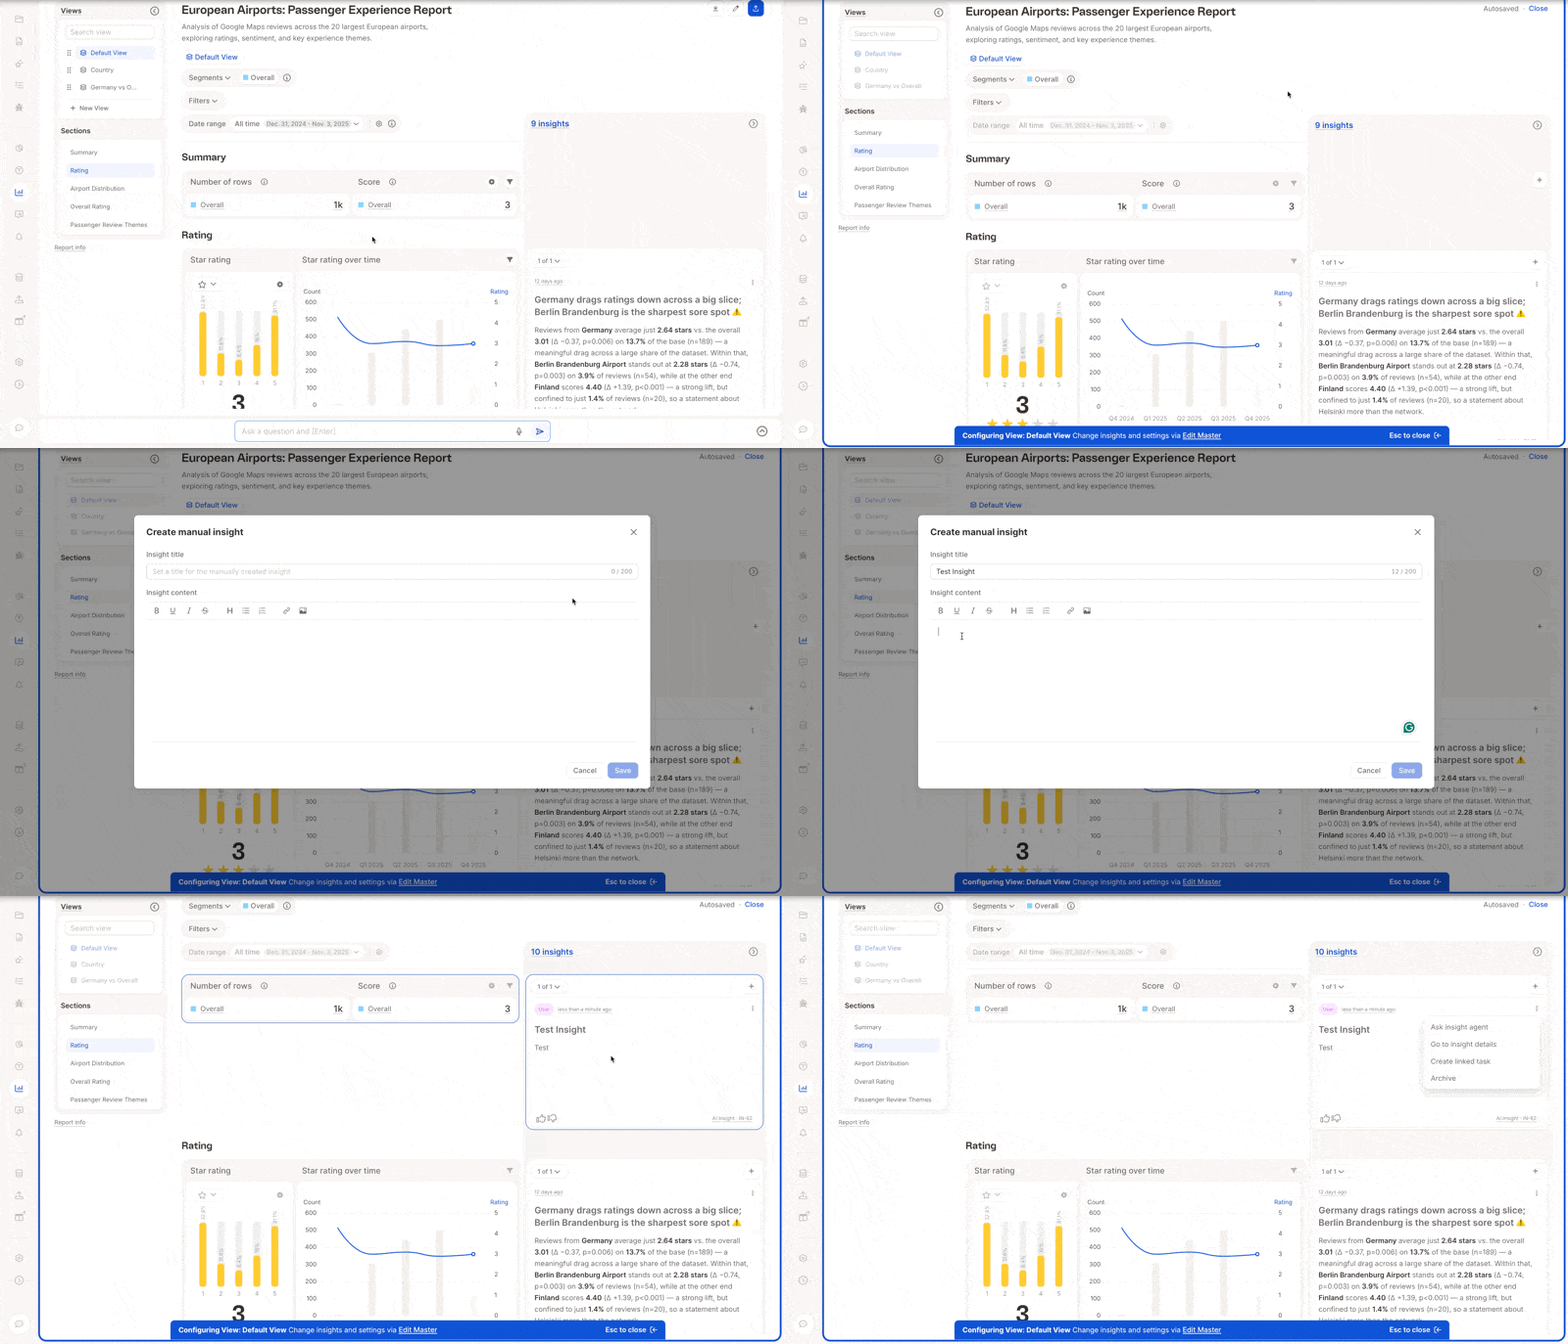
- Open the report and go into Configure View mode.
- Click Add Insight.
- Choose Manual, give it a title and a description.
- Save it.
Archiving an insight
From Configure View mode, open the burger menu on an insight and select Archive. Archived insights are removed from the active rail but aren’t deleted — you can find and unarchive them later from the Insights board by filtering for Archive status.Disabled state: filters or segments diverge from the view
Insights Radar is tied to the saved configuration of a report view. When you change the report’s filters or segments so that they no longer match the saved view, the rail is disabled and the button shows a popover explaining why. Click Reset in the popover to restore the view’s saved filters and segments and re-enable the rail.Limits
During the introductory period, which runs until 31 December 2026, the Enterprise, Team, and Agency plans include 60 insight runs per organization. A run checks a view for new insights and updates existing ones, which can also retire insights that are no longer relevant. You decide how to spread the 60 runs across your views. For example, you can update one view frequently or several views less often. More views and higher frequencies use up runs faster.A run is only counted when something has changed. If the underlying data, the report, and the view all stay the same (no new rows, no added insight elements, no changed filters), no run is deducted.
No cost during the introductory period. Insights Radar is free to use until 31 December 2026. Nothing will be billed automatically when the introductory period ends.
Related
- Tasks — turn an insight into assigned, trackable follow-up work.